
How To Create Web Forms Easily and Quickly
Name, Email, Phone, Message.
How many times have you seen this on a website?
That’s probably the most vanilla way to get information from your visitors.
The world wide web needs more birthday cake ice cream and sprinkles.
I recently had a chance to dive into Paperform, an online form creator that allows you to create beautiful forms, that according to them, is as easy as writing a word doc.
They’re right. I made an entire finance application for a client in less than 15 minutes.
Including customizing the style to match their branding, and placing it on their Shopify website.
In this article, I’m going to show you:
Why you should use an online form builder
How to use Paperform as a marketing and sales tool
A step-by-step guide to creating a form
Why use an online form builder
It’s quite possible that your website platform already includes a form builder. Popular sites such as Squarespace, Wix, Weebly all have their own. Rocket Websites by Bear City Impact also include a form builder, that’s native to our platform.
However, almost all form builders are very basic, eh hem, vanilla. Usually, there’s no customization, and it’s limited to just simply adding a form field and letting the visitor enter information.
An online form builder, such as Paperform will not only let you customize the look-and-feel of your form but also include powerful tools to use it as a marketing and sales tool.
Basically, it lets you turn your vanilla form into a pint of Chunky Monkey Ben & Jerry’s.
Here’s what Paperform will let you do instead.
How to use Paperform as a Marketing and Sales Tool
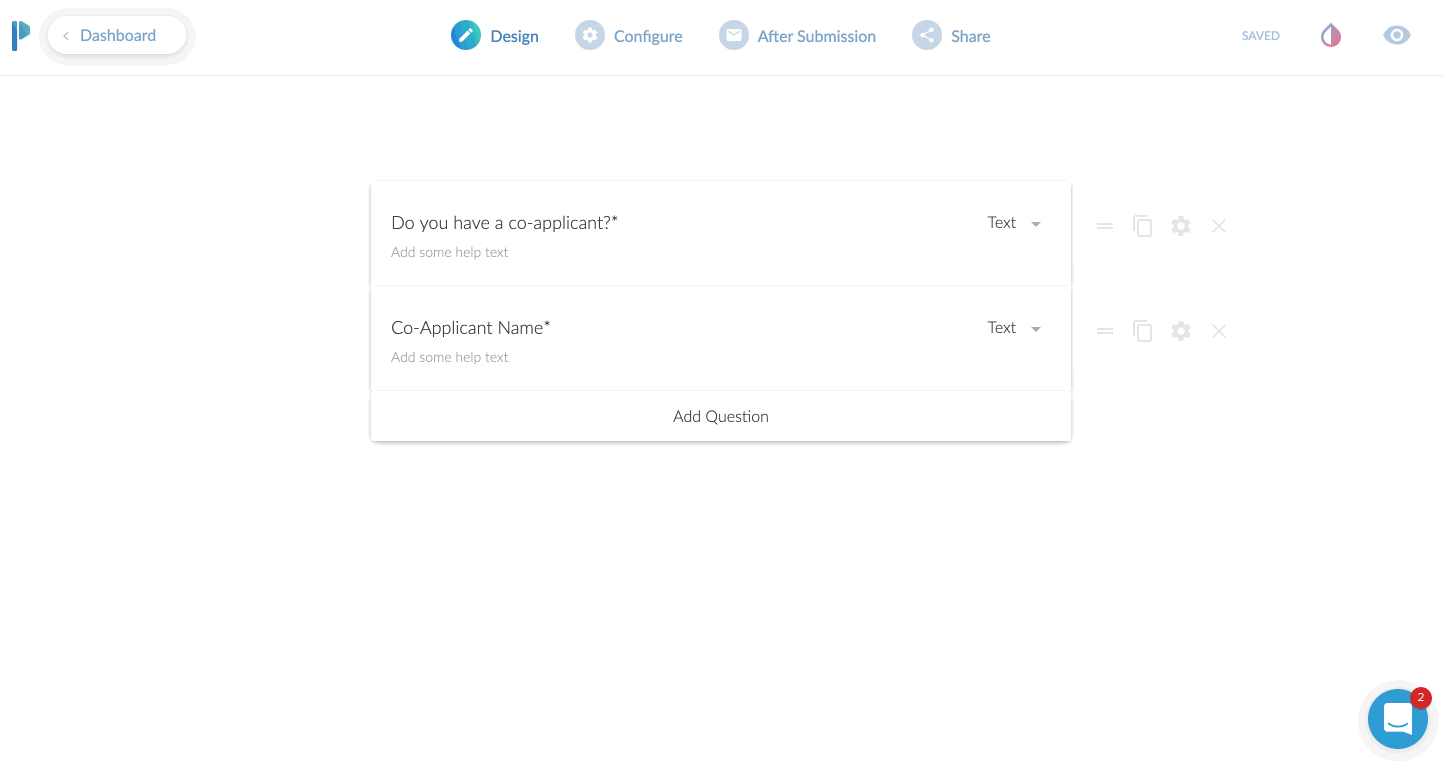
Use conditional logic
This is an extremely powerful feature. In short, what this does, is only show a field based on the input of another field.
Case use: Ask a Yes or No question such as “Do you have a co-applicant”, and if the user responds YES, then and only then, do you ask for the co-applicants information.
Why even do this? Well, long forms can be super intimidating. So the less information you can show to someone, the more likely they are going to fill the entire form.
Even if your form is relatively short, it still makes the form less intimidating. Create as little friction as possible.
Take Payments
YES! You heard that right. You can use Paperform as an online order form, or to take donations or create subscriptions right from within the form. They have claimed to take over $10,000,000 so far in credit card payments.
You can have a form that sells just one product or a menu list of products to order.
Or, set the form up to create a subscription service.
Taking donations, but want to let your donors pick their own amount? Perfect. Just leave the field blank and let the donor enter their own dollar amount to charge.
They integrate with all the popular services, Stripe, Braintree, PayPal, and Square.
Custom Email Notifications
I think this is a fantastic benefit to using Paperform.
99% of the forms I’ve ever used only allow me to adjust the email address the form details should be sent to. You get what you get.
With Paperform, you can set a primary recipient, plus an additional CC AND a BCC recipient.
This is very useful for sending to multiple team members.
If you had a lot of fields on the form, you can have a PDF version attached in the email.
Here’s a super nerdy hack-use-case for this:
Most printers today have the ability to print from the cloud or email. For instance, if I send an email to my printer’s email address, it will print that email or document!
Set your form to email yourself, and then CC your printer’s email so it can automatically print out all new leads for you and give you a personal notification!
You can also specify the “reply-to” address. Why do this? Well, you can actually use an email from the form itself to reply to.
Case use: Using as a lead gen form, after getting the form submission sent to you, when you hit REPLY on your email, it is replying to the new lead directly!
App Integrations
Everything is more fun when you play nice with others.
Sure, it’s cool that you can send the details of the form to your email.
Buttt, what if you could send all of the data, or even just some of it, to an app that you already are using.
Case uses:
You’re collecting survey data, and you want to send it all to a Google Sheet
Create a newsletter signup form, and send the data to your favorite email app such as Mailchimp or Hubspot
Use Zapier to send the data to 1,500+ apps
Share as URL or Embed
Once you create the form, you’ll need a way to get it in front of people.
The most common method will be to embed this into your website. In other words, you want the contents of the form to seamlessly live on your website’s contact page or somewhere else.
Here’s another method. Just share the direct URL. Every form you create on Paperform will have its own unique URL. You can customize the URL to your liking as well.
It will look something like this: https://your-form-name.paperform.co
This is awesome because you basically don’t even need your own website to capture new leads or sell products. All you’ll need is the URL of your form, and then share it on social media, send it in email newsletters, text it to your grandma, whoever!
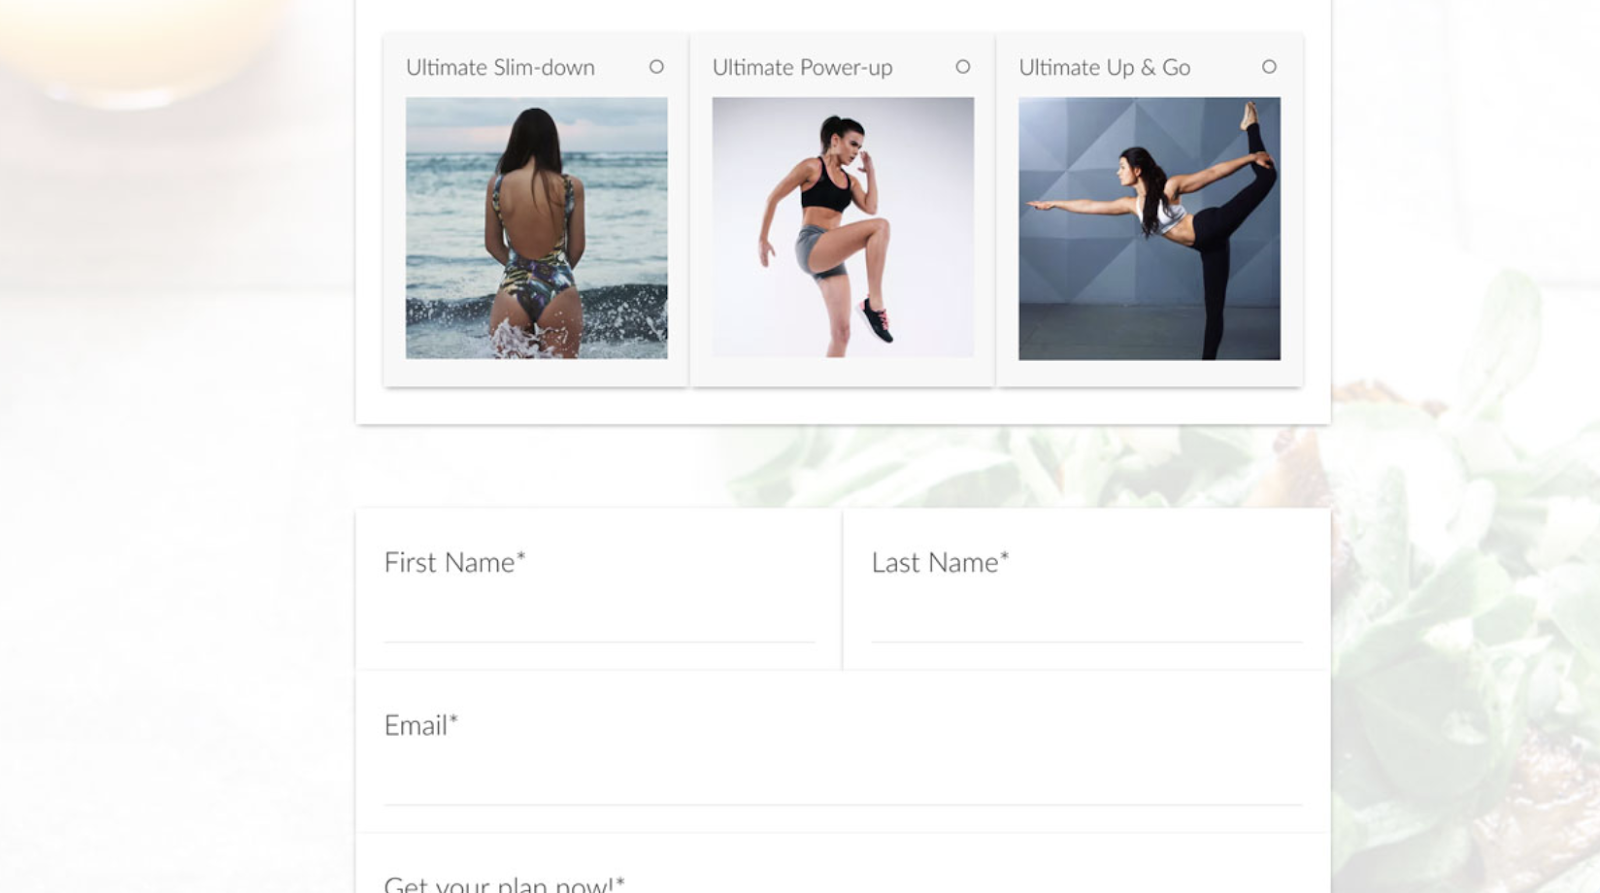
Templates
Personally, I’m not usually a template fan. I feel like templates are just soooo generic. Aka, vanilla. (Notice a trend here?)
Here’s why I really like Paperform templates though:
There’s a wide variety to choose from
You can interact with the template before using it
They feature rich content including images and video
They’re free and included on all plans
Using the templates by Papeform will be very helpful if you’re planning to use this as a direct sharing URL, or basically as a mini-webpage.
By using one of the templates, you can create a highly engaging visual experience that feels like a webpage, because well, it is a webpage.
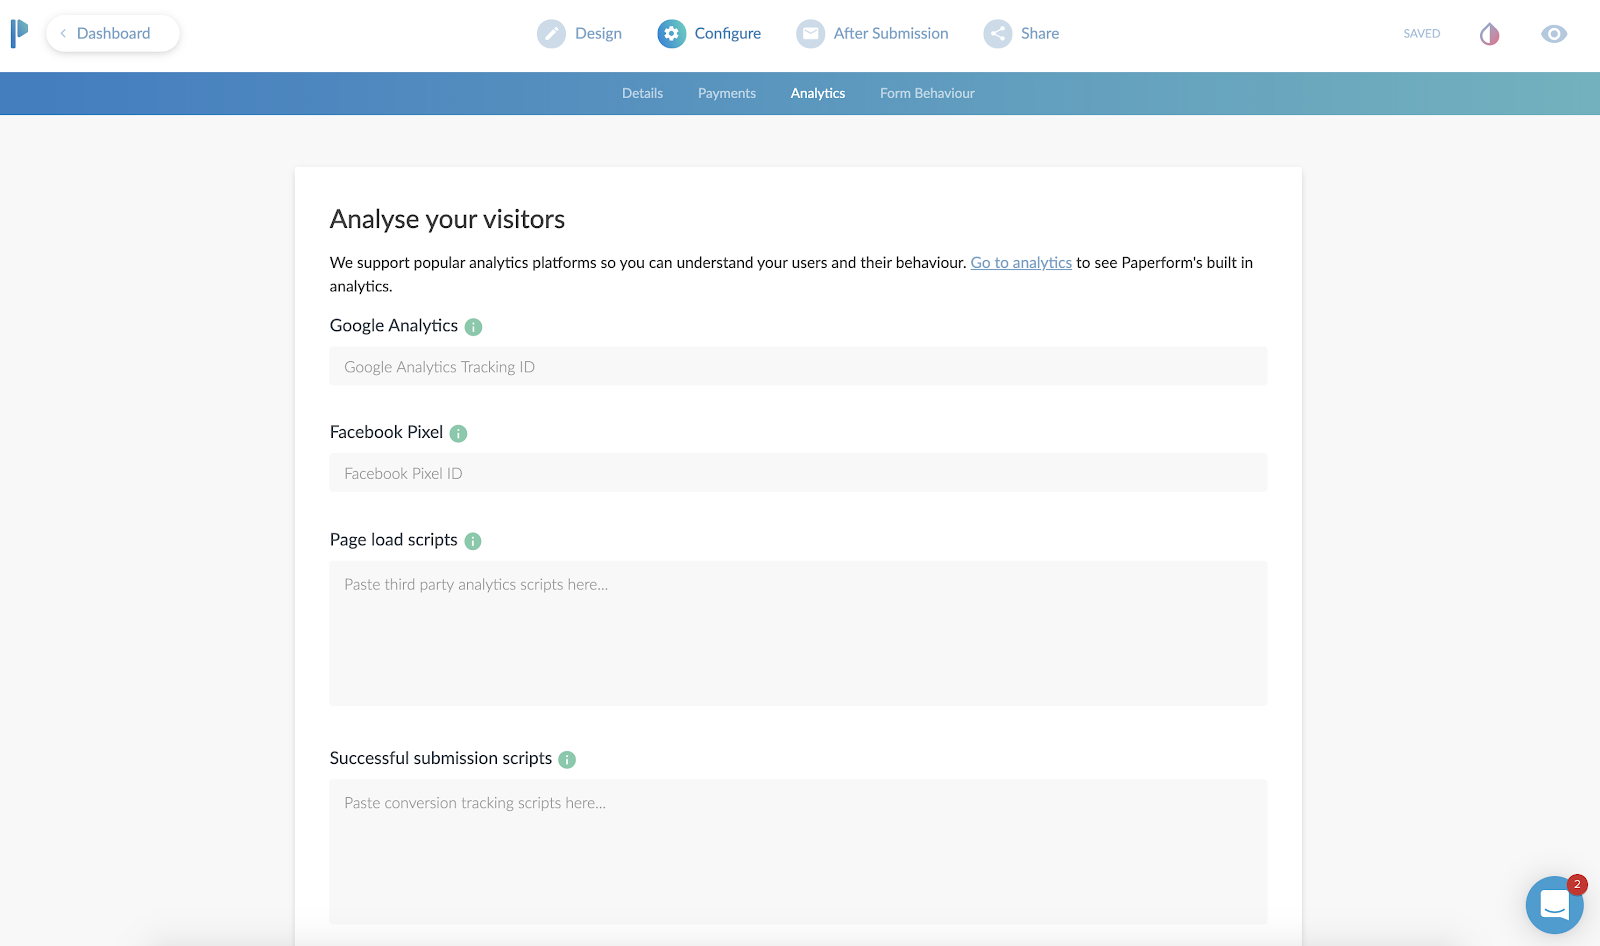
Analytics & Tracking
Going along with the theme here of using Paperform as a mini-webpage, you can actually track the entire form still!
First, you’ll add your Google Analytics ID and Facebook Pixel.
Then, you can add scripts (or tag events) after the form is “submitted”.
Case use: You can send the Facebook or Google event “Lead” after a user completes the form, so you can track the return on investment of an ad.
This is also beneficial to use, even if you are going to embed (integrate) this on your website. Your website might not have the ability to add a tracking pixel to it, or you might not have control of this. By adding the tracking code to Paperform, you can ensure you are tracking the results.
Ok, now here’s the meat and potatoes of how to create a web form using Paperform.
A Step-by-step Guide to Creating a Form
First, you’ll create an account, utilizing their free 14-day trial. You won’t even need to put your credit card in to try it out.
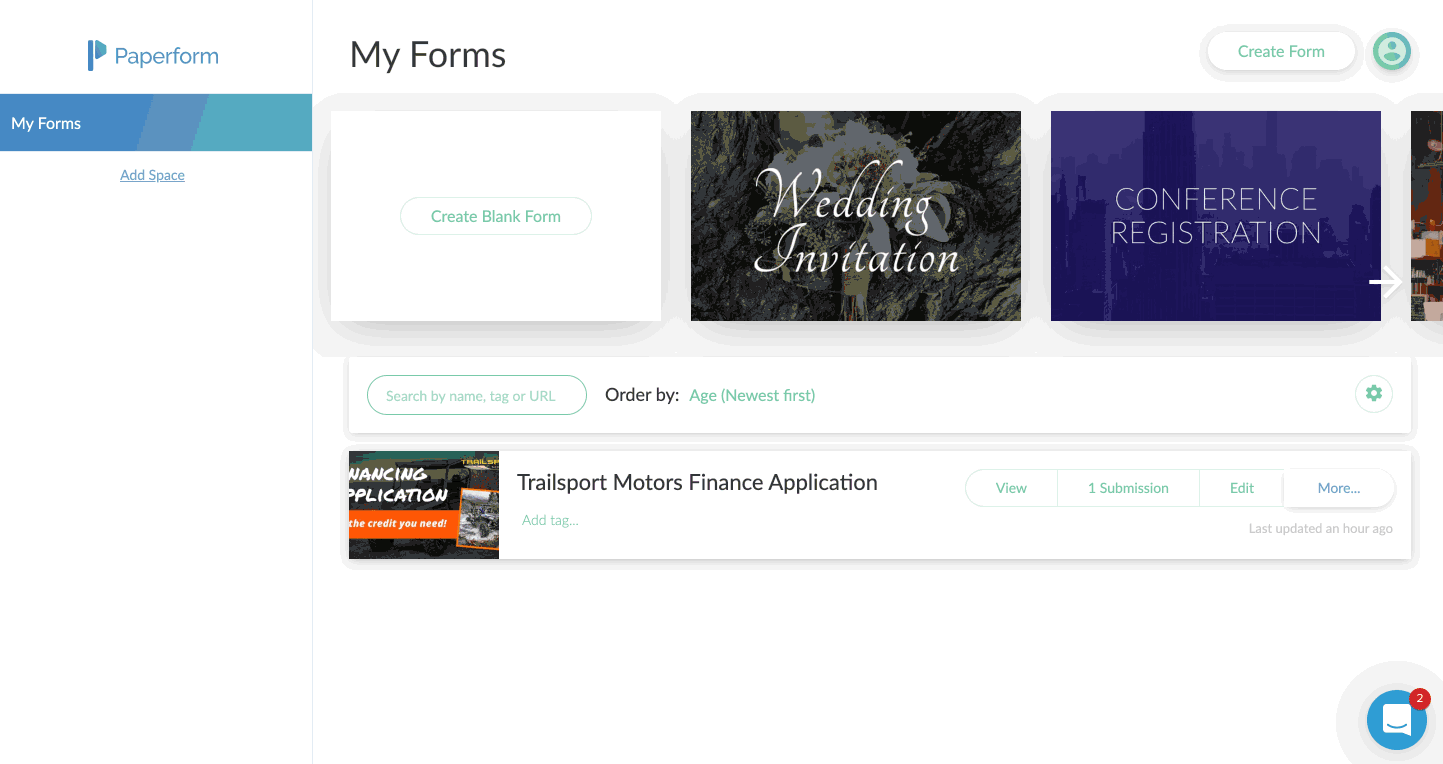
After that, you’re in the dashboard and ready to create your first form.
You’ll just click on the Create Form button in the upper right corner.
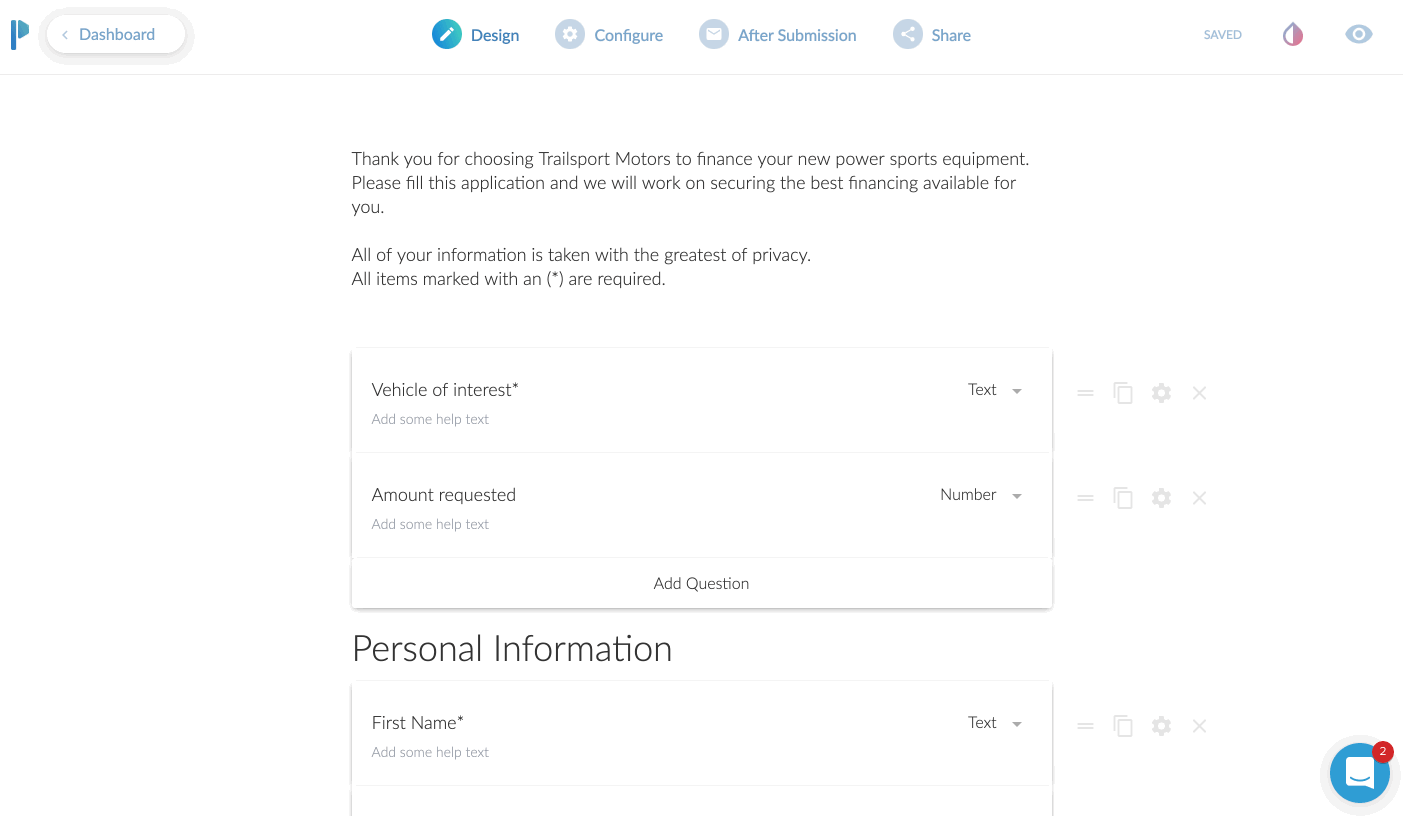
Give your form a name, and then choose to either start from scratch or use the built-in templates.
In my case, I chose to start with a blank form. I sort of wanted to see how long and potentially difficult it would be to do this without the option of a template.
I was pleasantly surprised at how easy it was, albeit a few learning curves.
Probably the biggest learning curve for me was that you just sort of start typing. Or you can hover over the tiny icons to the left to indicate what you are adding.
For example, the icons on the left allow you to add a form field (question), an image, a video, or a break point, which splits the form into multiple “pages”.
If you only start typing, you’re basically just putting in text. This is useful to preface what the form is about. I would say this is even more useful if you plan to use the form as a landing page, since you can pretty much put all your sales copy at the top and then build out the form.
If you’re planning on embedding (integrating) this onto your website, you might be able to just skip adding headings and paragraphs here and jump right to adding form fields.
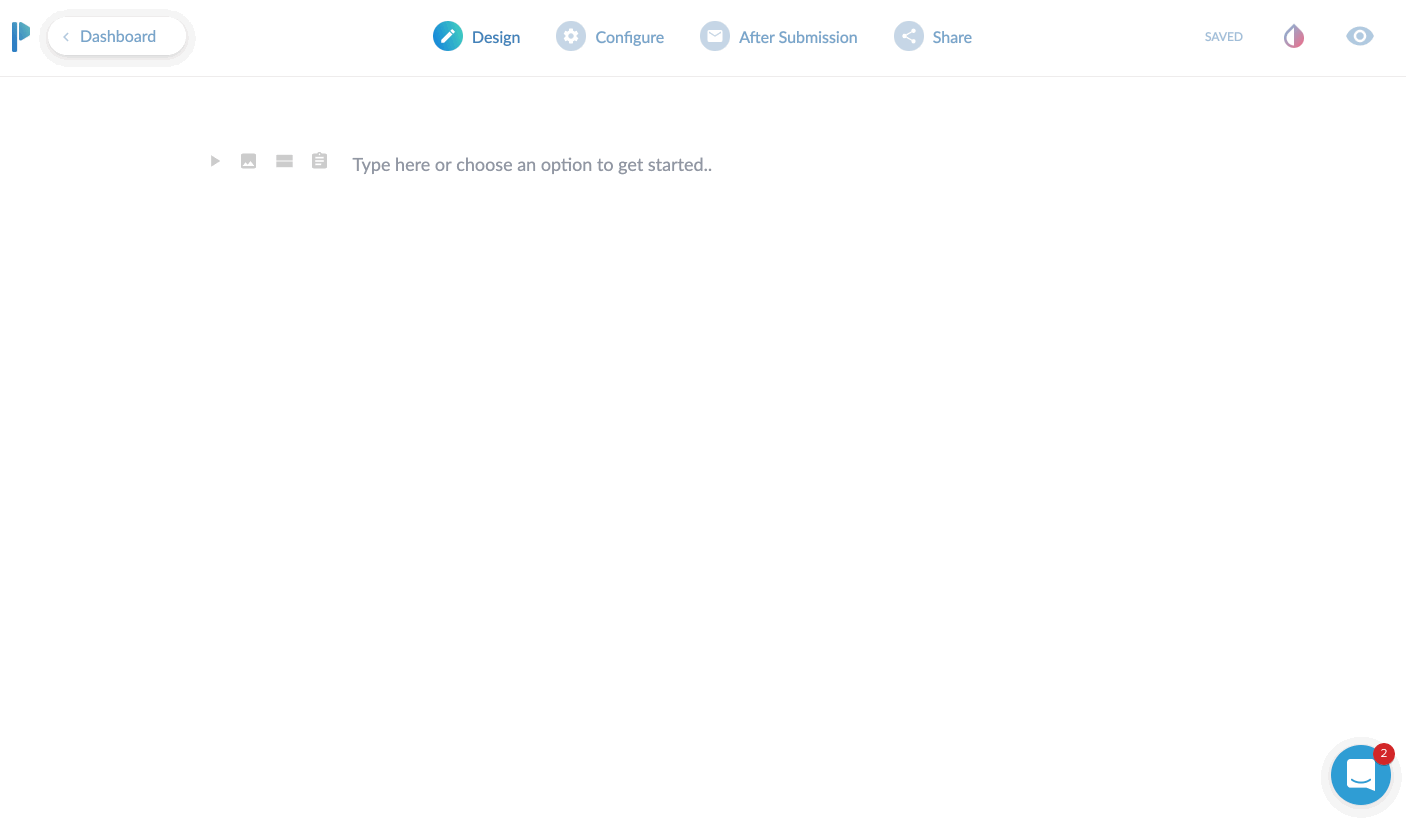
I’ll give a brief overview of the top toolbar area. Currently, you start in “DESIGN” mode. This is where you’ll lay out your form with all of the input fields, headings, images you want to use etc.
There are three additional main tabs at the top after that. CONFIGURE, AFTER SUBMISSION, and SHARE. We’ll dive into each of these.
The Design Tab

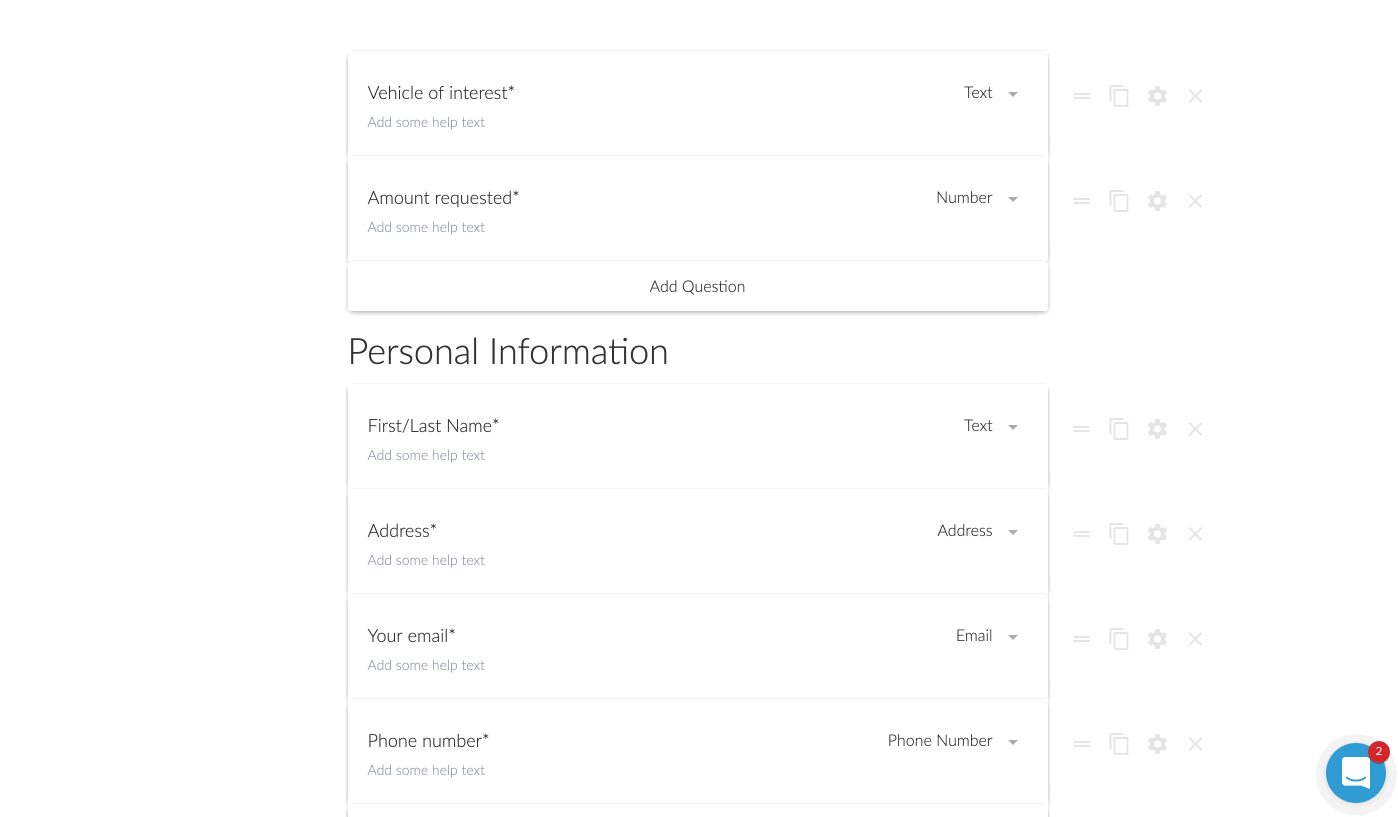
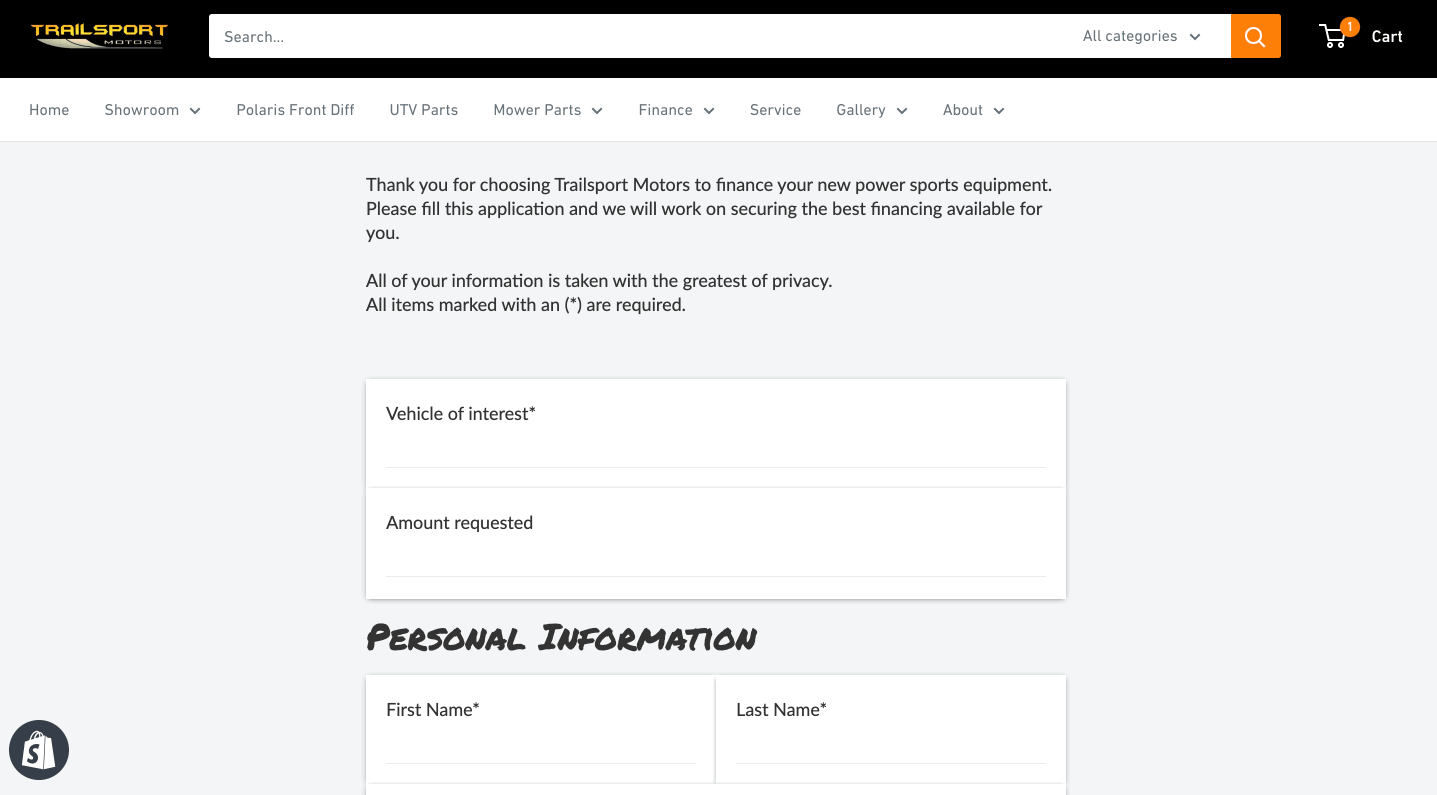
We’ve already added an introductory paragraph here. In this above screen play, you can see me clicking on the “questions” icon so I can add my first input field.
In this case, we’re asking for their “Vehicle of Interest”. To add a second field, I just click the “Add Question” at the bottom here. Super easy!
You’ll notice you can change the field type from “text” to a variety of options. You can choose from other common fields such as address or phone. There are some advanced fields you can do like multiple choice, dropdown selection, or a very handy signature input!
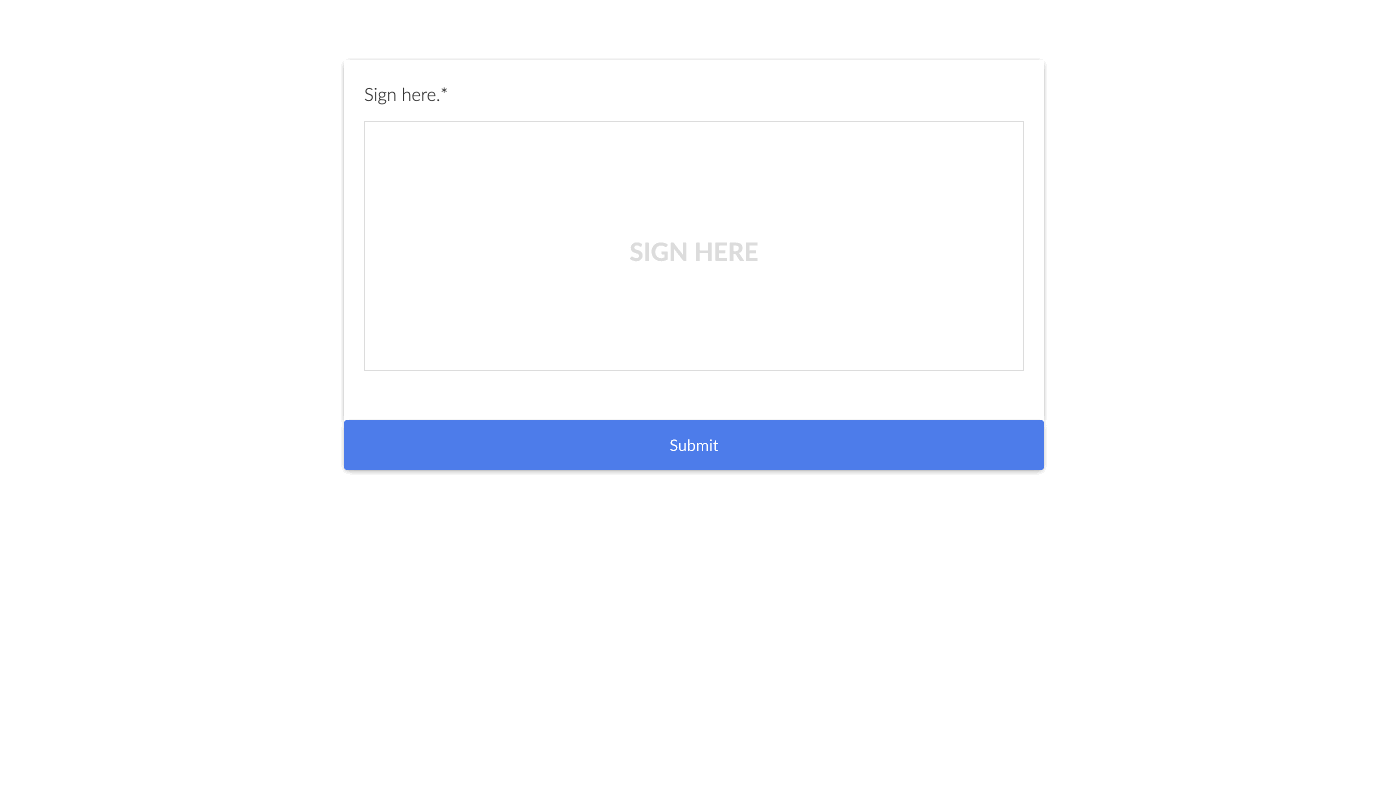
The signature input is very handy if you need to have people sign contracts here, or just need a signature for proof of submission as well. From a desktop computer, it was easy to sign by moving my mouse. On a tablet or phone, they can just do it with their finger. Or a stylus if you’re one of those people that carry a stylus around to use on your phone.
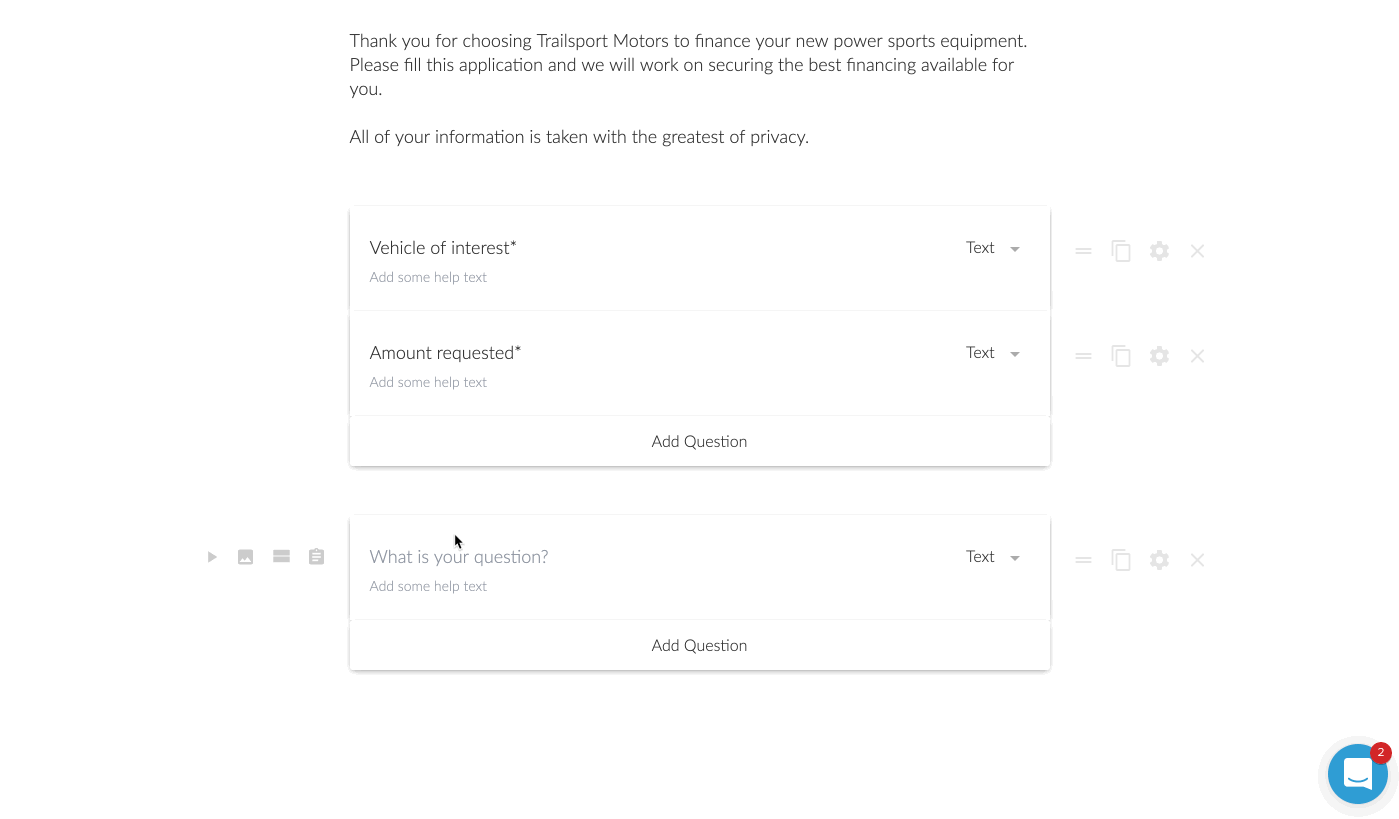
Now in this next step, I wanted to add a heading in between the different groups. This might be a little specific case use, but I was creating a longer loan application. I wanted to break up the sections. Another option I could have done was to add a ‘break’. This would make it so after those first two questions were answered, there would be a “next >” type of button.
For the loan application, I opted for to break it up by using headings. However, is this was a lead generation form, I am a huge fan of multi-step forms. It was one of my conversion trends for 2019 that I laid out on YouTube. Multi-step forms are perfect for lead generation because they assist with micro-conversions.
A micro-conversion is someone just only typing in their zip code for instance and clicking next. Once they type in their zip code, they’ve already micro-converted ONCE. Now you just need them to do a few more micro-conversions until they reach the end.
It’s far less intimidating to enter a zip code real quick than to be presented with 7 questions for a lead.
Question is Optional
For some of the questions, I wanted to make them optional to answer.
This was probably the first thing I had to think about for a moment on how to do. I then realized there was a little gear icon next to each field. Clicking that brings up a host of options to consider. One of those being “question is required”.
By default all of the questions are required, but unchecking that box makes the question optional.
Previewing Your Form
At this point, I was feeling pretty good about how my form was shaping up, but I wanted to see it in action.
This was no sweat at all. You just click on the little “eye” icon to preview it for real. You can even enter in the fields and click the different buttons on the page. It was here that I realized I wanted to change the stock blue buttons to match the branding of my client.
The Configure Tab
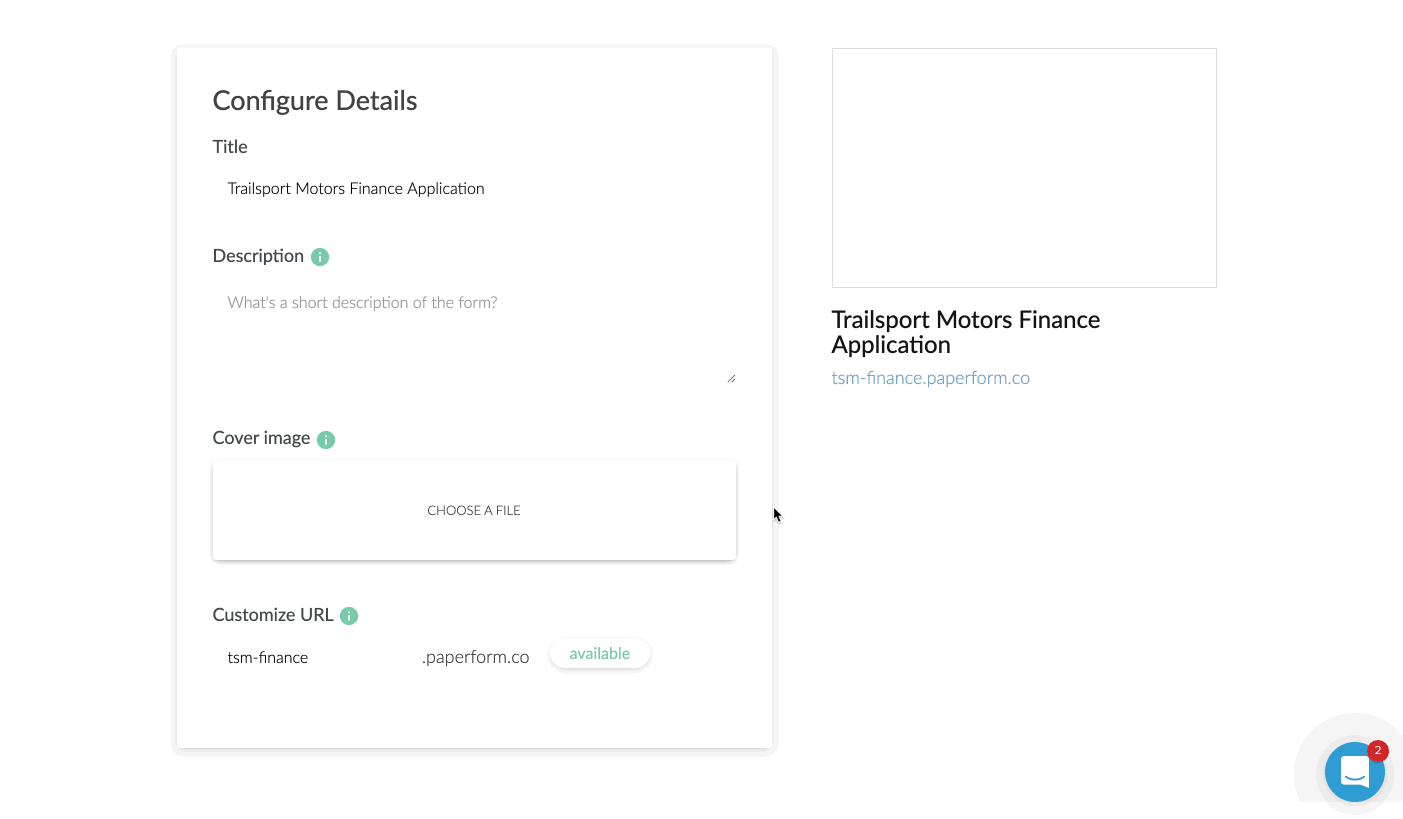
First up is the URL. If you are NOT planning on embedding this to your website, I’d highly recommend changing the URL. It will make it easy for you or someone else to remember.
From this first configure tab, you can also adjust the title, description, and cover image. This is excellent because if you plan to share the URL directly, those three elements will come up on Facebook when sharing the URL.

When I drop in the URL for this form, you’ll see the cover image I put in comes up as the share image on Facebook, automagically. In addition, the title (bold area) automatically pulls in as well.]
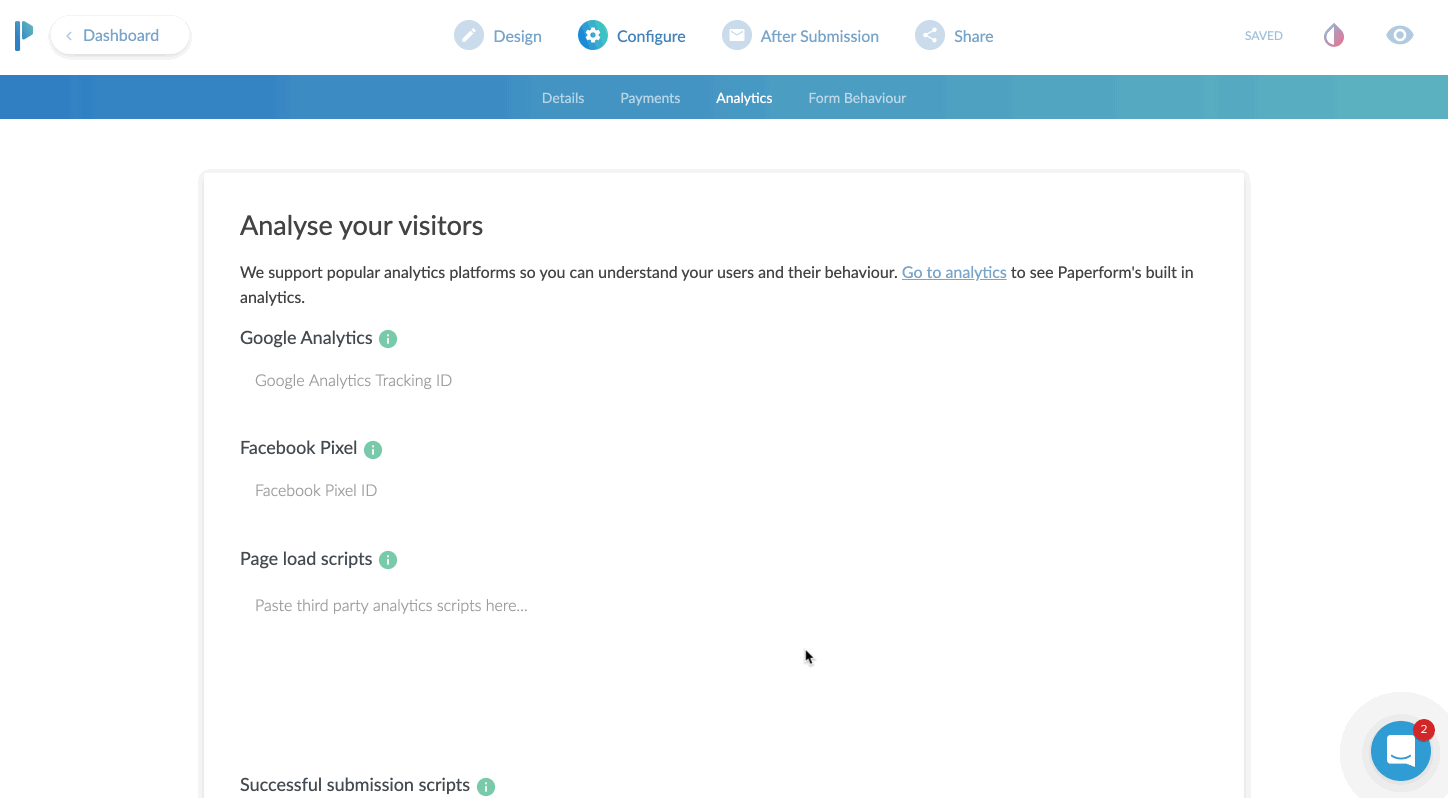
Now, if you are going to take payments here, you can just click on the payments options of the configure tab as well. In this area you’ll also be able to put in your Google Analytics ID and Facebook Pixel ID. This is very helpful again if you are using this as a stand alone landing page to track conversions.
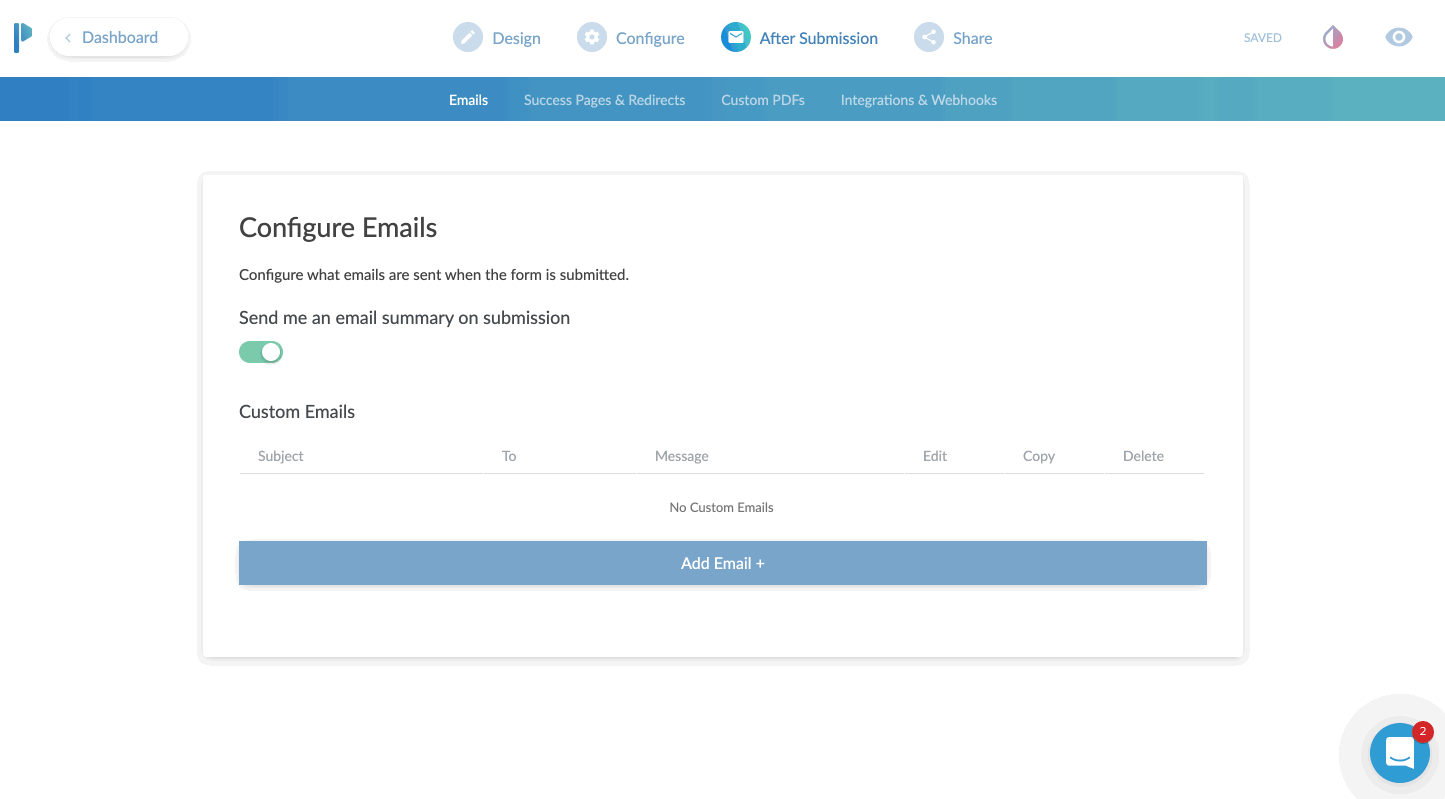
The After Submission Tab
I absolutely love this tab. Here you can configure the email that goes out when someone submits the form completely. It can be just a simple “Hey you have a new lead and here are the details”. Or, you can get a bit fancy and customize the email. This is where you can tell Paperform to attach a PDF copy in the email. Or set the “reply” address as the person who filled out the form, so that you can literally just click “REPLY” and reply directly to the lead from that email.
By the way, we’re almost done here.

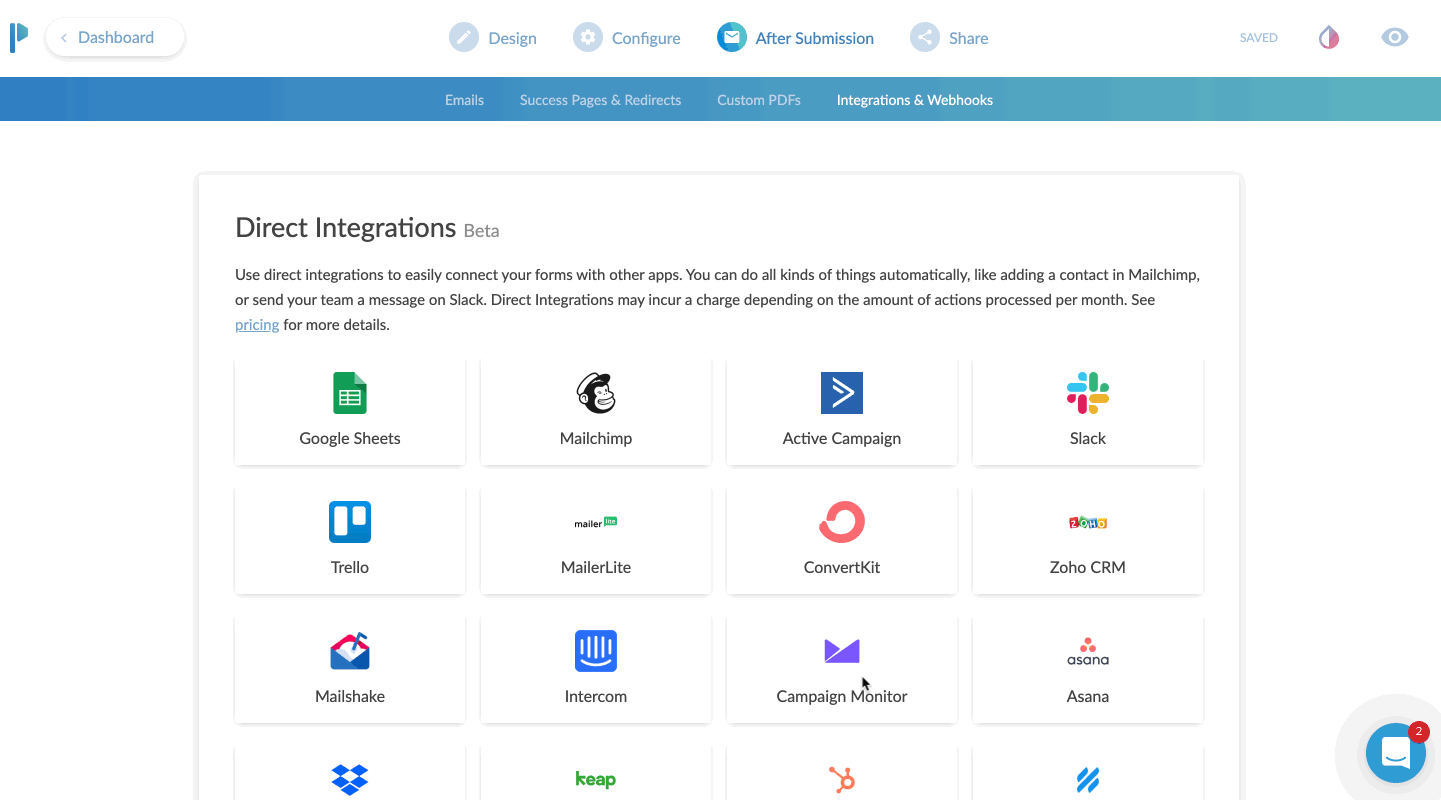
The next part of CONFIGURE is your integrations area.
You can send just about any data you collect over to an existing partner integration. Common uses would be sending data to your CRM or email marketing program. If you don’t find an existing integration, no sweat. Just choose Zapier and then configure your zap to go out to any of Zapier’s 1,500 plus apps.
The Share Tab
The share tab is pretty straightforward and easy.
This tab gives you two options. Either a direct share link to copy to your clipboard. Or an Embed option, which offers three ways to embed your form directly to an existing website.
For my client, I chose the inline embed. This places the form natively in the flow of the page it’s on.
The full screen embed is kind of neat. You place it on the page of website you want it to appear on, but instead of squishing in line with your content, it just takes over the page. BUT, it keeps the URL of your website. This is great for SEO and traffic to your site. Instead of sending traffic to a paperform.co URL, you get to send traffic to your own domain, but without having to configure a new page in your website editor.
Lastly is the pop-up option. I really like this actually. This would be a great option if you wanted to place a button on your website that says something like “Click here to subscribe to our newsletter”, and then a little box pops up with an email address field.
This is another type of micro-conversion. If the visitor clicks that button - it was intentional. They are WANTING to sign up for whatever you’re asking them.

Bonus: Theme Settings
This isn’t really a tab, but it is in my opinion, and important part of your form.
Click the little ink drop icon in the upper right and you’re brought to a theme settings area.
Here I was able to change the default blue to my client’s branded color of orange. I also customized the font choices here and as a nice surprise the background choice. The default was a light gray background. However, I was going to place this on their Shopify website, and there was already a background color of that page.
I set the color to NONE. You do this by clicking on the background color, then moving the transparency slider all the way to 0%.
Optionally, you can choose a background image instead of a color.
The Final Product
Here’s how it all looks once placed on the website. It looks and feels like a natural part of the Shopify site, but all pulling from Paperform!
From start to finish, I’d say this form took me about 15 minutes. Now truth be told, it took me longer but I was creating GIF recordings the entire time as well. I’m estimating 15 minutes.
I did go back and create another form for the client, which was limited to 5 questions. It was to request a service appointment.
Now that form, took me about 3 minutes to create I think? Since I already had one form under my belt, this second form was extremely easy and fast to create.
The Best Online Form Maker ?
All in all, I would say Paperform is the most versatile form creator on the web today. It’s easy to use and highly customizable to fit a variety of needs.
Remember – forms today are more than just name, email, phone, and message.
The ability to take payments, use smart logic to navigate the form, accept signatures, route responses to certain emails, and a crazy easy form editor makes Paperform my go to form editor for now on.
*Please note: In exchange for an unbiased review of Paperform, I received free use of the Paperform service. My opinions of the product were in no way influenced by this.