Lighting Made Easy with the Halumin H18 Open Cylindrical Modifier
Are you tired of spending endless hours setting up lighting systems for your product photography? Look no further! The Halumin H18 open cylindrical modified is here to save the day. In this article, we will explore the features and benefits of this innovative lighting solution, as well as share some tips and tricks for getting the most out of it.
Are you tired of spending endless hours setting up lighting systems for your product photography? Look no further! The Halumin H18 open cylindrical modified is here to save the day. In this article, we will explore the features and benefits of this innovative lighting solution, as well as share some tips and tricks for getting the most out of it.
Introducing the Halumin H18: A Game-Changer in Lighting Modification
The Halumin H18 is part of a new category called Open Cylindrical Lighting (OCL). Designed by Jeremy McGraw, a seasoned product photographer, this modified was born out of a desire for a quicker and more efficient way to set up lighting systems. With the H18, you can achieve professional results in minutes, thanks to its unique design and functionality.
How Does It Work?
The H18 features a 360-degree open ring with an 18-inch staging area. Simply place your product inside the circle, and you're ready to start shooting. The modifier can accommodate one or two speed lights, which you can attach using the openings and strap provided. If you prefer, you can also use a studio light adapter with a standard Bowens mount to connect a studio strobe or COB video light.
Endless Possibilities and Versatility
One of the standout features of the Halumin H18 is its versatility. Depending on where you position your subject within the ring, you can achieve different lighting effects. Placing your subject near the back of the ring creates a traditional lighting setup. In the middle, you'll get a soft but defined edge effect, while positioning it at the front produces a backlit look. This flexibility allows for creative experimentation and ensures you can capture the perfect shot for your specific needs.
Convenience and Quick Set-Up
With the H18, efficiency is key. Setting up the modified may initially seem intimidating, but fear not! Halumin provides tutorial videos on their YouTube page to guide you through the process. Additionally, the modified can be easily collapsed and stored, making it a breeze to transport and set up at any location. Say goodbye to time-consuming setups and hello to hassle-free shooting!
Additional Accessories for Added Convenience
To further enhance your shooting experience, consider adding the leg adapters to your H18 setup. These little helpers allow hands-free shooting and give you the freedom to explore various angles and compositions. The leg adapters can be purchased separately or as part of a package with the studio light adapter.
A Word About Lens Rentals
If you're in need of equipment rentals, look no further than lensrentals.com. With their unique rental shipping option, you can enjoy unlimited free shipping on all orders. This convenient service ensures your gear arrives when you need it, allowing you to focus on capturing the perfect shot. Plus, lensrentals.com offers an extensive range of equipment, including drones, for all your photography needs.
Get $25 off your first rental by signing up at bearcityimpact.com/lensrentals
Final Thoughts
The Halumin H18 open cylindrical modified is a game-changer in the world of product photography. Its innovative design, quick set-up, and versatility make it a must-have for any photographer looking to streamline their workflow and achieve stunning results. So why wait? Grab yourself a H18 and take your product photography to the next level!
Ready to shine a light on your products? Visit haluminphoto.com to learn more about the Halumin H18 and lensrentals.com for all your equipment rental needs. Happy shooting!
***Disclaimer: This blog post is not meant to endorse or promote any particular brand or product. The information provided is based on the speaker's personal experience and opinions. Always do your own research and choose products and services that best suit your needs.

What is the best email marketing service in 2022?
If you've spent any time on the internet, I'm sure you've seen ads for email marketing software. There are tons of companies that offer this service, but which one is right for your business? Well, first of all, let's look at some of the biggest players in the game:
There are many different email marketing services, but they all have pros and cons.
👍 Pros and 👎 Cons Overview
MailChimp is great for beginners and small businesses—they have a free plan that allows you to send up to 12,000 emails per month. Their interface is easy to use and they have an intuitive drag-and-drop builder.
Mailerlite is good for small businesses that want more customization options than what's available with Mailchimp. They also offer an unlimited free plan (you just can't send more than 10k emails per month).
Constant Contact is best suited for large companies who are looking for robust reporting tools and automated marketing campaigns. Their pricing starts at $99/month, which includes unlimited emails sent each month up to 5,000 contacts total (including subscribers).
ActiveCampaign offers flexible plans starting at $9/month, which include features like A/B testing, drip campaigns and integrations with Zapier or Google Analytics 360 Suite APIs
MailChimp
Mailchimp Email Marketing Platform
MailChimp is one of the most popular email marketing services, and it's no wonder why. They have a free plan that can be used by anyone without limitation, including sending up to 12,000 emails per month. The interface is easy to use and MailChimp offers a range of features that are useful for beginners and advanced users alike.
The main benefit of MailChimp is its simplicity: you can send emails easily through an intuitive interface or manage your accounts with drag-and-drop functionality. It’s great for beginners because there are no complicated settings or configurations required—just set up your email list in minutes!
(courtesy mailchimp)
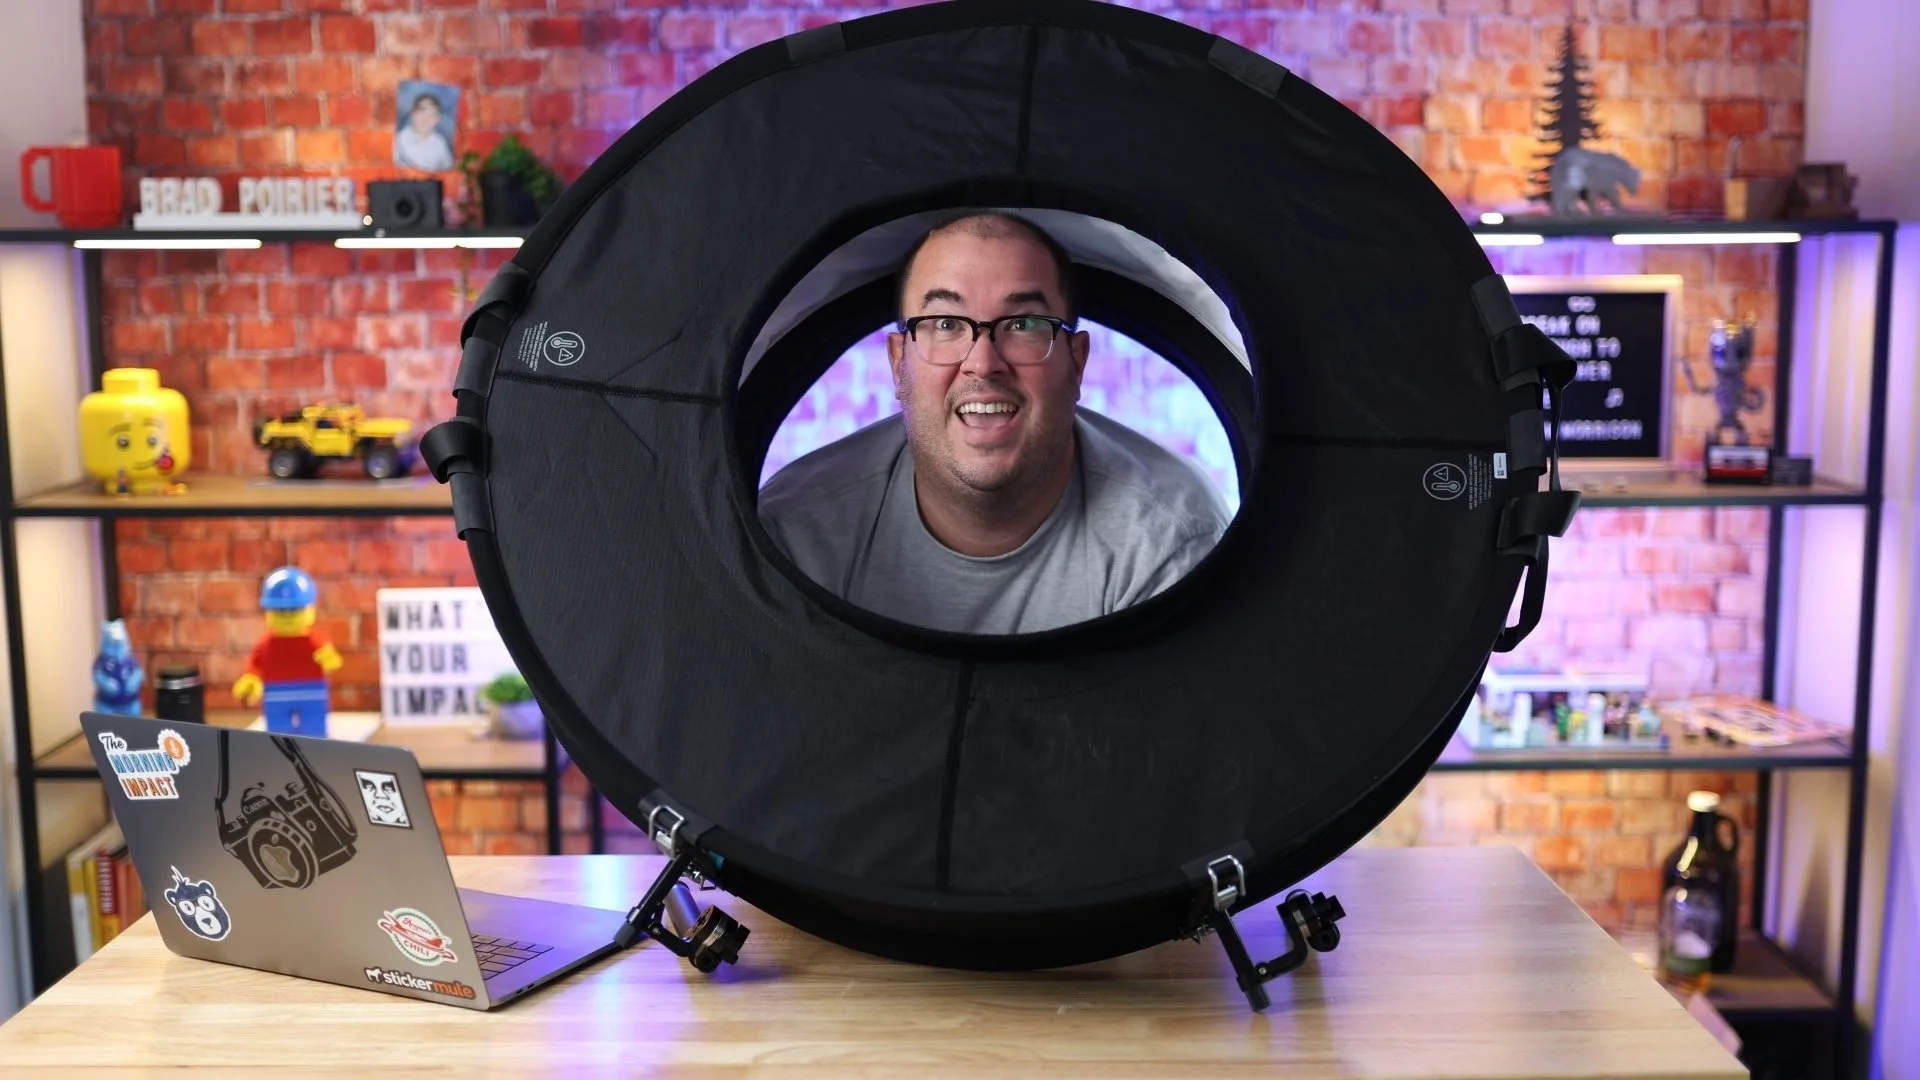
MailChimp also makes it easy to create segments out of your subscribers based on their behaviors (what they clicked on) or demographics (where they live). This enables you to better tailor content based on what you know about each customer so that each piece reaches them at just the right moment—whether that’s when they just signed up for your newsletter or when they made their first purchase from one of your products.
Mailerlite

Mailerlite, an email marketing service that boasts over 1 million users, is a good choice for small businesses. Their service is super easy to use and has both free and paid plans. They also have a great customer support team and reporting system so you can keep track of your campaigns' success rate.
The pricing structure at Mailerlite is pretty straightforward— It's free for the first 1,000 subscribers, then it's $15/mo if you're going solo (with up to 2,500 subscribers).
Constant Contact
If you don’t know about Constant Contact, well, that makes sense because this is a service for small businesses (emphasis on small) and it's not one that gets much press outside of those circles.
For these reasons alone this might be why many people are surprised to learn that Constant Contact has more than 2 million users and over 25 years in the business. It also has a great reputation among its users and is considered one of the best email marketing services out there by many marketers. That's right: it has both accolades from critics as well as positive feedback from actual customers! In fact, according to our research only MailChimp has more 5-star reviews on Trustpilot than Constant Contact does at the time of writing this article (the numbers keep changing but we'll update them if they change).
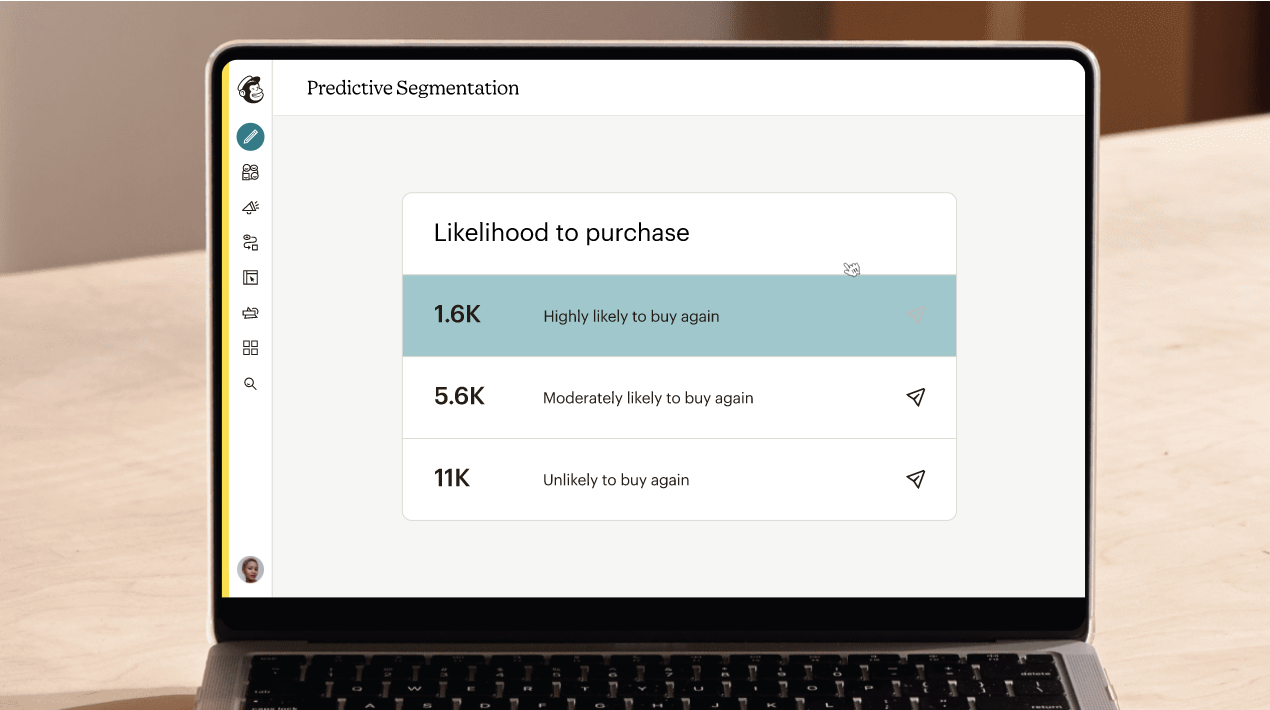
Constant Contact Marketing Automation
While it may not have quite as many features or capabilities as other options out there like MailChimp or Mailerlite, what makes Constant Contact stand out is its lower price point ($9/month) when compared with other similar services like Aweber ($19/month), Infusionsoft ($29-$99/month depending on plan type), Ontraport ($99-$299/month depending on plan type), Hubspot CRM ($150-$300/month depending on plan type), etcetera...
Active Campaign
Active Campaign is a popular email marketing service that's cheap, easy to use and has great customer support. Active Campaign does have a lower limit on the number of emails you can send per month, but if you're just getting started with email marketing or aren't sending very many emails yet it should be fine.

Active Campaign Personalized Marketing
The free plan also has some nice features like form customization, autoresponders, landing pages and SEO tools. You can even import your existing contacts from MailChimp or Constant Contact into Active Campaign using this CSV import tool from their support center!
Email marketing software can help you grow your business.
Email marketing makes it easy for you to build relationships with customers. The best email marketing tools make it easier for you to create, send and track emails. You can use them to automate your email campaigns, so that you don't have to do all this by hand. Email marketing software helps you track the results of your campaign so that you know what worked (and what didn't).
Conclusion
Email marketing is a great way to reach your customers and grow your business. It’s also easy to get started with email marketing. There are many different email marketing services, but they all have pros and cons. If you want something simple that doesn’t require much learning, go with MailChimp or Mailerlite. If you need more advanced features like A/B testing, segmentation, etc., then choose one of the other options on this list!

Best Wireless Mic System For Videos in 2020
Today I’m going to review the brand new Comica BoomX-D Wireless Microphone System. Overall I think this is a fantastic microphone for making videos at any level.
BOOM !
Today I’m going to review the brand new Comica BoomX-D Wireless Microphone System.
Overall I think this is a fantastic microphone for making videos at any level.
My name is Brad Poirier, and I am a content strategist and my company Bear City Impact creates content for small businesses. If you’re looking to create content that converts, then consider subscribing so I can help you give your content a kick in the butt.
Now there are few different versions of the BoomX-D. The model I’m reviewing today is the D2, that comes with two microphone and one receiver. Thank you to Comica for sending me this microphone by the way, but this is my genuine opinion of it.
They also make a model with just one microphone and one receiver, in addition the offer models where the receiver plugs directly into an iphone or android phone.
You can still use the D2 model that I have, you just might need an adapter if your phone does not have a headphone port.
I’ve left all of the model options in the description below, obviously.
Just a quick note, this is a practical review of this product. Meaning, I’m not getting into any technical details. I think they’re boring and at least for the clients that I serve - most of them won’t tell the difference between a better frequency response or some other “spec”.
Let’s look quickly at what you receive in this box:
Two microphones (transmitters)
One receiver
3 audio cables for the receiver, based on what you’re plugging in to
USB-C Charging cable
Two lavalier mic
Two fuzzy wind jammers
Reset pin
Plus a manual, which candidly you don’t even need because this is so simple to set up and use right out of the box!
One of my favorite features of this system is how small, compact, and lightweight it is. Plus the transmitters have an integrated microphone. So you can use it as a clip on mic, or plug in the included wired lav if you prefer.
Conveniently, the belt clips on all models double as camera mount. You can slide the belt clip right into your camera’s hot shoe.
Or if using your smartphone, you can just clip it to the phone itself. Perfect!
Both the receivers and transmitter have a built-in rechargeable battery, although I have not tested how long it lasts. It is rated for five hours though. I do appreciate not having to change out batteries though.
The receiver has two outputs. One for your camera or smartphone, and another if you want to monitor the audio through a pair of headphones.
This is especially useful for connecting to smartphones, so that you can make level adjustments.
You don’t want to just hit record and then find out later the volume was too low or too high.
Connecting the receiver and transmitter couldn’t be easier. Comica uses their own 2.4Ghz network, so you don’t have to worry about connecting via bluetooth or wifi etc.
You practically just turn them both on, click the pair button, and then it finds the receiver!
Once they are connected, you can adjust the input levels from the receiver.
So if you have a person that talks a bit louder (like me), you can reduce the amount of gain from 0db to 12db, 12db being the most amount of gain.
Another reason to raise the gain level is if you are using a Canon camera like I am. If you leave the canon’s mic level high, you’ll get a lot of fuzz noise in the background. I set the mic level at about 25% on my Canon DSLR, and then raise the gain level on the Comica microphone, which produces a much better, noticeable sound difference.
If I had to pick my favorite features for this microphone set, it would be:
how easy it is to just take out of the box and start using it
You can use the built in mic or plug in the wired lav
Compact form factor
Built in battery
Clips on anywhere
Now this unit as reviewed currently sells for $233, but you can get the single mic option for $166.
In both cases, that’s a fantastic value for any wireless microphone, let alone one that packs so much in a small punch.
What are you currently using for a microphone to make videos? Are you using the built in mic from your phone or camera? Let me know in the comments.
Btw, did you find this review to be more helpful than techy? If so, consider subscribing - I speak human to human, or at least I try!
Cheers.

The Best LIVE Stream Software for Mac OSX
This is the 2nd app of three that I use DAILY, although this one I use about every other day. In this video I breakdown 5 ways that I use this program and show some examples.
Get a Free trial of Ecamm here:
https://bit.ly/ecamm-trial
This is the 2nd app of three that I use DAILY, although this one I use about every other day. In this video I breakdown 5 ways that I use this program and show some examples.
Here it is in case it is TL;DW:
1) Scheduling Live Streams - Each week I schedule the live stream for The Morning Impact by using Ecamm Network. This way, it gets posted to Facebook as a preview post, alerting my audience of the new episode, and also alerts my guest so that they can start a watch party!
2) Broadcast Studio - Hands down this is the way to live stream if you have more than yourself on camera. Ecamm let's me hook up multiple camera sources, and then my buddy Dave is on the switcher changing the cameras based on who is talking - JUST LIKE IN A REAL TV STUDIO! This stops the boring one camera angle. Also, I can add in things like titles, overlays, and logos.
3) DSLR Recorder - I record directly from my camera to Ecamm when doing talking head videos, like this one you are watching. This is because Canon is a memory hog when it comes to 4K recording. For reference, for the same 7 minutes of footage, my Canon will store it as 25GB whereas Ecamm records it at 800MB... I dont know about you, but I don't notice the compression when watching on a PHONE (Like 99% of everyone does)
4) Screen Recordings - I also use this sometimes to create tutorials on my computer, where I record my screen and what I am doing, and then can also have a little camera bubble in the corner.
5) Green Screen - This is less common, but has been neat to do. I had a demonstration table at a recent career day for @cravencountyschools, and we made 15 second career videos for the 9th grade students. I set up a green screen, and then had 9 pre-made backgrounds to superimpose the students into! It was a blast!
Budget Alternatives to Adobe CC Suite
This is part one of a three-part series on the three tools I use in my content marketing DAILY. This first video is about the Adobe Creative Cloud suite of apps. I use everyday Premiere Pro, Lightroom, and Illustrator. In this video I'm showing you alternatives for each of these apps, that are made by Adobe - but considered a "light" version of the pro apps.
This is part one of a three-part series on the three tools I use in my content marketing DAILY. This first video is about the Adobe Creative Cloud suite of apps. I use everyday Premiere Pro, Lightroom, and Illustrator. In this video I'm showing you alternatives for each of these apps, that are made by Adobe - but considered a "light" version of the pro apps.
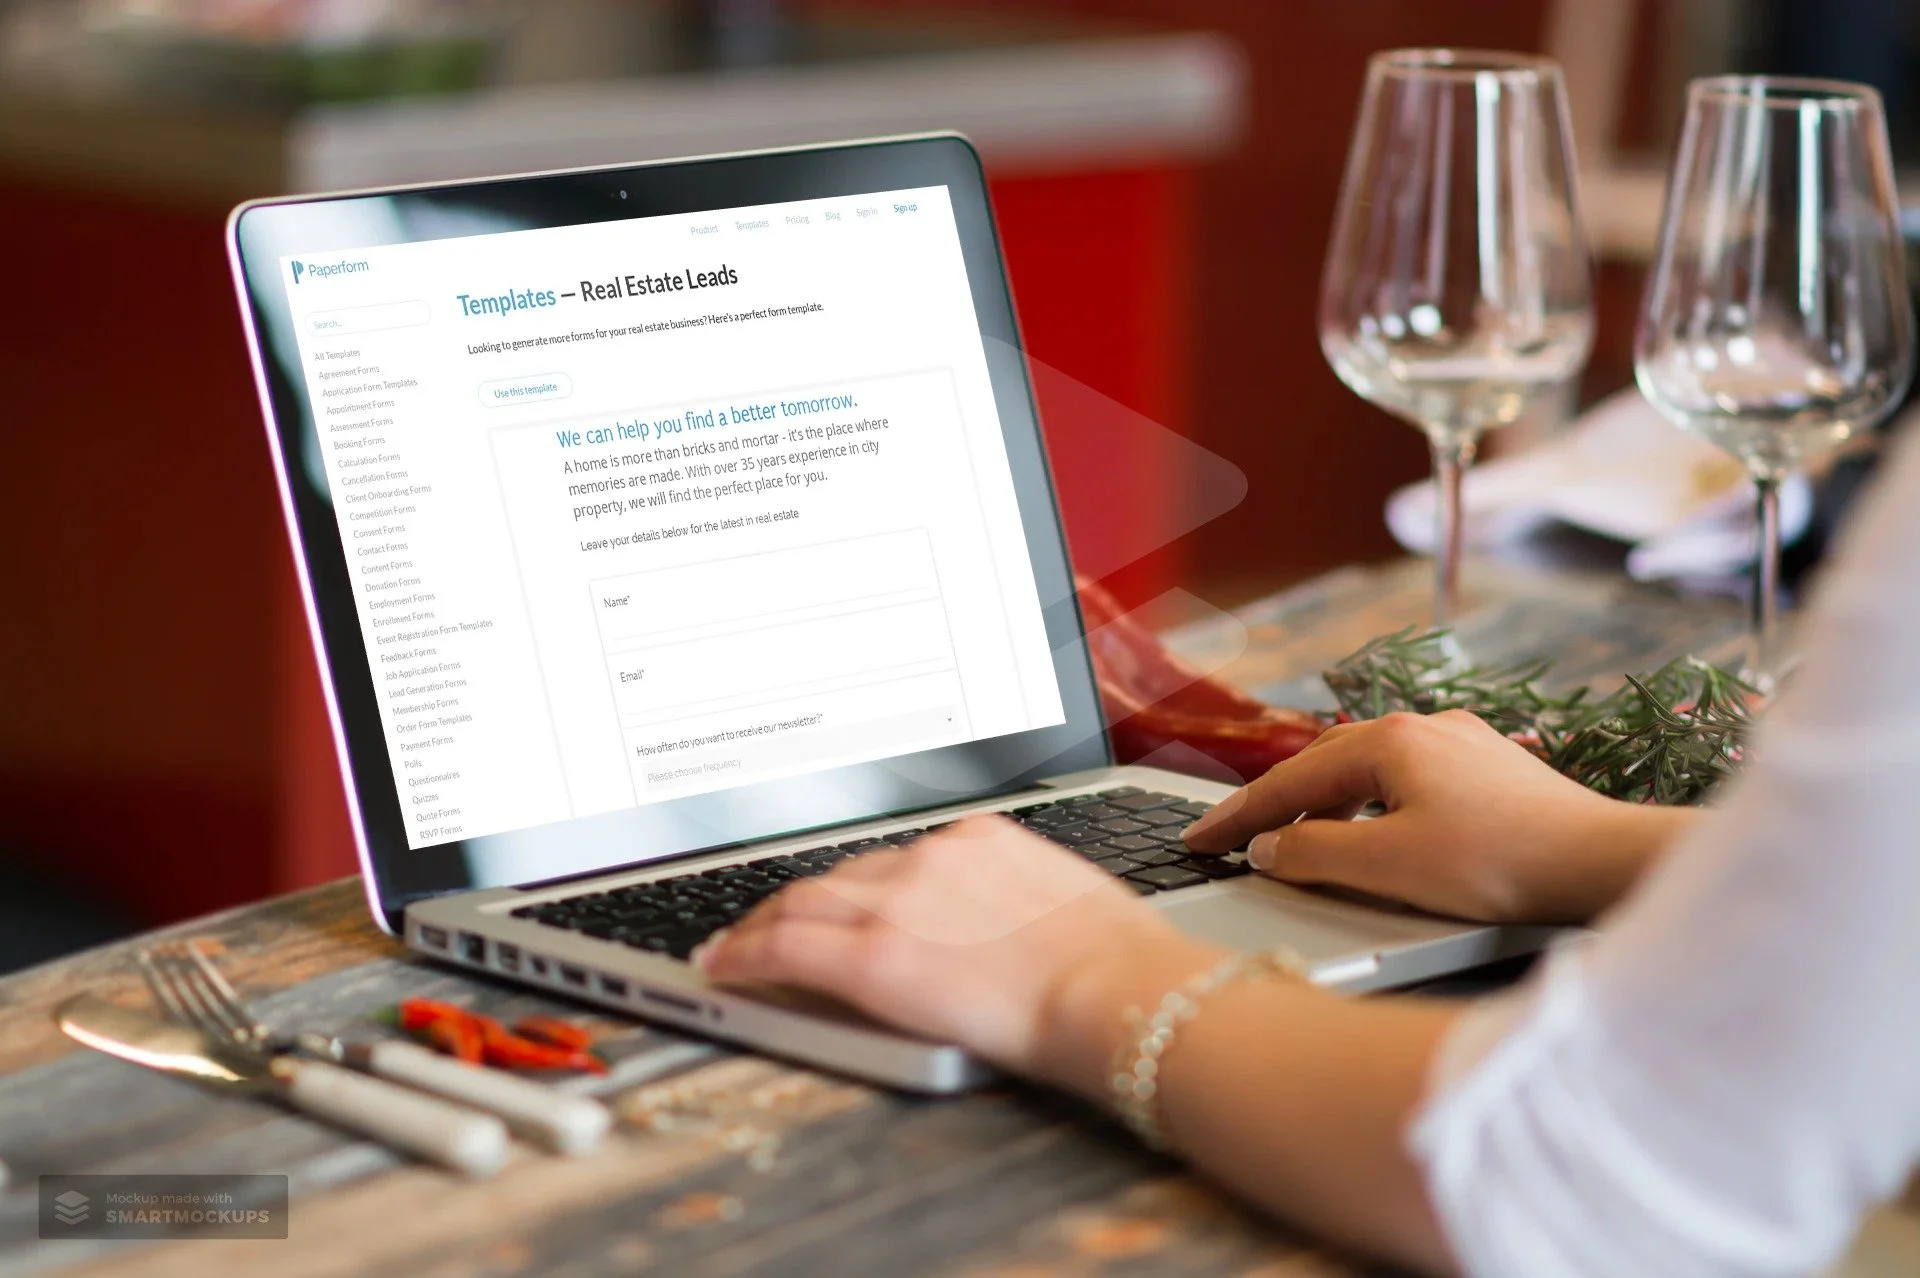
How To Create Web Forms Easily and Quickly
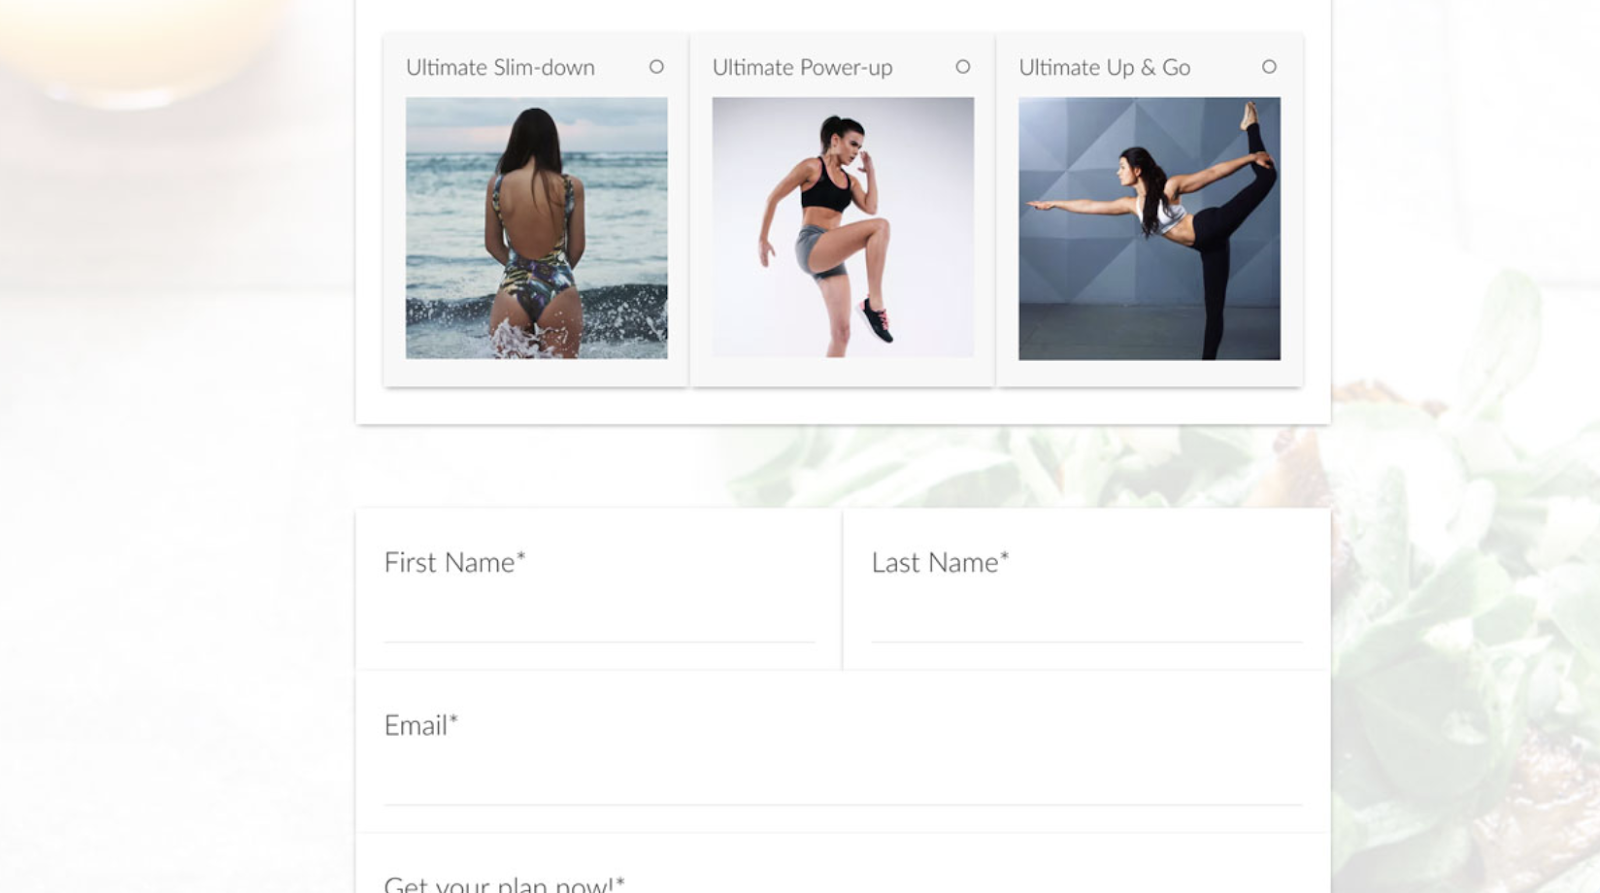
I recently had a chance to dive into Paperform, an online form creator that allows you to create beautiful forms, that according to them, is as easy as writing a word doc. They’re right. I made an entire finance application for a client in less than 15 minutes.
Name, Email, Phone, Message.
How many times have you seen this on a website?
That’s probably the most vanilla way to get information from your visitors.
The world wide web needs more birthday cake ice cream and sprinkles.
I recently had a chance to dive into Paperform, an online form creator that allows you to create beautiful forms, that according to them, is as easy as writing a word doc.
They’re right. I made an entire finance application for a client in less than 15 minutes.
Including customizing the style to match their branding, and placing it on their Shopify website.
In this article, I’m going to show you:
Why you should use an online form builder
How to use Paperform as a marketing and sales tool
A step-by-step guide to creating a form
Why use an online form builder
It’s quite possible that your website platform already includes a form builder. Popular sites such as Squarespace, Wix, Weebly all have their own. Rocket Websites by Bear City Impact also include a form builder, that’s native to our platform.
However, almost all form builders are very basic, eh hem, vanilla. Usually, there’s no customization, and it’s limited to just simply adding a form field and letting the visitor enter information.
An online form builder, such as Paperform will not only let you customize the look-and-feel of your form but also include powerful tools to use it as a marketing and sales tool.
Basically, it lets you turn your vanilla form into a pint of Chunky Monkey Ben & Jerry’s.
Here’s what Paperform will let you do instead.
How to use Paperform as a Marketing and Sales Tool
Use conditional logic
This is an extremely powerful feature. In short, what this does, is only show a field based on the input of another field.
Case use: Ask a Yes or No question such as “Do you have a co-applicant”, and if the user responds YES, then and only then, do you ask for the co-applicants information.
Why even do this? Well, long forms can be super intimidating. So the less information you can show to someone, the more likely they are going to fill the entire form.
Even if your form is relatively short, it still makes the form less intimidating. Create as little friction as possible.
Take Payments
YES! You heard that right. You can use Paperform as an online order form, or to take donations or create subscriptions right from within the form. They have claimed to take over $10,000,000 so far in credit card payments.
You can have a form that sells just one product or a menu list of products to order.
Or, set the form up to create a subscription service.
Taking donations, but want to let your donors pick their own amount? Perfect. Just leave the field blank and let the donor enter their own dollar amount to charge.
They integrate with all the popular services, Stripe, Braintree, PayPal, and Square.
Custom Email Notifications
I think this is a fantastic benefit to using Paperform.
99% of the forms I’ve ever used only allow me to adjust the email address the form details should be sent to. You get what you get.
With Paperform, you can set a primary recipient, plus an additional CC AND a BCC recipient.
This is very useful for sending to multiple team members.
If you had a lot of fields on the form, you can have a PDF version attached in the email.
Here’s a super nerdy hack-use-case for this:
Most printers today have the ability to print from the cloud or email. For instance, if I send an email to my printer’s email address, it will print that email or document!
Set your form to email yourself, and then CC your printer’s email so it can automatically print out all new leads for you and give you a personal notification!
You can also specify the “reply-to” address. Why do this? Well, you can actually use an email from the form itself to reply to.
Case use: Using as a lead gen form, after getting the form submission sent to you, when you hit REPLY on your email, it is replying to the new lead directly!
App Integrations
Everything is more fun when you play nice with others.
Sure, it’s cool that you can send the details of the form to your email.
Buttt, what if you could send all of the data, or even just some of it, to an app that you already are using.
Case uses:
You’re collecting survey data, and you want to send it all to a Google Sheet
Create a newsletter signup form, and send the data to your favorite email app such as Mailchimp or Hubspot
Use Zapier to send the data to 1,500+ apps
Share as URL or Embed
Once you create the form, you’ll need a way to get it in front of people.
The most common method will be to embed this into your website. In other words, you want the contents of the form to seamlessly live on your website’s contact page or somewhere else.
Here’s another method. Just share the direct URL. Every form you create on Paperform will have its own unique URL. You can customize the URL to your liking as well.
It will look something like this: https://your-form-name.paperform.co
This is awesome because you basically don’t even need your own website to capture new leads or sell products. All you’ll need is the URL of your form, and then share it on social media, send it in email newsletters, text it to your grandma, whoever!
Templates
Personally, I’m not usually a template fan. I feel like templates are just soooo generic. Aka, vanilla. (Notice a trend here?)
Here’s why I really like Paperform templates though:
There’s a wide variety to choose from
You can interact with the template before using it
They feature rich content including images and video
They’re free and included on all plans
Using the templates by Papeform will be very helpful if you’re planning to use this as a direct sharing URL, or basically as a mini-webpage.
By using one of the templates, you can create a highly engaging visual experience that feels like a webpage, because well, it is a webpage.
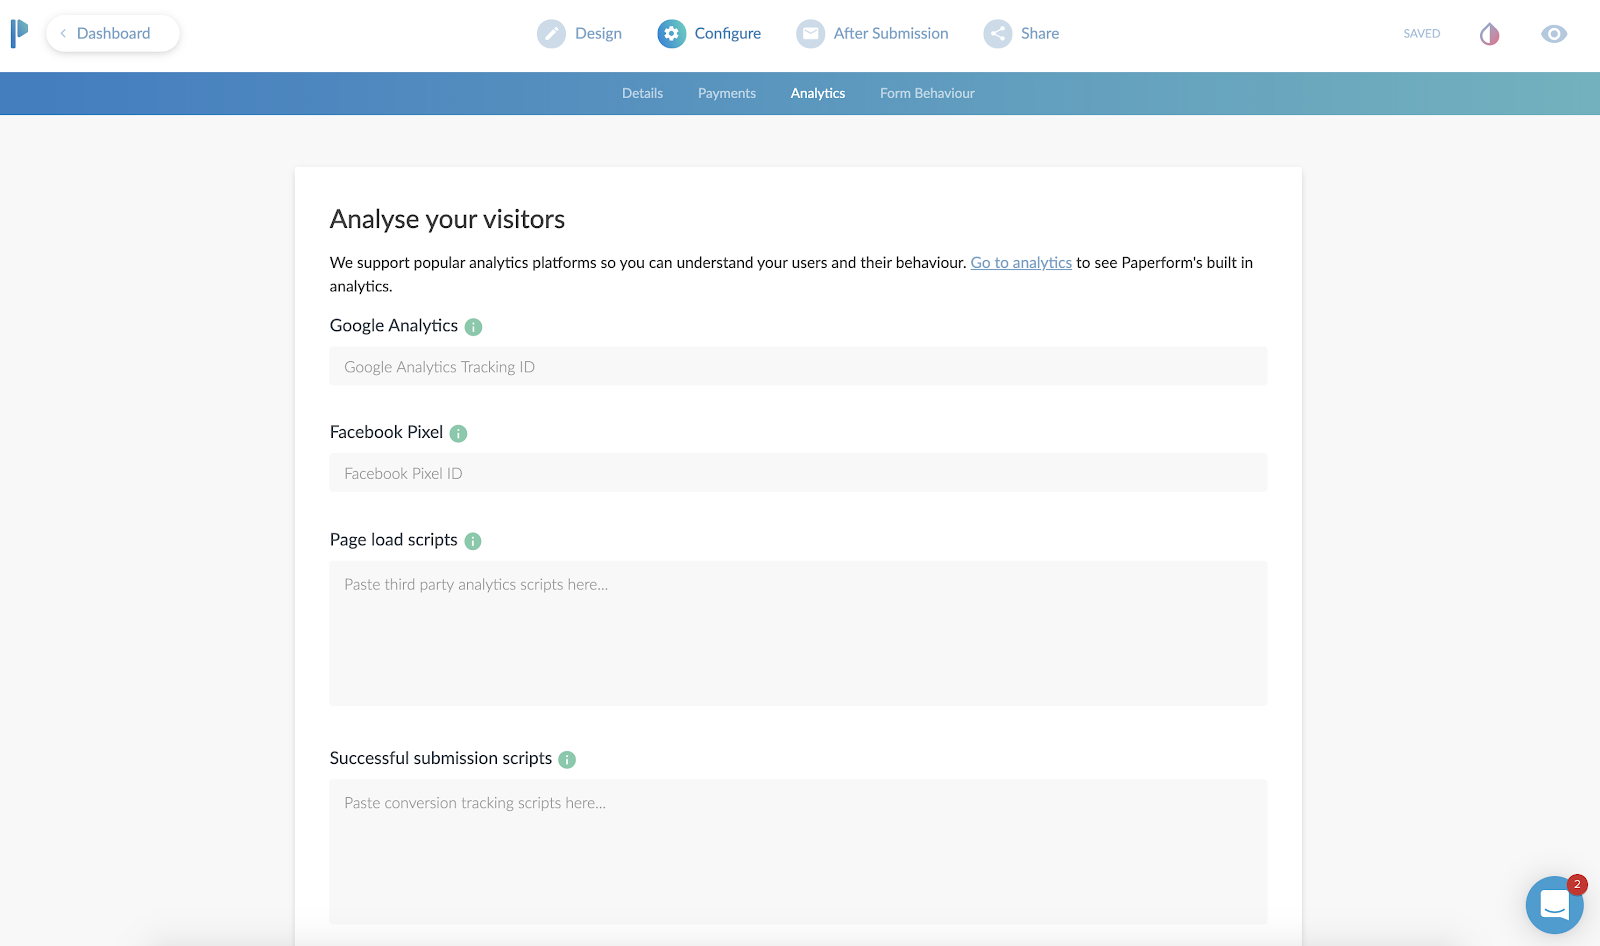
Analytics & Tracking
Going along with the theme here of using Paperform as a mini-webpage, you can actually track the entire form still!
First, you’ll add your Google Analytics ID and Facebook Pixel.
Then, you can add scripts (or tag events) after the form is “submitted”.
Case use: You can send the Facebook or Google event “Lead” after a user completes the form, so you can track the return on investment of an ad.
This is also beneficial to use, even if you are going to embed (integrate) this on your website. Your website might not have the ability to add a tracking pixel to it, or you might not have control of this. By adding the tracking code to Paperform, you can ensure you are tracking the results.
Ok, now here’s the meat and potatoes of how to create a web form using Paperform.
A Step-by-step Guide to Creating a Form
First, you’ll create an account, utilizing their free 14-day trial. You won’t even need to put your credit card in to try it out.
After that, you’re in the dashboard and ready to create your first form.
You’ll just click on the Create Form button in the upper right corner.
Give your form a name, and then choose to either start from scratch or use the built-in templates.
In my case, I chose to start with a blank form. I sort of wanted to see how long and potentially difficult it would be to do this without the option of a template.
I was pleasantly surprised at how easy it was, albeit a few learning curves.
Probably the biggest learning curve for me was that you just sort of start typing. Or you can hover over the tiny icons to the left to indicate what you are adding.
For example, the icons on the left allow you to add a form field (question), an image, a video, or a break point, which splits the form into multiple “pages”.
If you only start typing, you’re basically just putting in text. This is useful to preface what the form is about. I would say this is even more useful if you plan to use the form as a landing page, since you can pretty much put all your sales copy at the top and then build out the form.
If you’re planning on embedding (integrating) this onto your website, you might be able to just skip adding headings and paragraphs here and jump right to adding form fields.
I’ll give a brief overview of the top toolbar area. Currently, you start in “DESIGN” mode. This is where you’ll lay out your form with all of the input fields, headings, images you want to use etc.
There are three additional main tabs at the top after that. CONFIGURE, AFTER SUBMISSION, and SHARE. We’ll dive into each of these.
The Design Tab

We’ve already added an introductory paragraph here. In this above screen play, you can see me clicking on the “questions” icon so I can add my first input field.
In this case, we’re asking for their “Vehicle of Interest”. To add a second field, I just click the “Add Question” at the bottom here. Super easy!
You’ll notice you can change the field type from “text” to a variety of options. You can choose from other common fields such as address or phone. There are some advanced fields you can do like multiple choice, dropdown selection, or a very handy signature input!
The signature input is very handy if you need to have people sign contracts here, or just need a signature for proof of submission as well. From a desktop computer, it was easy to sign by moving my mouse. On a tablet or phone, they can just do it with their finger. Or a stylus if you’re one of those people that carry a stylus around to use on your phone.
Now in this next step, I wanted to add a heading in between the different groups. This might be a little specific case use, but I was creating a longer loan application. I wanted to break up the sections. Another option I could have done was to add a ‘break’. This would make it so after those first two questions were answered, there would be a “next >” type of button.
For the loan application, I opted for to break it up by using headings. However, is this was a lead generation form, I am a huge fan of multi-step forms. It was one of my conversion trends for 2019 that I laid out on YouTube. Multi-step forms are perfect for lead generation because they assist with micro-conversions.
A micro-conversion is someone just only typing in their zip code for instance and clicking next. Once they type in their zip code, they’ve already micro-converted ONCE. Now you just need them to do a few more micro-conversions until they reach the end.
It’s far less intimidating to enter a zip code real quick than to be presented with 7 questions for a lead.
Question is Optional
For some of the questions, I wanted to make them optional to answer.
This was probably the first thing I had to think about for a moment on how to do. I then realized there was a little gear icon next to each field. Clicking that brings up a host of options to consider. One of those being “question is required”.
By default all of the questions are required, but unchecking that box makes the question optional.
Previewing Your Form
At this point, I was feeling pretty good about how my form was shaping up, but I wanted to see it in action.
This was no sweat at all. You just click on the little “eye” icon to preview it for real. You can even enter in the fields and click the different buttons on the page. It was here that I realized I wanted to change the stock blue buttons to match the branding of my client.
The Configure Tab
First up is the URL. If you are NOT planning on embedding this to your website, I’d highly recommend changing the URL. It will make it easy for you or someone else to remember.
From this first configure tab, you can also adjust the title, description, and cover image. This is excellent because if you plan to share the URL directly, those three elements will come up on Facebook when sharing the URL.

When I drop in the URL for this form, you’ll see the cover image I put in comes up as the share image on Facebook, automagically. In addition, the title (bold area) automatically pulls in as well.]
Now, if you are going to take payments here, you can just click on the payments options of the configure tab as well. In this area you’ll also be able to put in your Google Analytics ID and Facebook Pixel ID. This is very helpful again if you are using this as a stand alone landing page to track conversions.
The After Submission Tab
I absolutely love this tab. Here you can configure the email that goes out when someone submits the form completely. It can be just a simple “Hey you have a new lead and here are the details”. Or, you can get a bit fancy and customize the email. This is where you can tell Paperform to attach a PDF copy in the email. Or set the “reply” address as the person who filled out the form, so that you can literally just click “REPLY” and reply directly to the lead from that email.
By the way, we’re almost done here.

The next part of CONFIGURE is your integrations area.
You can send just about any data you collect over to an existing partner integration. Common uses would be sending data to your CRM or email marketing program. If you don’t find an existing integration, no sweat. Just choose Zapier and then configure your zap to go out to any of Zapier’s 1,500 plus apps.
The Share Tab
The share tab is pretty straightforward and easy.
This tab gives you two options. Either a direct share link to copy to your clipboard. Or an Embed option, which offers three ways to embed your form directly to an existing website.
For my client, I chose the inline embed. This places the form natively in the flow of the page it’s on.
The full screen embed is kind of neat. You place it on the page of website you want it to appear on, but instead of squishing in line with your content, it just takes over the page. BUT, it keeps the URL of your website. This is great for SEO and traffic to your site. Instead of sending traffic to a paperform.co URL, you get to send traffic to your own domain, but without having to configure a new page in your website editor.
Lastly is the pop-up option. I really like this actually. This would be a great option if you wanted to place a button on your website that says something like “Click here to subscribe to our newsletter”, and then a little box pops up with an email address field.
This is another type of micro-conversion. If the visitor clicks that button - it was intentional. They are WANTING to sign up for whatever you’re asking them.

Bonus: Theme Settings
This isn’t really a tab, but it is in my opinion, and important part of your form.
Click the little ink drop icon in the upper right and you’re brought to a theme settings area.
Here I was able to change the default blue to my client’s branded color of orange. I also customized the font choices here and as a nice surprise the background choice. The default was a light gray background. However, I was going to place this on their Shopify website, and there was already a background color of that page.
I set the color to NONE. You do this by clicking on the background color, then moving the transparency slider all the way to 0%.
Optionally, you can choose a background image instead of a color.
The Final Product
Here’s how it all looks once placed on the website. It looks and feels like a natural part of the Shopify site, but all pulling from Paperform!
From start to finish, I’d say this form took me about 15 minutes. Now truth be told, it took me longer but I was creating GIF recordings the entire time as well. I’m estimating 15 minutes.
I did go back and create another form for the client, which was limited to 5 questions. It was to request a service appointment.
Now that form, took me about 3 minutes to create I think? Since I already had one form under my belt, this second form was extremely easy and fast to create.
The Best Online Form Maker ?
All in all, I would say Paperform is the most versatile form creator on the web today. It’s easy to use and highly customizable to fit a variety of needs.
Remember – forms today are more than just name, email, phone, and message.
The ability to take payments, use smart logic to navigate the form, accept signatures, route responses to certain emails, and a crazy easy form editor makes Paperform my go to form editor for now on.
*Please note: In exchange for an unbiased review of Paperform, I received free use of the Paperform service. My opinions of the product were in no way influenced by this.

How to Make A Facebook Messenger Chatbot in 2019 – Free Easy Setup
If you want to learn how to set up a chatbot for your website or Facebook page then this video is going to blow your mind.
Today, I'm going to show you how to:
Set up a chatbot for your Facebook page or website without writing a single line of code.
I'm going to show you how to create auto-responses for your chatbot to interact with your audience while you're not even there.
I'm gonna show you how to put this on your website so you can get messages to your Facebook page from your website as well.
Which Facebook Messenger Bot Service Should You Use?
The messenger chatbot service that I use is called Mobile Monkey. And the founder Larry Kim had this to say about chatbots.
People already overwhelmingly prefer messaging for communication, but yet businesses haven't figured this out.
100% Mobile Monkey Facebook Messenger Chatbot
More often than not, I don't want to have to call up a business. I end up either messaging them on Facebook. It's not because I'm antisocial, in fact I'm completely the opposite of an anti-social person.
I just find that messaging oftentimes is much quicker especially when I'm trying to get support from a company that I'm already using. You know most of the time when you call in for phone calls nowadays, it's all automated anyways. So I would much rather get an automated response back from a messenger bot because it's just gonna lead me to the place that I need to get to very likely.
The thing of it is most people aren't using chatbots so this is kind of a really nice way for you to get a competitive edge because people aren't using these chatbots right now so this isn't like a flooded market feature that everyone is using right now.
So I'm gonna keep this video as short as possible so you can just finish up with this and then just get to installing your chatbot right away. But this video is part of a five-part series on web design trends to boost conversions in 2019, and this is part one.
I recently published a highlight of the top five web design trends to boost conversions in 2019. So I'll throw a link up in the cards if you want to be able to check that video out as well. But if you find this kind of content helpful then consider subscribing right now so you can get notified of the other four tips that I'm going to show you in-depth on how to boost your conversions in 2019.
Okay, so let's get into the meat and potatoes. Let's just quickly talk about why chatbots are part of my web design trend.
Why Chatbots Are Part Of My Web Design Trends
First of all, Facebook Messenger messages have an open rate of 80%. Those same messages have a click-through rate of up to 20%. Now, 20% doesn't sound like a whole lot but go ahead and look at the last email campaign that you sent out and look at the click rate of that email campaign.
I thought so.
So 20% is actually a really really good click-through rate when it comes to one-to-one message communication. Plus, when you set up a chatbot properly, it's going to be your best sales and marketing person 24/7.
It's going to deliver the same messages everyone in the same format. And not only that, but it works on both your Facebook page and your website simultaneously and seamless. And lastly, once again, it's currently not being used by everyone, hence, this is why I call this a trend.
If you don't know me. My name is Brad Poirier. I'm the owner of Bear City Impact which is a web design and video marketing business. Now, I'm going to show you exactly how to create this chatbot in just a few seconds.
But before I do that, if you want to pause this video, and in the description box below there's a link that says click this to start a chat, that's going to open up a new messenger chat through my Bear City Impact page and I've created a special chat sequence for this exact YouTube video.
Click this link to try out the test chatbot sequence: https://bit.ly/2JCWCIm
Okay, so we are now over at the computer and I'm gonna jump in and I'm gonna show you how to create a chatbot for your website and your Facebook page. Let's jump in.
So we are on the Mobile Monkey web page. So if you need it's just mobilemonkey.com. So we're just gonna click login. You'll notice basically there isn't like a get started kind of thing. The app itself is free. They do have paid plans.
When I click login, it's actually asking me to sign in with Facebook. So there isn't an option to like sign in with an email or something, it's basically just sign in with Facebook so that's all you got to do. So we're gonna click sign in with Facebook. That's just gonna take my account. In here I already have the chatbot set up, okay. So this chatbot basically already set up here.
The first thing actually I want to show you is how to install this on your website because it's super super easy. Once we get that out of the way then I can show you how to create the bot and you can create multiple sequences for your bot depending on what you're trying to do. So to do that we're actually going to click on lead magnet and over here it says customer chat widgets, okay. And basically what that will do, I already have one set up here but to create one is super-easy and so basically we’re gonna do add customer chat widget. We're gonna give this a name. We're going to call this website chatbot, okay. The dialogue is one of the dialogues that you've already set up. So I've already set these things up here and so I'm gonna do the welcome dialog, okay. So basically when they click this button here on my website, I want them to go to the welcome dialog which is sort of just like the sequence that I want to put them into. And then you can also change the color of it. Then from there you just need to copy this code and then add it to the header of your website. So depending on what website you have, it's gonna be different for every kind of website. I'm not gonna get into it.
I do mine through Google tag manager. Google tag manager is super easy. Basically I just go to tags and from here I just add a new tag. If you don't use tag manager now, I highly recommend it. Much easier to add these little plugins to your website. So I'm just gonna call this one Mobile Monkey chatbot and in the tag configuration I click custom HTML and I add my script there. And then on the triggering I'm going to do all pages. It's the way it comes up on every page and then that’s basically it. So once you click submit then from there it's going to automatically activate that and again it's gonna look something like this on my particular website. So in yours it's gonna a little different. And so here you'll see the little chat button again here so this basically opens up a chatbot.
So now we have installed the chat widget to your website so now we're gonna show you how to build a bot. And I'm gonna build this bot for this particular YouTube tutorial that we just basically talked about in the very beginning. So again if you haven't interacted with it yet and you want to try it out, click the link in the description that says click here to start a chat and you'll see basically what happens. You'll basically see what we’re… Basically what we're building right now is what's gonna go to that little click here to start a chat so you can kind of see what happens in the future of this video which is now. [Phew] Mind blown, told you.
Okay, so the first thing we need to do is basically build a new dialogue for the YouTube bot that I'm creating right now. So we're going to do is click on the bot builder from the home page wherein click on dialogs. And basically we're going to click on add a new dialog and we're gonna call this one YouTube video. I'm going to create this dialog. And basically the first thing we want to do, so you’re kind of like it's almost like building out a web page but just kind of like step by step so you're building out a series of text here. So let's go ahead and just throw in perhaps an image to start with. I'm just going to grab an image. I'm going to speed this up real quick. Okay, my dial-up internet is finally working so I have the image uploaded now. So then we're gonna add another little widget here. So basically this will happen, this is the first thing that someone will see. Just click add a widget and we're going to say I want a little text piece here actually so we're gonna put a little typing box. So this kind of simulates the fact that someone is typing right now and then we're going to put in some text and we're gonna say hi, first name, and then we're gonna add another little typing piece. We're gonna add another widget. We're gonna add this texture that says, “Thanks for watching my YouTube video. If you'd like more helpful content like this, please tap the subscribe button below.” And we're gonna add a little button here and we're actually gonna click.
So there's a couple things here. So if I can click a dialog and basically this button will take them to another dialog so this is kind of how you can funnel them into different parts but right now I'm going to keep it super simple. I'm going to just click a URL and basically that URL is going to be my subscription link so when they click this or when you click this, it'll subscribe you. So I'm going to click this add button. I need to enter a button name, duh. Subscribe on YouTube. Okay, now we're gonna click this add button. Okay, so that's basically it there. So this is all that it's going to do. I mean this is like a very very basic bot. But from here… That's pretty much it. So I'm just gonna go back here we can see that this is all done here. I'm gonna copy this link so I can test this dialog by clicking the test dialog and then opening in messenger. And now when I do this, you'll see here you this is the sequence here. So it's basically has through that picture in there and then it says hi Brad so that's obviously that's me that's logged in here. And then here's the thanks for watching my YouTube video. If you'd like more helpful content, please tap subscribe button below. Subscribe on YouTube. And when I do that [Pop], it opens up the YouTube sub confirmation. Are you sure you want to subscribe to Brad Poirier Bear City Impact? That's basically it, so that's like super super simple.
Now even a little bit simple, you can basically take this now and you can do this for a lot of other things so this could be from your YouTube. So perhaps if you have a video on YouTube, you can use this to send them to a content upgrade that you want them to download but you're doing this all from messenger, right. So they're already logged in. You don't need to grab their name and email, all kind of stuff. You basically already have their contact information from Facebook's database and then you can simply say if you want this you know content upgrade just confirm your email here. So it's gonna assume their email which is the one they're logged in from or they can change it up and then you can give them the content upgrade link right from within your Facebook Messenger. So it's super super easy.
So this is a very very basic kind of bot but that's basically the bottom building from Mobile Monkey. I mean it's literally just a few minutes and you can pretty much get yourself going here and really what you can do is this just limited to the ideas that you have. So again that's basically that's how you create a chatbot for your website or Facebook page it's, pretty easy.
Okay, wasn't that super helpful? So if that was helpful maybe perhaps hit that little thumbs up button, that would be great. I'm really interested to see the chatbots that you create so go ahead and drop a comment with what your Facebook page name is and I'll go ahead and visit it in a few days and I'll go ahead and check out the chatbot that you've created. And now remember this is part one of a five part series that's going to show you how to boost your web design conversions in 2019. So be sure to subscribe and hit the bell button so that way you can get notified when I show the other parts to these web design conversion trends. And throughout the week I'll be posting some additional content on these web design conversion trends on my Instagram. So be sure to visit @bradpaulp for more tips. But that's it for now. I will see you on part two.

Why I'm Switching To Later For My Social Media Platform
TL:DR; 1) Excellent media manager, 2) quick schedule a week's worth of posts, 3) hashtag suggestions, 4) and link in bio management
TL:DR;
1) Excellent media manager, 2) quick schedule a week's worth of posts, 3) hashtag suggestions, 4) and link in bio management
If someone was to ask you: "Hey, have you ever tried using a social media app to manage your social accounts?" - Likely you'll respond with something like Hootsuite. In fact, I've recommended Hootsuite to many SMB's over the years. I've also recommended Buffer as an alternative. Now, those are two in a sea of 100's of apps that can help manage your social media accounts.
In fact, I have been using Buffer for quite some time now to manage my two business profiles, and several client pages. There's a lot that I like about Buffer, and it's super simple to use. A somewhat unique feature they have is a content inbox. You add a few RSS feeds to an inbox and you can quickly schedule content from those sources.
Their pricing is reasonable also. Depending on how many accounts you'll need and how many team members, you'll pay anywhere from $0 to $15 if you're just one person managing one business. After that, their next tiered plan goes to $99.
After a while of using Buffer though, it's time to say goodbye to them. It's time to say hello to Later, well, again. I actually used Later for a brief month, and just about considered switching to them a few months ago.
At the time, I was stuck on a few components that were missing in their tool set. So, those components are still missing, but I've come to realize that I can live without them and if they get added in the future, that'll be great too.
Here's the reasons I'm switching to Later.com for all of my social media management. There are some points of criticism I have though, that I explain in the end. You'll also see what I believe those missing components are, in case those are deal breakers for you.
An obsessive compulsive media library
"Did I post this picture yet?"
"When did I last post this picture?"
Those are two questions you can easily answer using Later's built-in media library, and more.
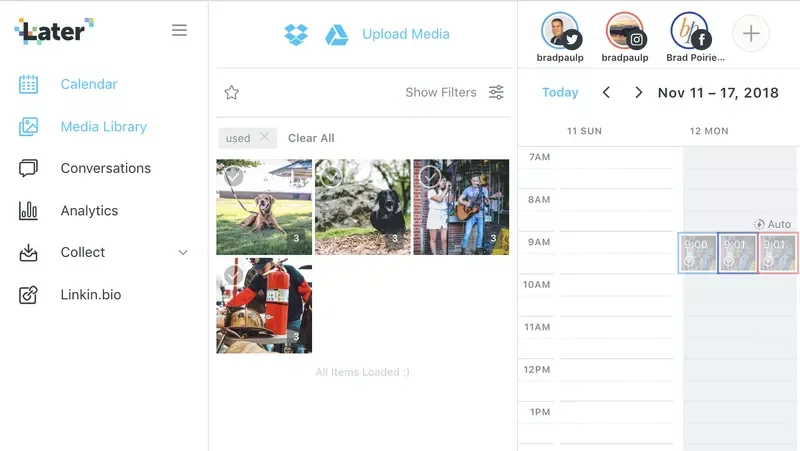
The first thing you'll want to do is add a bunch of images and videos to your media library. You can do this easily with a bulk upload of images via drag and drop. Literally, just select a bunch of images on your computer and throw it onto the media library – it adds it to the library for you and as a bonus, preselects all of them for tagging.
Which brings me to my next media library feature: tagging. With your photos selected, you can tag the photos for easy reference.
For instance, I've done a lot of dog photography in my side hustle. Here I can upload photos from a session, and tag them as "dog" and then the name of the dog. Now I can quickly find photos to schedule out for just that one portfolio. By default, the "unused" tag is filtered. So this way, Later will only show me photos I have not used in a post yet. You can easily change that filtered to "used" or "all media" so you can see everything.
There is also a native dropbox and google drive integration. If you often store your finished photos or use those services to store media – you can just upload directly from those cloud services.
A hidden gem for this media library is external collaboration. If you have someone that takes photos for you, but is not on your team, or you just don't want them having access to your later.com account, you can invite them as a media collaborator. This feature works awesome and flawlessly.
You'll set up your custom inbound email @submit.media. For example, let's say your business is Tony's Tacos. You just put in something like: tonys tacos in front of the @submit.media area. Now, you can just have yourself or anyone else email photos to tonystacos@submit.media – and poof! your photos will be ready in your media library for use! You can, of course turn on approval required before it ever makes it to the media library. No photos will get posted anyway until you schedule them.
Quickly schedule your social media posts
There's several ways you can go about quickly scheduling your social media posts with Later. I think it comes to what workflow you are comfortable with AND if you're focusing on certain social networks or not.
The first thing you want to do with your social calendar is set up what days and times you want to post on. You'll do this for each network, just once. Once you have created this weekly schedule, you can take a bunch of photos from your media library (wink) and drag it to the calendar. Later will then create a scheduled post for each content. You can go into each of them and just add your captions, and hashtags and links.
Scheduling to multiple social networks
Quick scheduling works with just one social network at a time. If, however, you want to schedule one post to multiple social networks at once, you'll want to use the multi-post scheduling feature.
Here you'll select the social channels you want to publish to, drag a photo onto the calendar, and then put your caption in.
When you click NEXT, you will actually be able to customize each network. So basically you have one 'master' caption for that post and then you tweak it per channel. For instance, you'll be required to trim it down for Twitter if it's beyond the 320 character limit. For Instagram, you'll want to remove any links you've placed and put that in the LinkIn.bio section – more on that Later! (all puns intended)
Then just watch and wait. Your perfectly captioned post will appear on all the networks you selected at the time you've scheduled it. Voila.
Auto-post to Instagram
Recently, Instagram opened up its API to allow direct posting without the need for using the mobile app. This is only for single photos though. If you're schedule multiple photos or videos to Instagram - Later has a workaround for that.
Let's say you schedule a video post for Tuesday at 10am. When that time comes, you'll get a notification to your phone from the official Later app. You'll confirm that you're in the right Instagram account, and then it will open Instagram for you with the caption already copied to your phone's clipboard. From there you'll just select the different photos or the video from your camera roll.
BOOM!
4 Bonus Gems For Creating The Perfect Post
You might have noticed in the above screenshots something called "Saved captions" and "Hashtag suggestions".
This is your life-saver, eh hem, time saver.
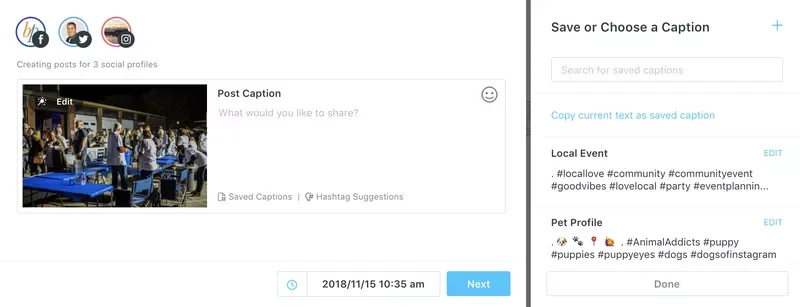
Saved Captions
With saved captions, you can select from several predefined captions. I personally use them for saving my hashtags.
Yaaaaaas, that means no more having to switch to Evernote to copy/paste hashtags there. I just click on the one I want and it adds it to my post :)
Hashtag Suggestions
Well, "Hey Brad, how do you even know what hashtags to use?"
I'm glad you asked. Later has a built in hashtag suggestion box. You put in the hashtag you want to start with, and it will spit back several comparable hashtags. Complete with a relevancy to your original hashtag, and also how many times it's been used, so you can see its popularity.
Tag users directly
Many other platforms do not let you tag other users outside of the Instagram app. This is also in part due to recent API restrictions, most of which came from the Cambridge Analytica scandal.
Later has a feature that allows you to tag users in the photo. Technically, if you also put their handle in the caption exactly as is, it will tag them in the actual post. It just won't show you that you've put the correct handle in during the caption.
Seek And Share
Sometimes you come across content that you really love and want to share it also. You know what I'm talking about – the HOME BUTTON + SIDE POWER BUTTON to activate a screenshot, or using a re-share app.
With Later, you can search for hashtags that you want to find content for, and then you can import the photo or video directly into your media library to reshare. Just, it's a good idea to tag that original account when you DO share the content, to avoid copyright infringement. 😳
Use your one link wisely
This is an Instagram specific feature, but it's worth its weight in gold. Instagram only gives you ONE clickable link in your entire bio area.
Just a quick break down of how your bio even works:
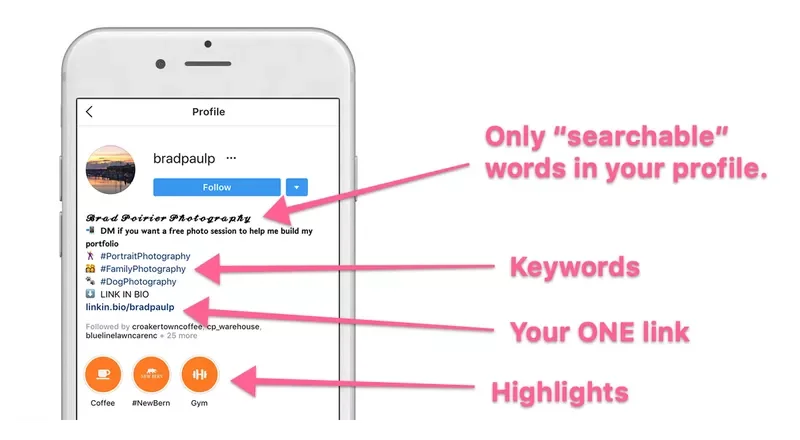
Your NAME can be anything, completely different from your username – and it should be. The name is the only searchable text from Instagram, use this like the page title in your website SEO.
The bio description area has a maximum set of characters - I recommend using this as a "keyword" area. Your profile can potentially come up when people are discovering hashtags.
At the bottom, you have your highlights, if you've enabled them for Stories.
Right above that though, is your ONE link Instagram gives you to place in your bio. In case you didn't know why this is so important – any link you place in the caption of your post, is NOT clickable. So, please stop placing links there, no one can click them. No one is going to type that 💩out into their browser – from their phone nonetheless.
So, what Later has done is something magical. They use a feature they built in-house called Linkin.bio to handle multiple links.
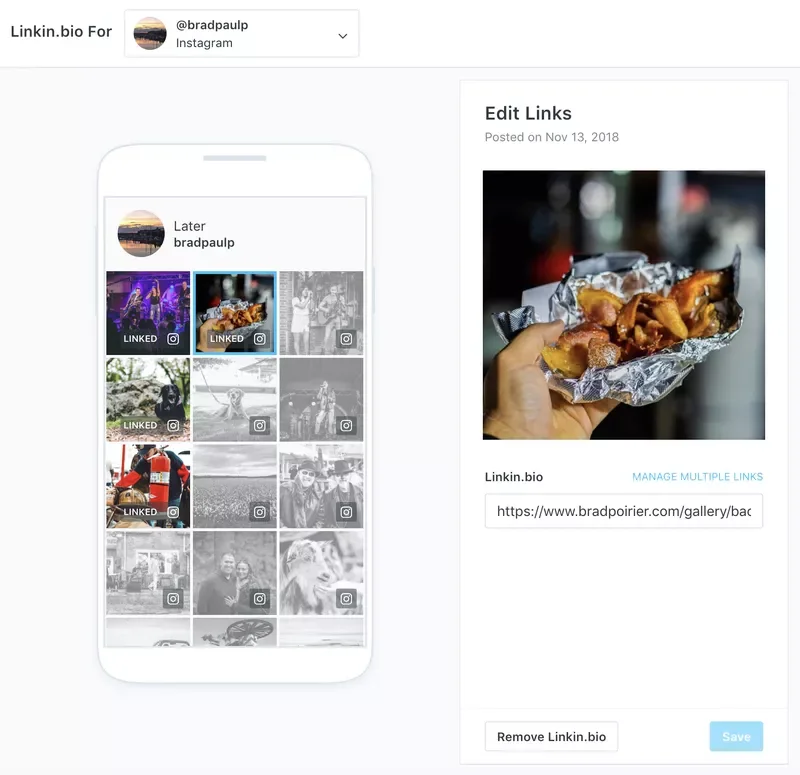
Basically any links you want people to get to on Instagram, you add them to your linkin.bio. You do this easily by simply pasting the link into the box provided during your Instagram caption.
You then replace your current website link in your bio, with the one Later provides you. From there, Later handles the rest. When someone clicks on your special link, they'll be taken to a page which has all of the photos you've tagged for links. Now your visitors can just tap the picture and go to your intended link.
Perfecto' !
Analytics that give you actionable data
I'm pretty certain that most dashboards that have some sort of analytics to them were built by data junkies, for data junkies.
There's just toooo much data to comb through usually.
Not with Later.
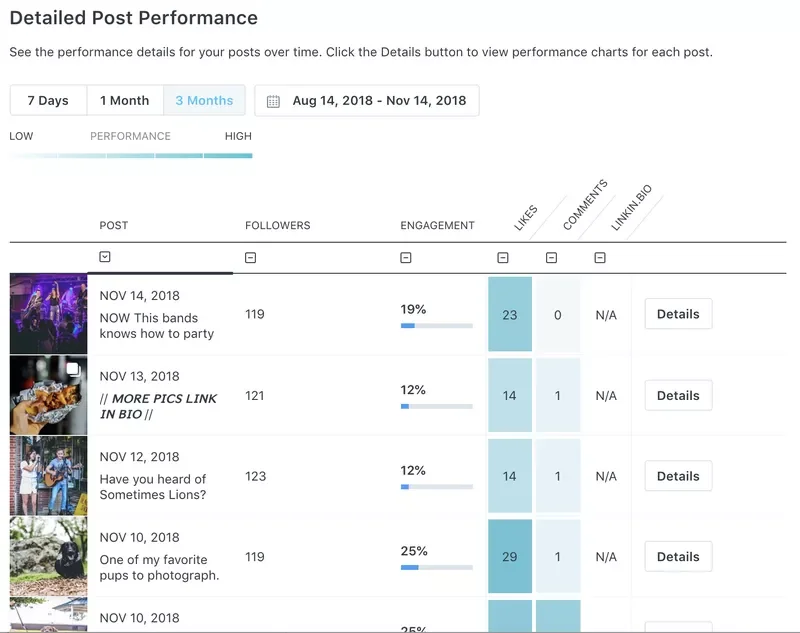
The analytics dashboard, which is currently limited to Instagram and Pinterest only, gives you a quick but powerful overview of your social media performance.
The follower count shows you how many followers you had at the time of that post being published. The engagement column shows your overall engagement percentage – which is a calculation of the likes, comments, and linkin.bio clicks divided by your follower count at that time.
Finally, you can see how many likes, commments, and clicks each post received. You can also sort by any of these columns.
Perhaps you want to create more content that generates more comments.
Just filter by the comments column, and you'll see your top performing posts that generated the most conversations. Then, you can start creating more content like that!
What's the best time to post?
This is another Instagram specific feature, but it's powerful!
Most other social media scheduling platforms will give you a recommended posting time. They might set up a queue based on known industry best times to post. However, that's really not personalizing it to YOUR feed.
Later will look at your historical posts, even the ones that weren't posted by Later, and determine the best times to post in the future based on engagement rates.
You can then use these "best times" to create your quick schedule calendar mentioned earlier.
Manage engagement right from the dashboard
Comments on your insta feed are one of the biggest factors Instagram uses when sorting your posts out in their algorithm. It's not enough to get comments though – you want to engage with them as well. This is both useful to create a community around your product, but also to keep the conversation, eh hem, engagement going.
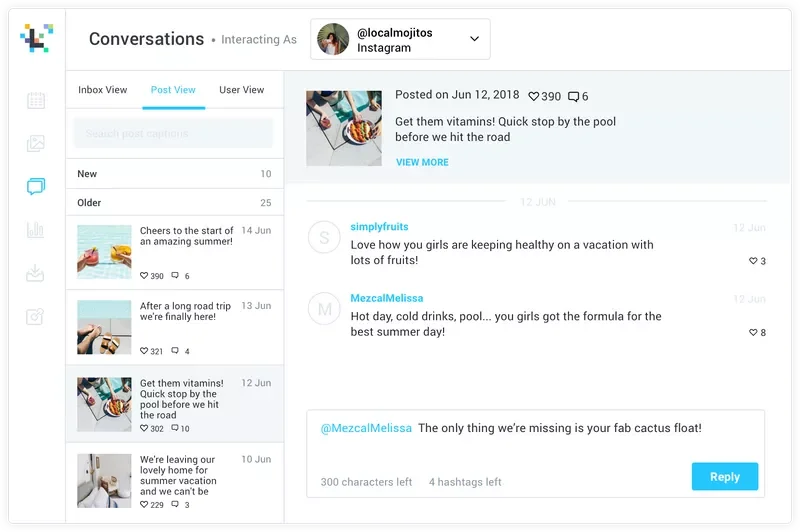
via later.com
With Later you can:
Manage Instagram conversations from within your dashboard
Respond to comments on recent posts
Like comments (heart)
Delete comments
This last one is particularly useful, especially when you get the robo-dummy comments inviting your followers to like their page.
They still need to work on a few things though
I think Later is one of the best social media management platforms out there, contending with the likes of Hootsuite, and my former pal, Buffer.
However, they're not perfect. These are a few pain points I've run into, but these may not be a big deal to you. It's worth noting however.
This first feedback is a small one, but could make life a bit easier. If posting to something like Twitter or Facebook only, it would be great to create a post with no image, and then have an image pulled in from the URL. Basically, right now the only way to create any new post is to add some sort of media to it – photo(s) or video.
I get it.
Sometimes though, I'd like to schedule sharing of content from another source, and I really don't want to have to try and get images from that site first. (Though, for what it's worth, they do have a handy Chrome extension that lets you right click any image on the web and add it to your media library)
The second feedback is to include analytics for Twitter and Facebook. Their support team has told me they are looking to integrate Facebook analytics in the future. I'm keeping my eyes peeled :).
Thirdly, they yet to have implemented anything beside Instagram, Facebook, Twitter, and Pinterest. LinkedIn is NOT present in their social networks. It's not a deal breaker for me, but it would be convenient to have as an option.
Last feedback, and this might be the most important. Transparently, they're kind of slow when it comes to responding to support requests. Their chat box indicates they usually respond in 24 hours. That's true. Perhaps I find this frustrating because there IS a live chat box inside the dashboard. I don't think you should have chat widgets on any part of your site unless it is monitored for at least some part of the day.
That's really it though. Those really aren't huge flags for me, so I'm giving them a real go at their platform.
What social media management tool are you using currently? If you're looking for other tools, I have a roundup of the 17+ best free social media tools you can use in your business right n
Increase Your Website Conversion With Easy Opt In Forms
What if I told you that only a few percent of your website visitors will hit that “contact” now button. Then, what if I told you there was a way to automate the growth of your email list - for free. No, I’m not kidding around.
What if I told you that only a few percent of your website visitors will hit that “contact” now button.
Then, what if I told you there was a way to automate the growth of your email list - for free.
No, I’m not kidding around.
Convertful is a website tool used to acquire more leads using smart behavioral-based sign up forms. The problem with most email tools are that they send the same offer to everyone. Convertful kind of knows your website visitors better than your visitors knows your visitors.
Imagine your website is a local shop for a moment. Here’s how most websites work for a first-time visitor, playing the role of a local business here:
I open the door to your shop and I’m immediately greeted by an enthusiastic employee saying “How can I help you”.
I say “No thanks”, and I continue walking into the store.
Then, a few steps later, another enthusiastic employee comes over and hands me a coupon for 10% if I give them my email address.
Again I say “No thanks” and move on.
Two steps later, a third employee walks over to me and says “Here is our store security policy about how we monitor your shopping”.
All they ask for is a simple acknowledgement that they told me they are monitoring the store for security purposes.
Now, let’s take this one step further. I’m about to leave but I see another person walking in. This person has shopped here before - but guess what - they get the same speel by those three employees.
This is basically how some websites are creating a distracting user experience - for everyone. Local business owners who want to get an edge over their competition have been lured into using these strategies and their websites have turned into some sort of a casino.
What’s the problem here? In the example of the local business, there’s two problems here:
They are giving the same offers to everyone, regardless of their shopping behavior
They are overloading the visitor with too many offers at the wrong times
How To Fix Your Website Conversion With Convertful
In this article you are going to learn how to:
Setup and install Convertful on ANY website
Create your first Email Opt-in widget
Show your opt-in widget to targeted visitors
Send your opt-in subscribers to your email service
1. Setup and install Convertful on any website
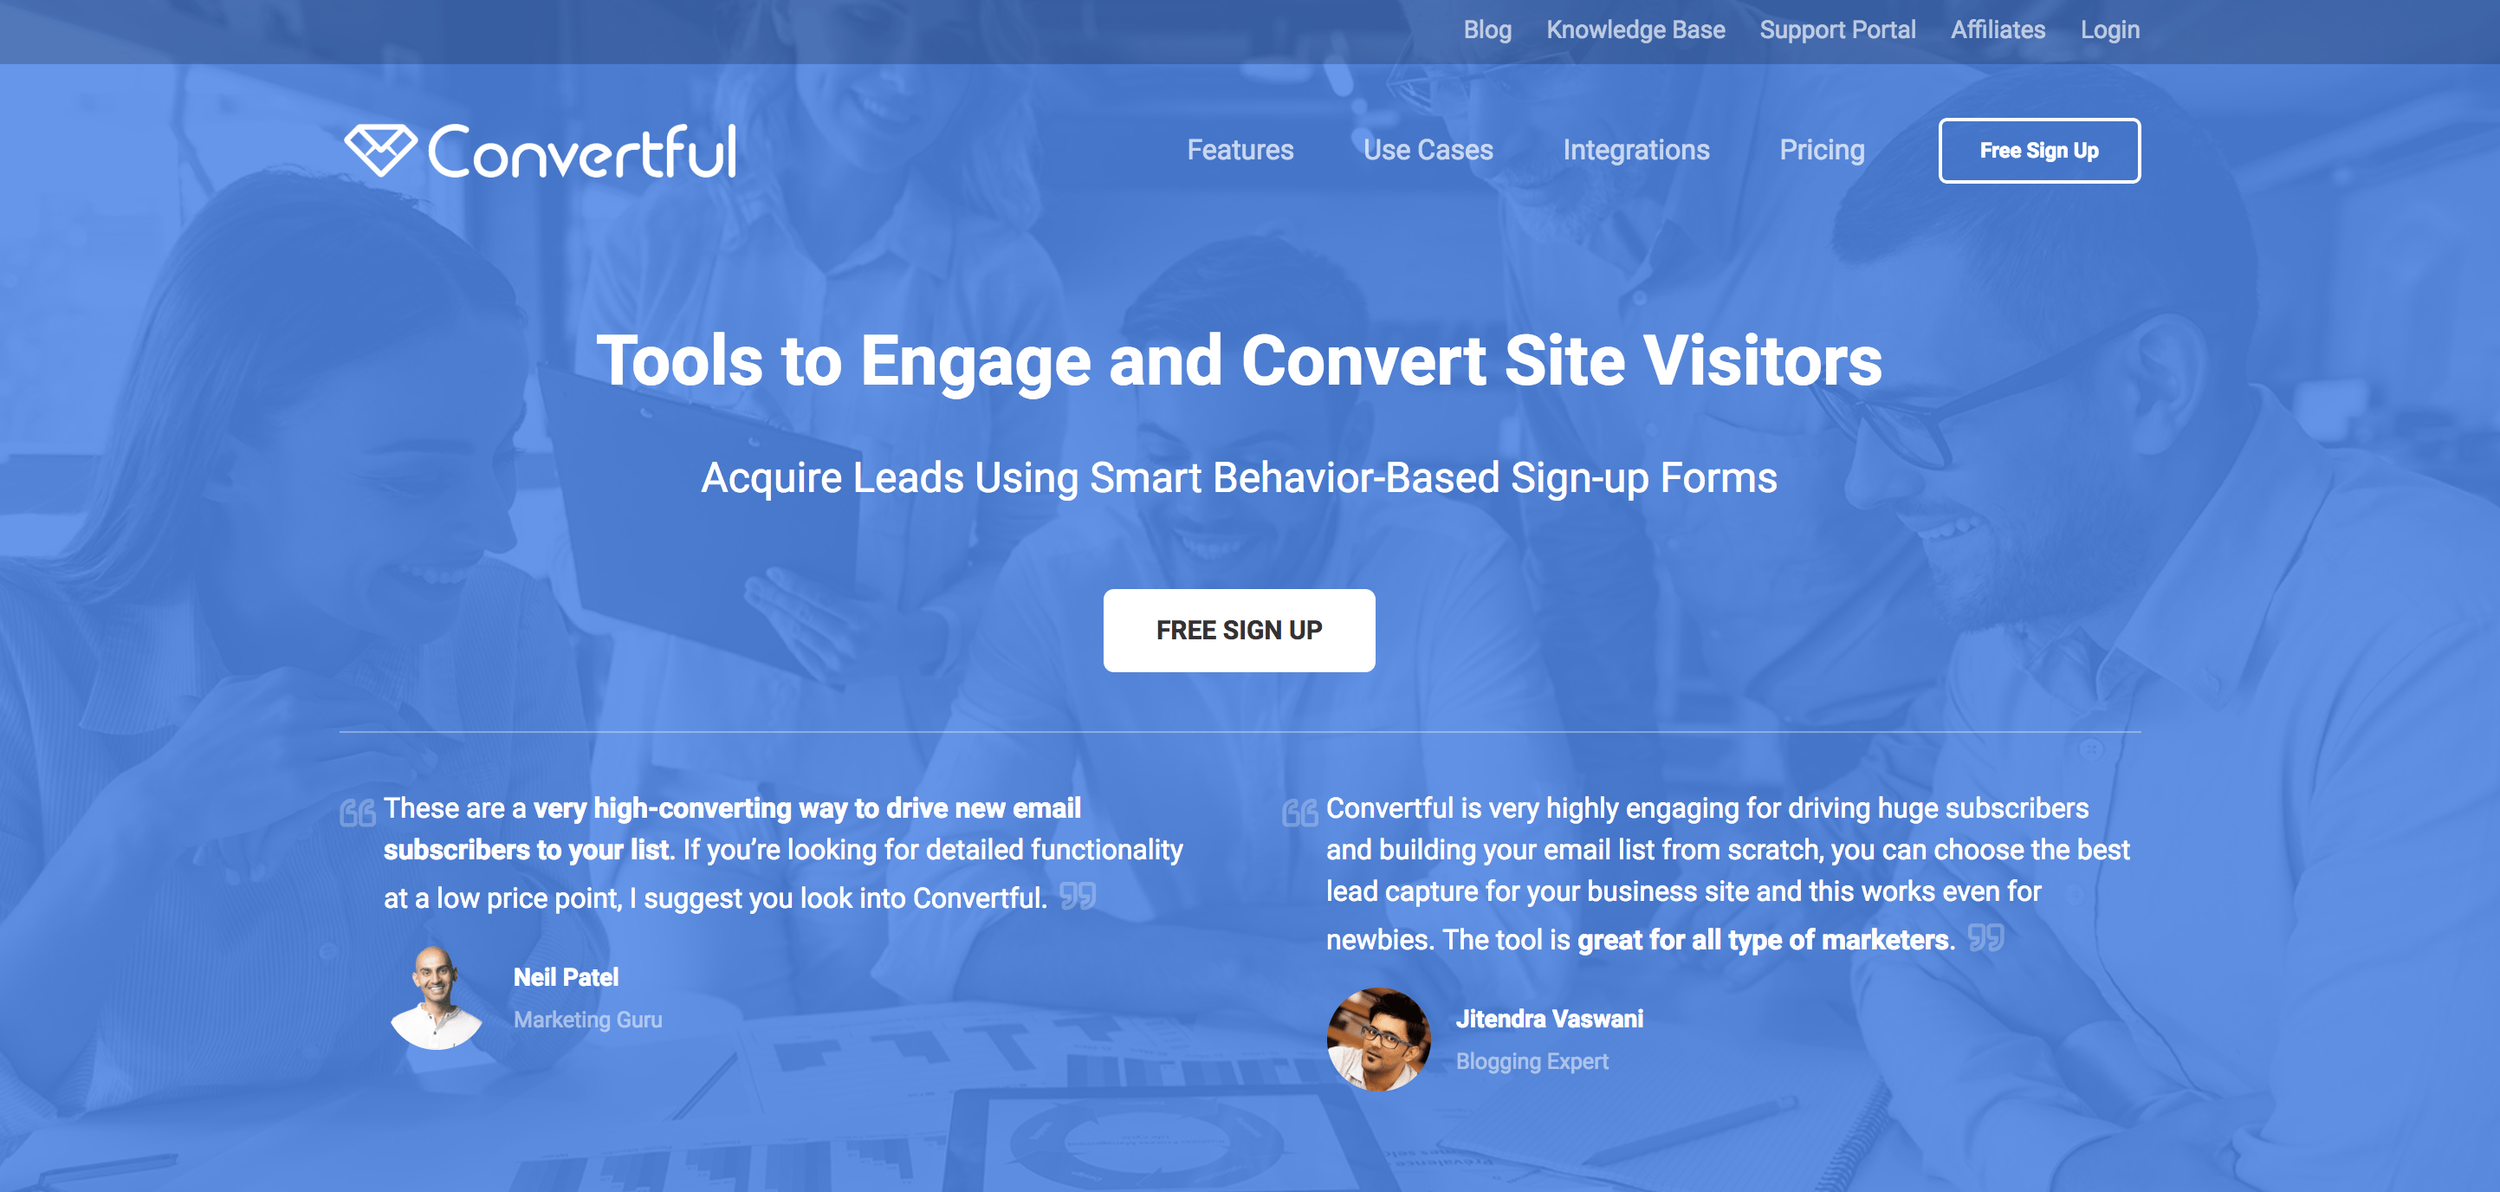
ConvertfulImage source:
Getting Convertful on your website couldn’t be easier. Seriously.
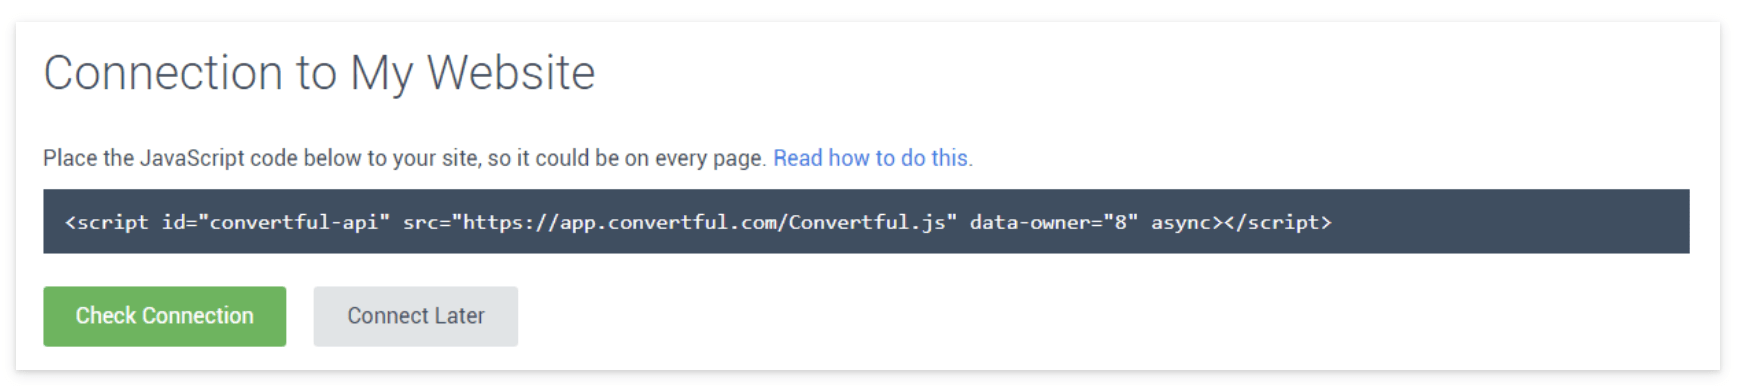
Create your free account, enter the website address you want to place it on, and then you will get a code to place on your website. Each website will be a bit different, but you’ll want to add this to the </head> section of your website, so refer to your website’s help docs on where to place custom code.
If you’re using Wordpress, it’s even easier. After you create your free account, you just install the Wordpress plugin.
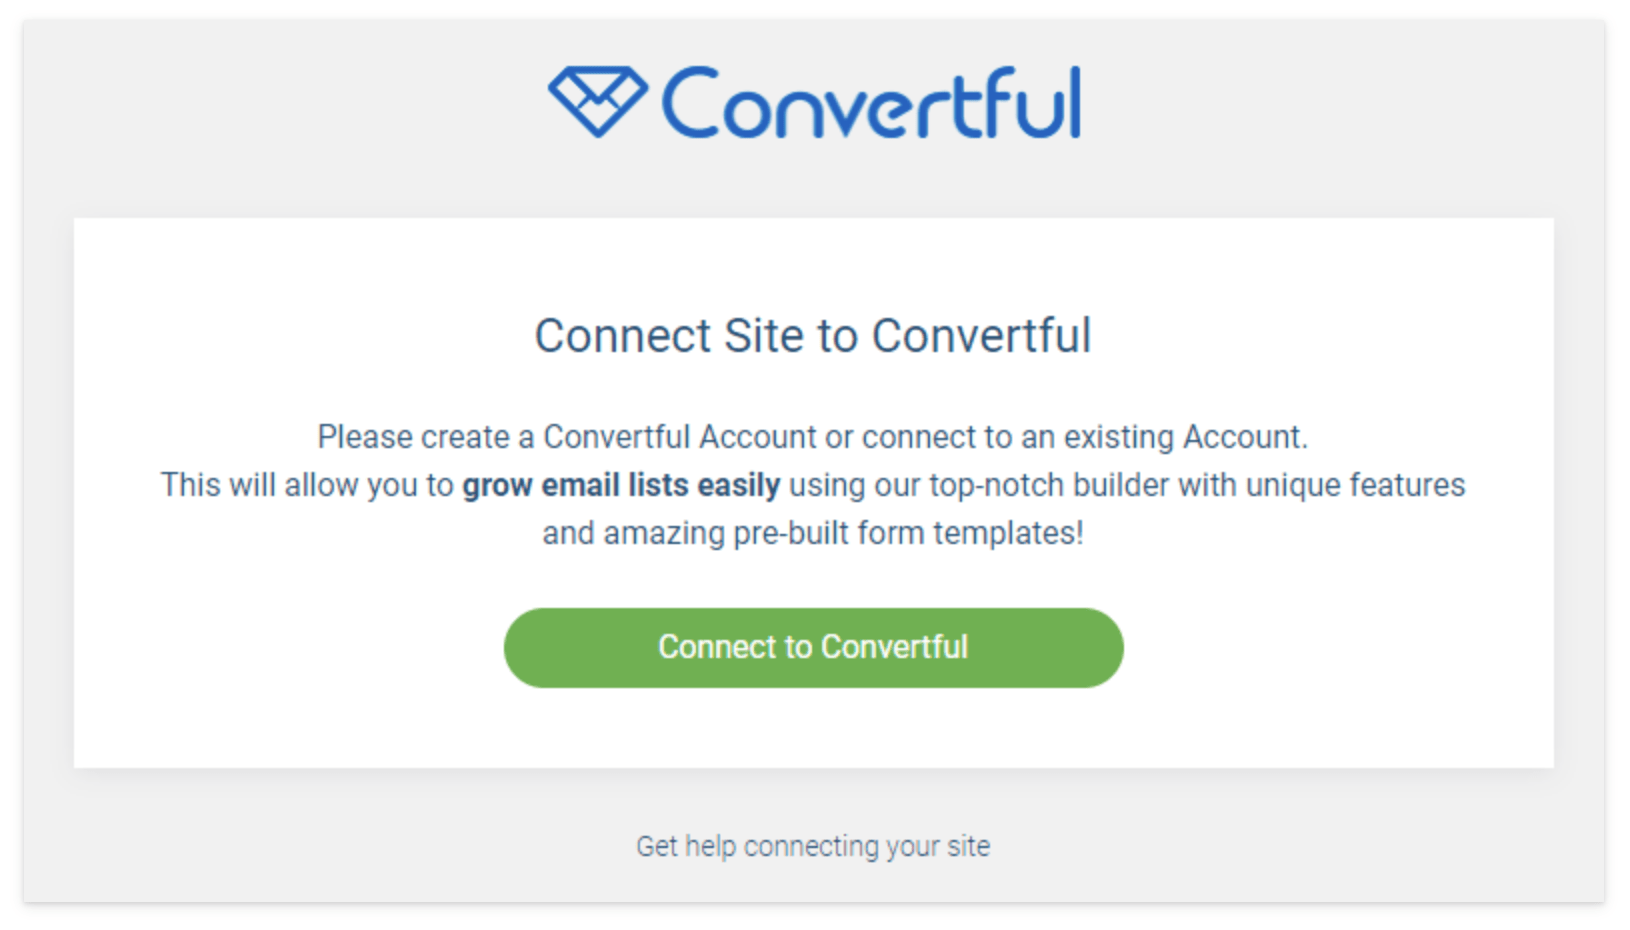
When you click the “Connect to Convertful” button it will open a window logging you into your Wordpress site for authentication.
That’s it, in both instances, you have now completed the step to installing Convertful to your website.
2. Create your first email opt-in widget
The whole point of Convertful is grow your email list. By using a combination of the right offer at the right time, you can grow a (loyal) email list, turning visitors into customers.
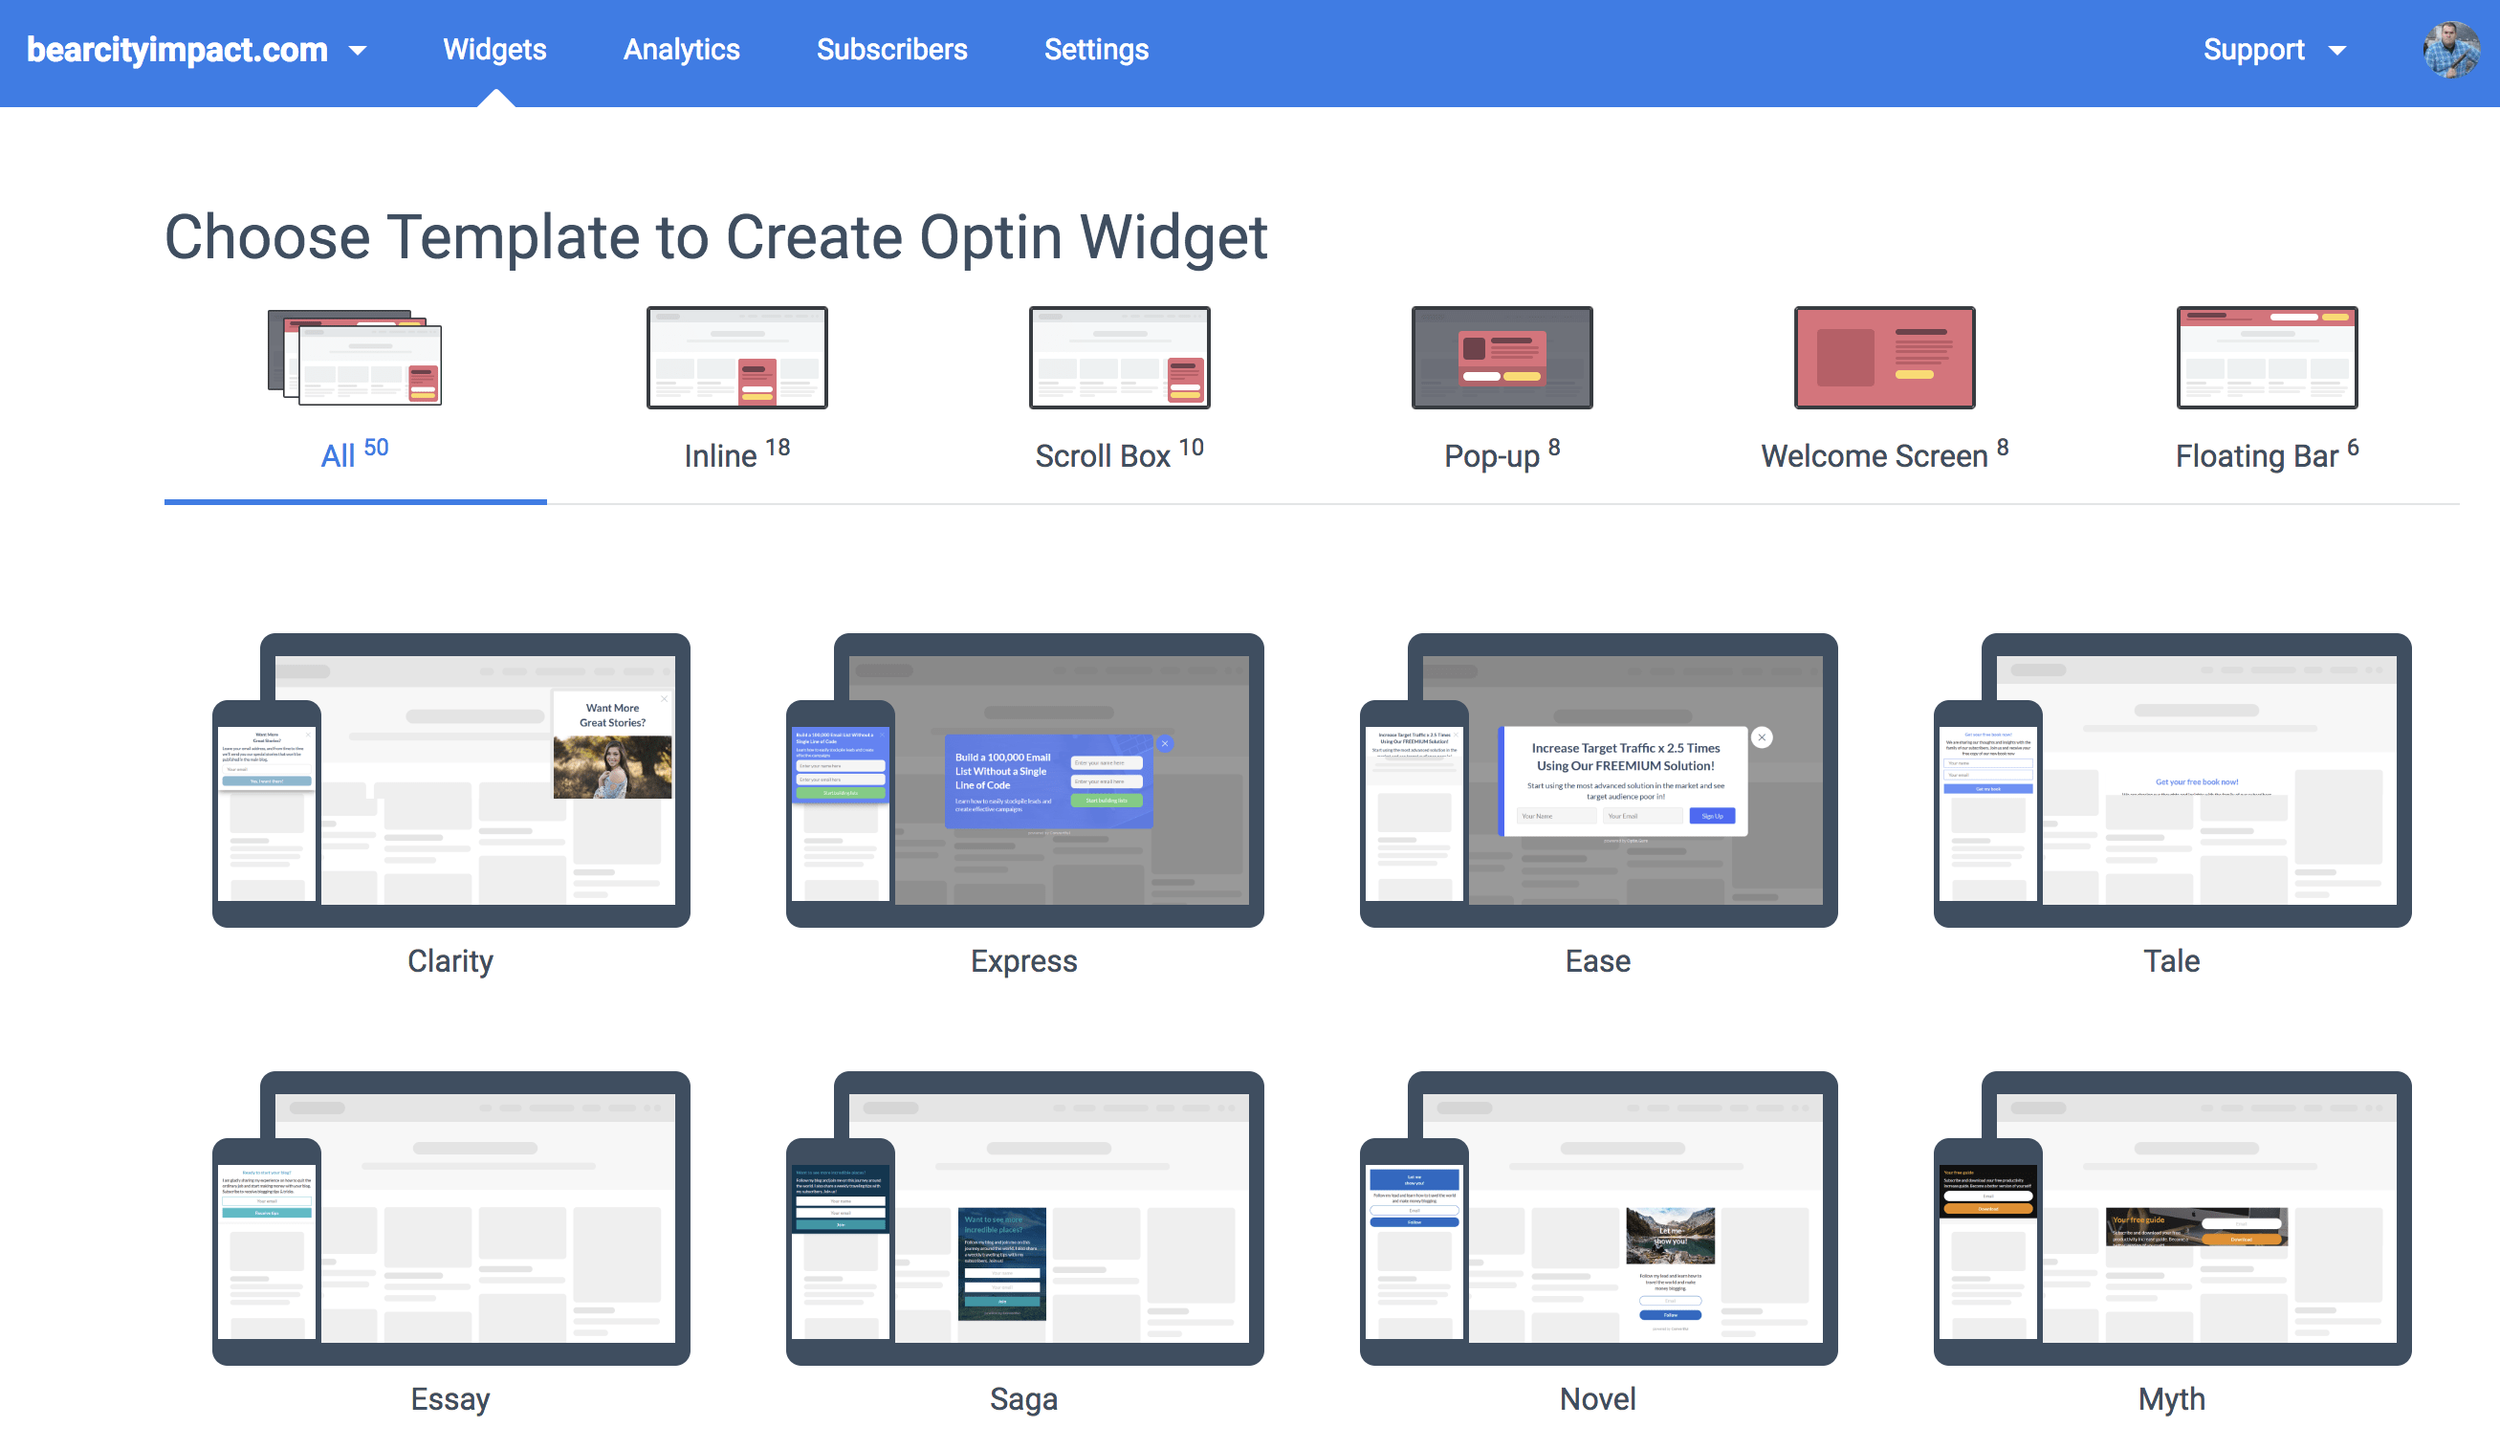
Click on WIDGETS in the blue bar at the top
Click the green button that says “Create” widget
Choose your template as shown above
Currently there are 50 different templates across 5 different opt-in styles to choose from. Each of the styles can be used for capturing email addresses, but they each have their best case use.
1. Inline Widget
This will be place in line with the rest of your content, in a static position so to speak. When using this widget, it will always show, because you are manually injecting it into your desired content area. It’s best to use this in a sidebar of your blog, or as a strip below some content.
ConvertfulImage source:
ConvertfulImage source:
2. Scroll Box
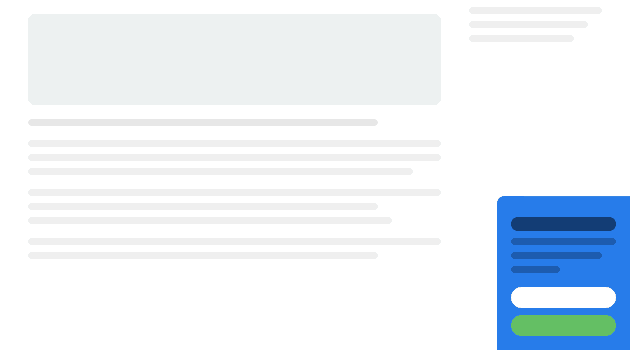
When using the scroll box, you’ll be able to control to whom and how this appears. Slide in from the bottom right is the default, but you can choose the position and the type of animation. Use this for any type of subscriber opt-in, from content upgrades, to growing your social audience, to offering discounts to first time visitors.
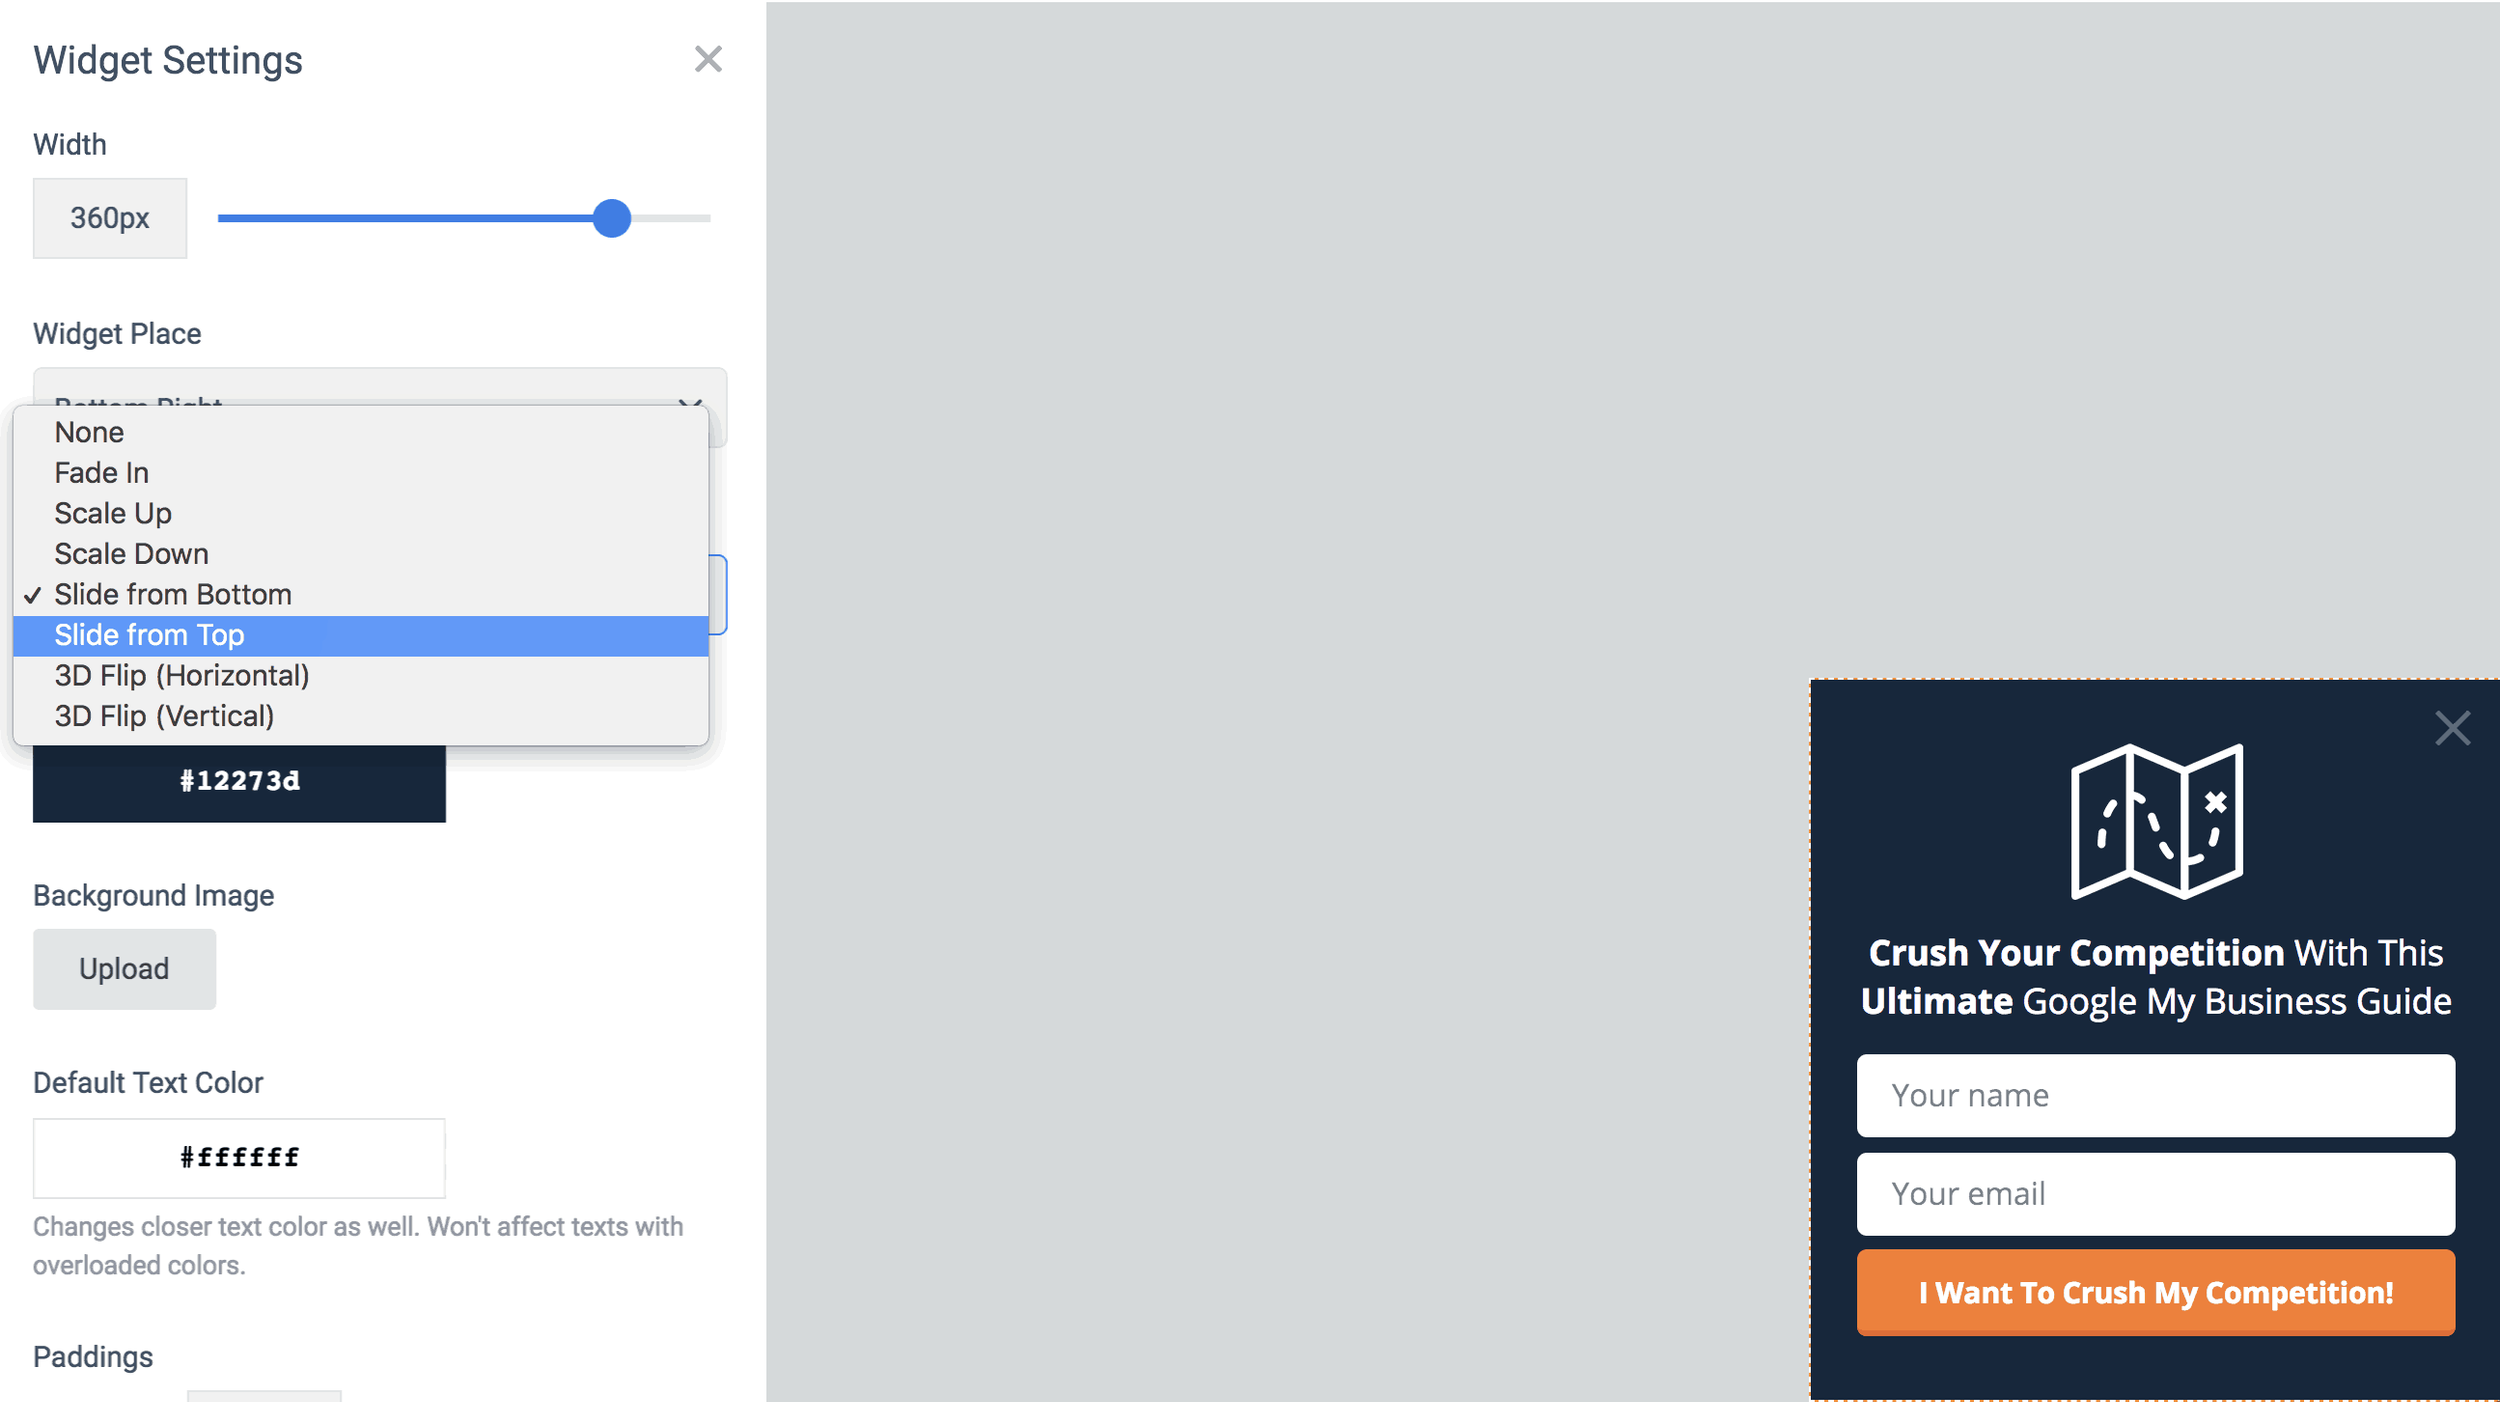
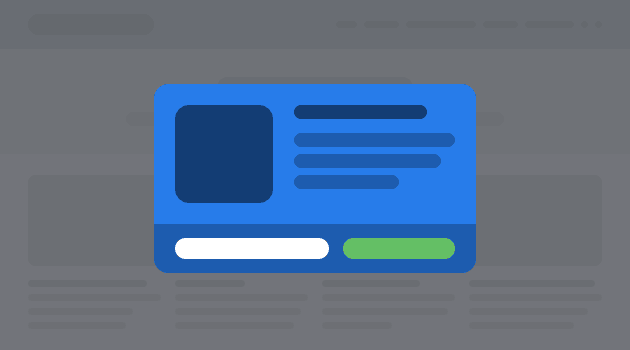
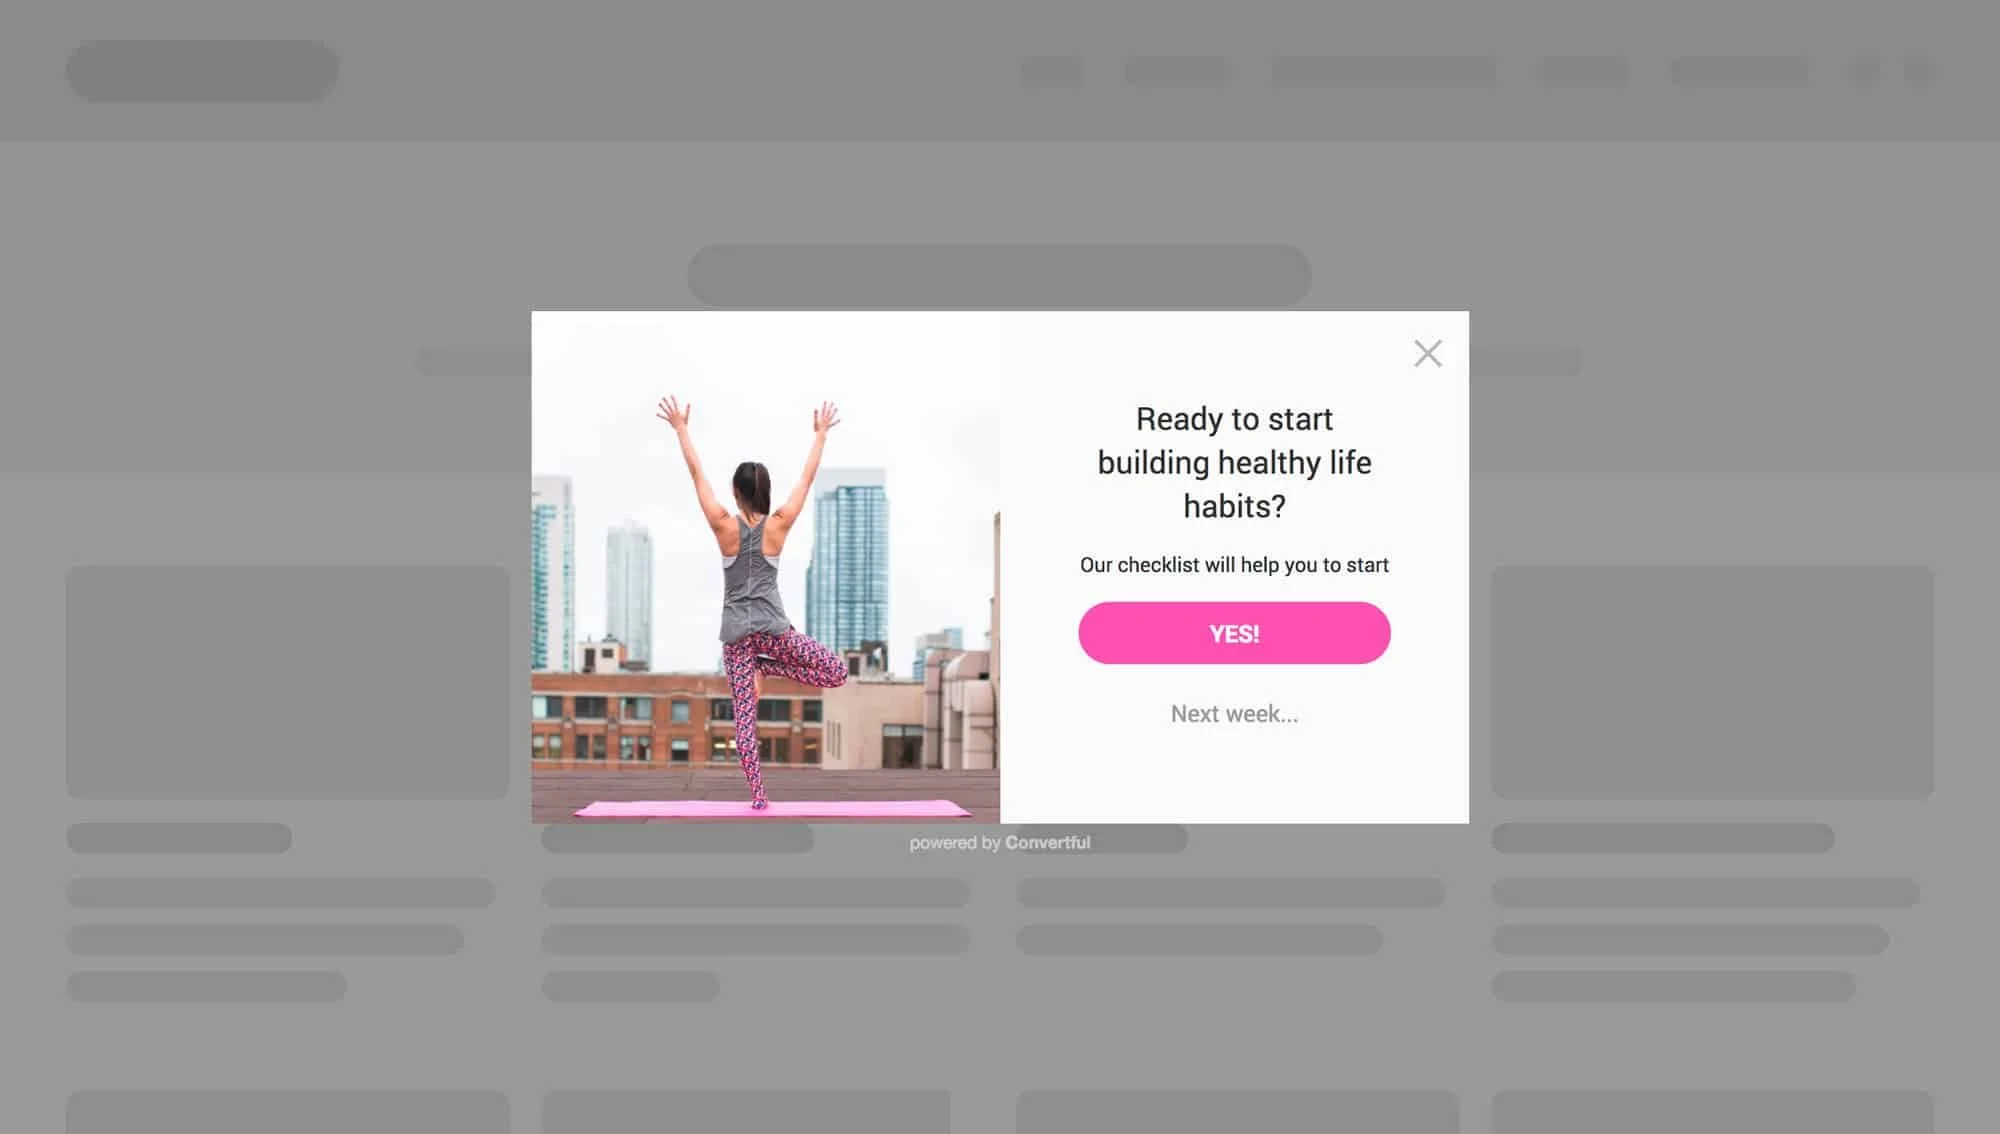
3. Popup
In general, this is the one that is most abused on websites. This is the one that immediately pops up in your face when you enter a website. (Keep reading the article for a MUCH better use of this and a MUCH more effective use) In either case how you use this, it will create a pop-up box. Use this type when you have a high impact offer that you’ll make irresistible to refuse.
4. Welcome Screen
Many have argued that the Welcome Screen is the most effective for capturing email addresses. The welcome screen has all of the same targeting and display options as the other opt-in widgets. The benefit is that it’s a full screen take-over. So, with the right messaging and call to action, it’s both impossible to miss and and to not opt-in.

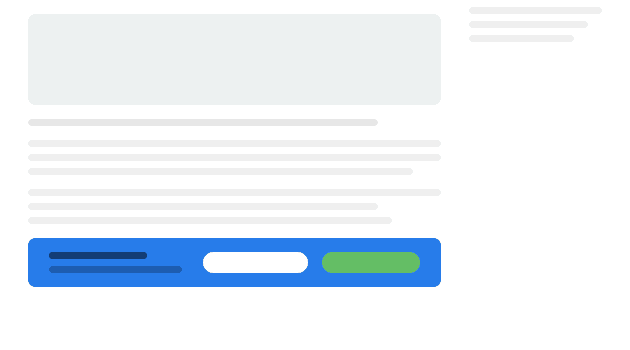
5. Floating Bar
The floating bar is a strip that goes from edge to edge and can be positioned either at the top of the page or the bottom. Your choice. This is useful when used with short, persuasive copy, one single field of information and a submit button. This isn’t the place to ask for all sorts of information - we only want their email essentially.
The Floating Bar is also useful to use as a social media tool to increase your followers.
All of the widget types with the exception of the inline widget, can have display rules attached to them. So that means, the scroll box, pop-up, welcome screen, and floating bar can all be targeted by several different user behaviors.
3. Show your opt-in widget to targeted visitors
The power behind an app like Convertful is that you have very advanced targeting methods that are super simple to implement.
For instance, on the pop-up widget, stop showing that to people soon as they enter the website. It’s annoying. Google hates it by the way, especially on mobile. Your site is penalized if you show pop-ups to users if it’s within seconds of entering the page. Read it straight from the Google Webmaster Blog.
Here’s 3 better ways to use the pop-up widget.
Show it to people:
When they are about to leave
If they have scrolled a certain percentage down the page
If they click a specific button or link that you specify
Let’s break that down
1. When They Are About To Leave
This is what we call the “last chance offer”. The app is so smart, it knows when a user is about to exit the website based on mouse movement and position. Soooooooo you’re about to hit that x-button to close the tab and then suddenly you are presented with an offer you cannot refuse. Well you can, but the copy is so good that you just have to say “Yes!”
You have to think about a few things here when using the “last chance offer”. Think of the exit intent. Were they just reading a blog article? Were they on your homepage and about to bounce? Were they viewing a service page and went to your contact page but then chickened out?
2. If they have scrolled a certain percentage down the page
This is highly effective for article pages, like this one! If someone is reading an article and they are presented with an offer while they are reading the opening paragraphs - That’s gonna be a no for me. If the reader is let’s say, 50% through the current article and they are presented with an offer that is relevant to the article they are reading, you have a much higher chance of converting that reader into a subscriber.
Now, you can take some guestimates as to how far into the article to place your widget, or you can scientifically know when to place it. We use HotJar to track article depth via their Heatmap tool. In short, HotJar records mouse clicks along your page but also will tell you the average read depth for a page. Take your most viewed articles and run them through a heatmap. If you see your top performing article people are exiting by the time they hit the 65% mark, then show them your opt-in widget at 60%, right before the average person leaves.
3. If they click a certain button or link on your page
This is another powerful targeting as the user is in 100% control of viewing the opt-in box.
It doesn’t matter if you are using a pop-up box, slide in, welcome screen or floating bar. In this scenario you are telling Convertful to only show the opt-in box IF the user clicks a certain link or button on your website.
For instance, on our blog article 9 Tips To Rank #1 On Google Maps, we have a content upgrade to download a complete guide on using Google My Business. In order for this opt-in to be shown, you must click on the link: “Bonus: Download The Ultimate Guide To Google My Business And Crush Your Competition”.
Or, if you want to try it out right now, click this link and you'll see a pop-up appear.
4. Send your opt-in subscribers to your email service
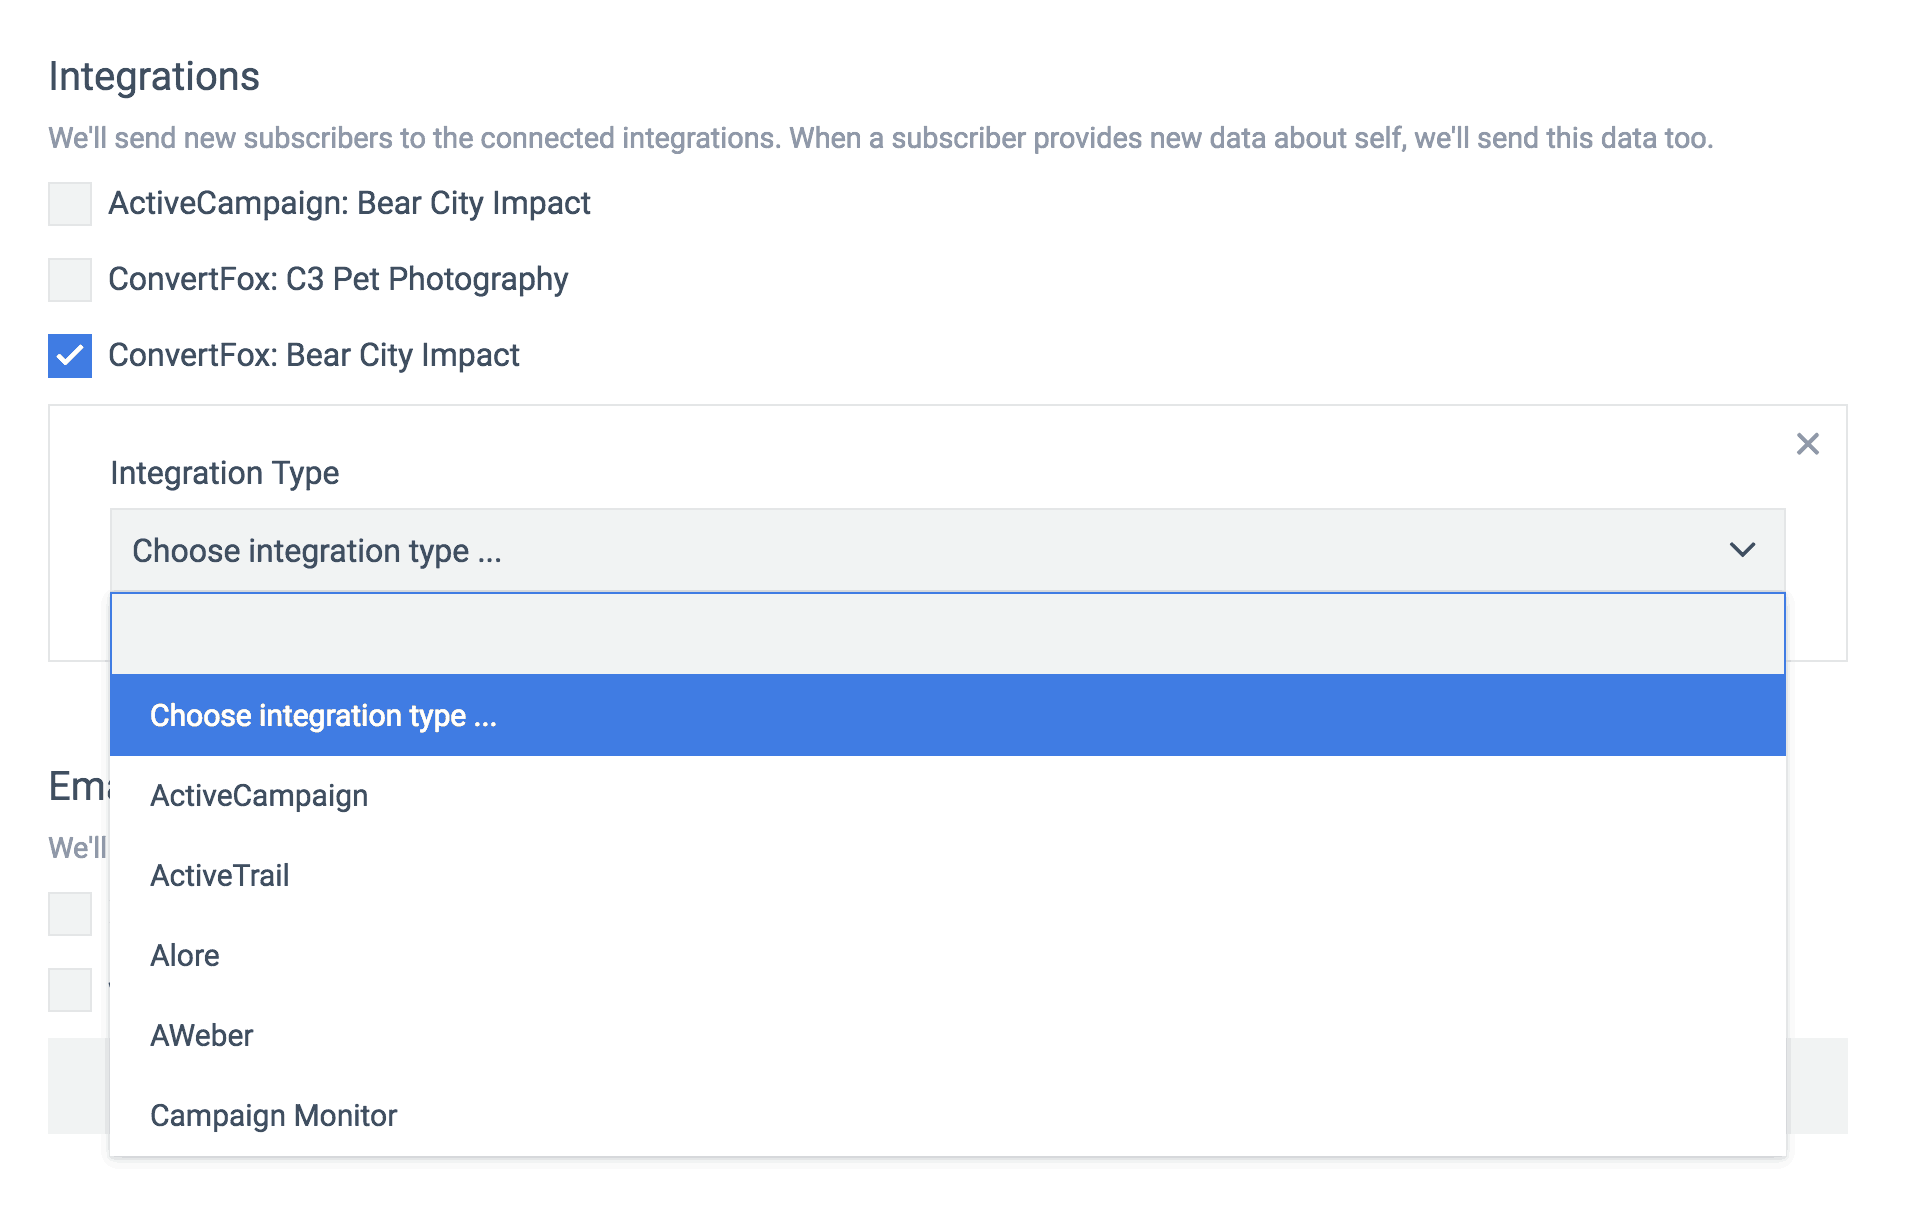
Now that you have people opting into your email list, you’ll want to actually email them! Convertful makes it easy to send your subscribers to your email service provider of choice. They work with all of the major marketing providers such as Mailchimp, ActiveCampaign, HubSpot, and my new favorite, ConvertFox.
You’ll specify where to send the email data while you’re creating the widget. Just tab over to the “Success Actions” area, and choose your integration. Since this will likely be your first integration here, you’ll want to click on the “Add Integration” button, which will then pull up a list of supported 3rd party tools.
From this tab you can also set up notifications to your email, if you want to be notified everytime there is a new subscriber. Lastly, you have the option to redirect them to another URL or simply display the success message you might have created.
The option to redirect to another URL is useful for a couple of reasons.
The offer might have been to download a content upgrade, in which case you are placing the upgrade on a new webpage and also emailing it to them
You want to send them to a thank you page, for more information and/or tracking
Or, you want to send them to a tripwire page as part of your 5-step funnel system.
Combine Matching Conditions To Your Targeting
Since you are able to specify which pages you want the widget to appear on, you can choose advanced targeting methods to only show it if certain conditions are met.
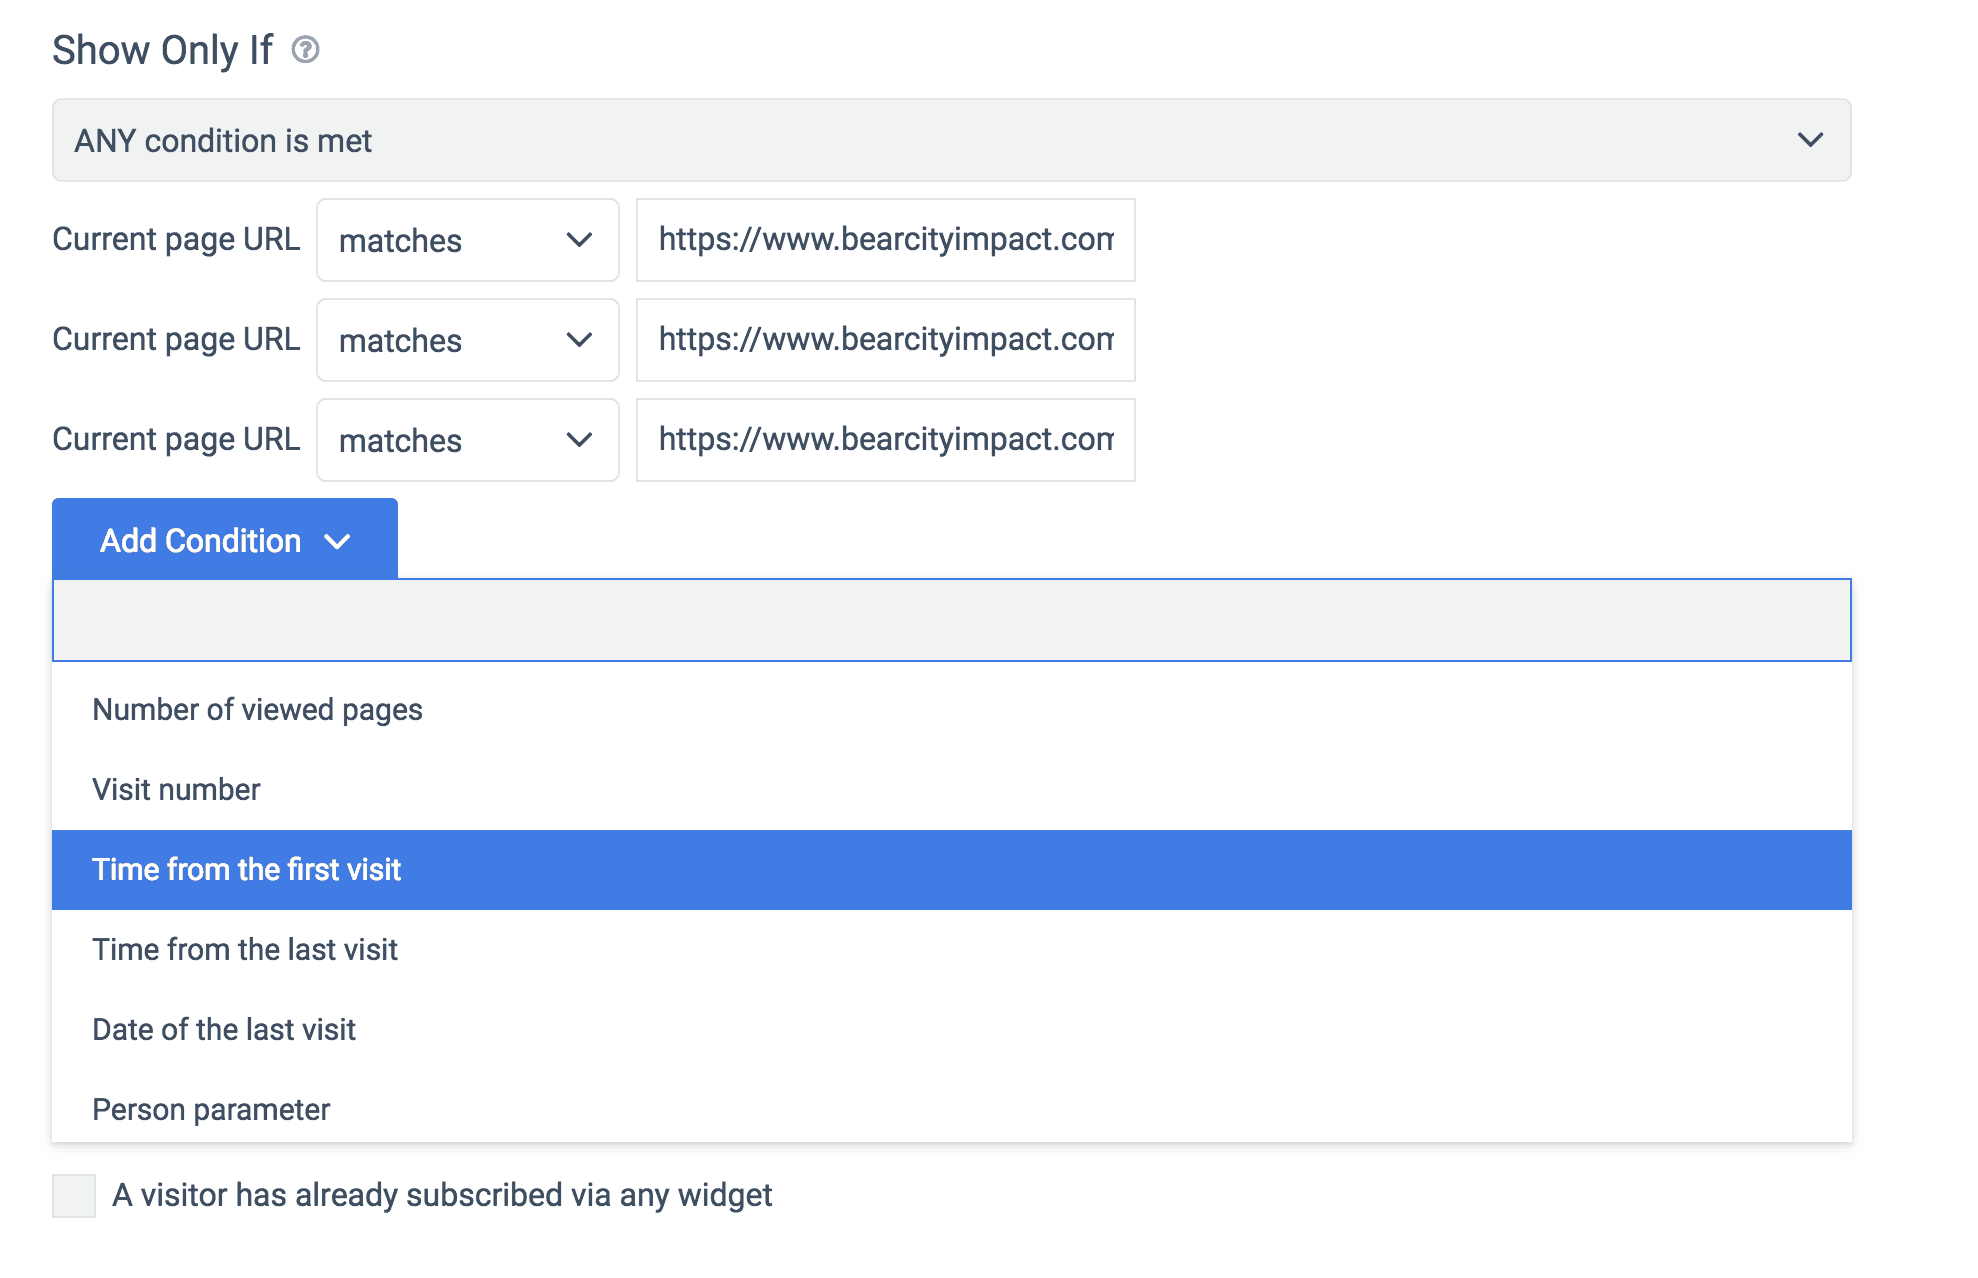
Here you can see we are telling Convertful to show this opt-in when a visitor intends to leave.
But we are adding the condition of time from the first visit. So here we would specify the amount of time we want the visitor to be on page to then trigger the intent to leave opt-in.
For example, if we set the time from first visit at 3 minutes, 30 seconds, and the visitor goes to that page and has only been on your site for 1:30, then it will not show the opt-in box, even when they are about to leave.

Lastly, you are able to exclude the opt-in box from showing based on several conditions as well.
For instance, the most important in my humble opinion, if any other floating widget it currently shown. This prevents having two different opt-in boxes from showing at the same time. I.e. a slide-in box and a pop-up box showing at once. Hello! Annoying!
Convertful has a good memory also, so if the person has already submitted their info within the past X-number of days, it won’t show it to them again until a time you specify, or if the person closed the offer box recently.
Get More Leads & Customers With Convertful
When you spend so much time getting traffic to your website, be it from social, paid ads, etc, you want to make those visits count. Using a powerful tool like Convertful will give your website it’s silent marketing partner. Combined with an irresistible offer, you can easily double or even triple the email signups you might be getting now.
Try out Convertful for free today.
Disclosure: Some of the links on this page are affiliate links. Meaning, at no additional cost to you, I will earn a commission if you click through and make a purchase.
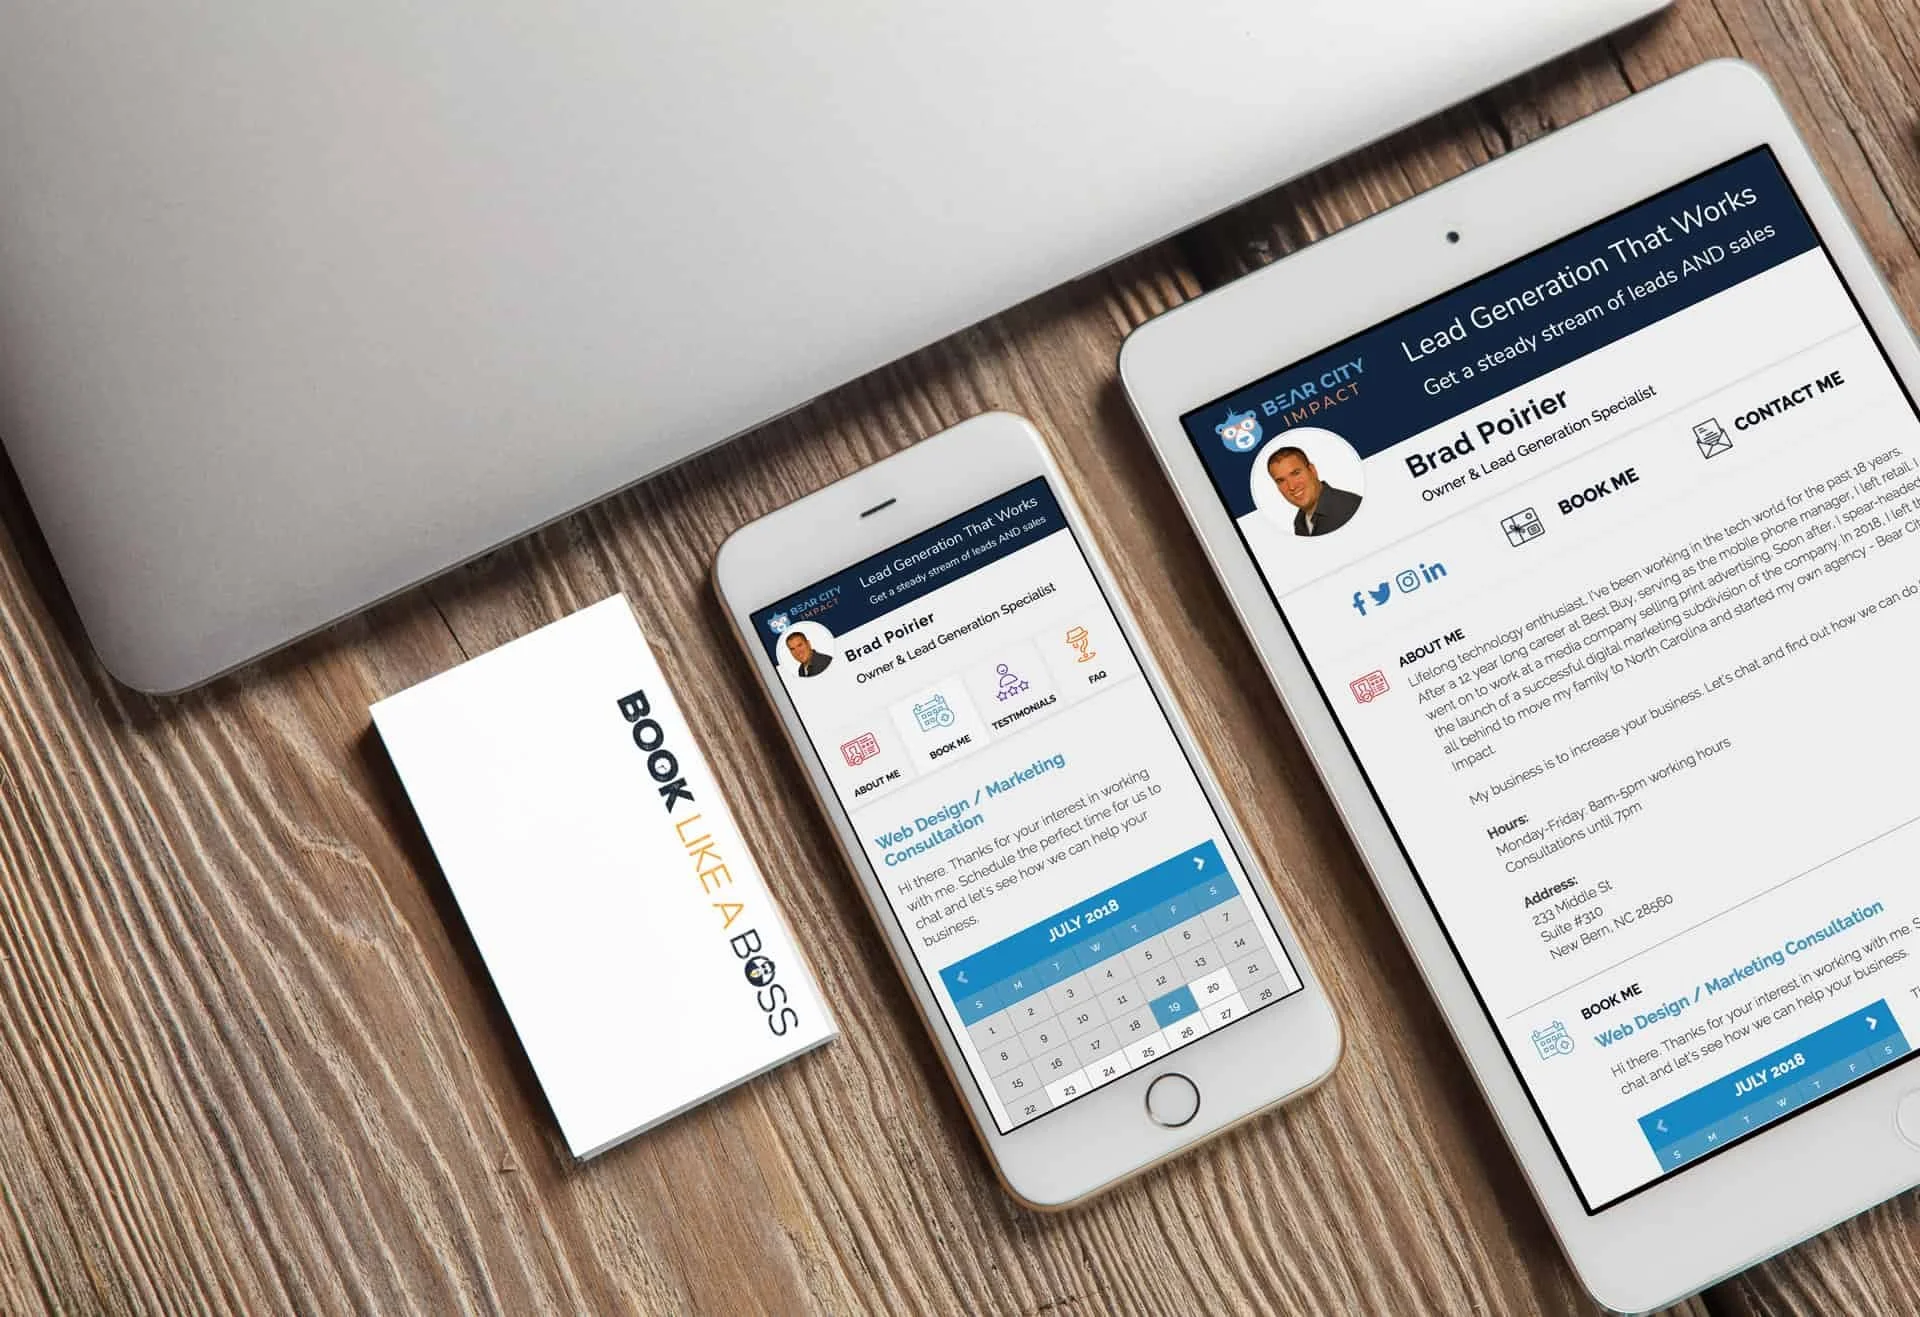
Book Appointments Like A Boss
If Rick Ross was in the service industry needing to take appointments, I’m 100% certain his scheduling app of choice would be: Book Like A Boss. Few things are more frustrating than the back and forth emailing and texting your clients trying to find a time that works for the both of you. Yuck. Meet: Book Like A Boss.
If Rick Ross was in the service industry needing to take appointments, I’m 100% certain his scheduling app of choice would be: Book Like A Boss.
Andddd if you don’t get the reference, here you are, you’re welcome.
Few things are more frustrating than the back and forth emailing and texting your clients trying to find a time that works for the both of you.
Not to mention, once you find that time, they have to reschedule and the fun starts all over again – and you still haven’t been paid for any of this!
Yuck.
If you haven’t been paying attention to the internet, I basically just described how client scheduling worked in 1999. Yes, as in when snake was still cool on your Nokia and gas was $1.20/gal.
It’s 2018 now. Get yourself a scheduling app or wreck yourself.
Book Like A Boss is all that and a bag of potato chips (smoky bbq flavor, mhmm)
So how can a scheduling platform help out kitchen designers? Book Like A Boss (BLAB) will make it significantly easier to take appointments. Oh, and you can set up several different appointments.
Think of your current workflow for taking in new potential clients:
Prospect visits your website
They go to your contact page and actually send you a message
You get this message at some point and call them back and email them
Takes a bit to get in touch with them
Finally you two schedule a time for them to visit your showroom for a consultation
They don’t show
You call them back and reschedule this
They finally come to your showroom
You find out they are a qualified customer and schedule an in-home measurement
The rest is $$$
Now, this is how it will work when you’re a boss and using online scheduling software:
Prospect visits your website
They go to your contact page and are presented with your calendar
They immediately find a time and day to visit your showroom, and they answer a couple of pre-qualifying questions
They get a reminder email about their visit and they actually show up
You find out they are qualified and schedule an in-home measurement
The rest is $$$
Boom. I just cut your sales cycle in half. LIKE. A. BOSS.
Yeah, let’s dig into this a little more.
Here’s what you’ll get with Book Like A Boss:
Calendar Integration – It connects to all of your calendars so that people can only book the times you are actually available. It works with Outlook, Gmail, Office 365 and iCloud.
Confirmation / Reminder Emails - They’re automatic too, soon as an appointment is made, your client will get a confirmation email. Then, a reminder email before the appointment.
Tracking - Connect your Google Analytics or Facebook Pixel to track progress and completion and retarget those that have not compelted a scheduling.
Support - Excellent support team and an active Facebook group with over 2,700 members to get success tips and help
Website Integration - Easily embed your booking page into your website. Skip the contact form. (Try it out here)
Those are the most important features in my humble opinion.
What if super easy client scheduling isn’t enough for you though?
What if you need to get paid for your service? (Greedy!)
You can do that too. With Book Like A Boss, you can get paid during the checkout process.
Do you charge for your in-home measurements? Just setup your service and assign a price to it, connect with either PayPal or Stripe and voila - you can get paid right when they book the appointment.
Hashtag MindBlown.
If this all sounds ridiculously easy, it actually is. Literally all you need to get started is to create an account, choose your page name, set up your available hours, list your services offered, and then BOOM - you’re good to go.
Optional fifth step is to add your payment options if you’re going to require payment to schedule any services.
I forgot to mention that… they have several plan options including a free forever plan.
It’s perfect if you’re just looking to explore what they offer and want to try out their scheduling platform.
The free forever plan includes:
Unlimited Appointments
Google Analytics
Facebook Pixel
Zapier Integrations
Want to learn more? Head over to their site with the link below and check out all of their plan options, including the free forever plan.
Or check out their intro video below.
Website to learn more: >> Book Like A Boss <<
Fully Automated Social Media Content with Promo Republic
“I don’t have the time”, “I don’t know what to post”, Those are the two most common responses I get when I ask a potential social media client about their current social media business habits. Here's a great app to help you with BOTH.
Stop me if you’ve said this before:
“I don’t have the time”
“I don’t know what to post”
Those are the two most common responses I get when I ask a potential social media client about their current social media business habits.
In the past, I’ve preached to many of my clients to use social scheduling tools like Hootsuite or Buffer, or even just the built in scheduling tool from Facebook. These are indeed great options.
Basically what should be doing is dedicating some time each week to plan out a content schedule and create several posts to go out through the week, so you don’t have to post it one by one.
However, that still doesn’t solve the “what do I post” dilemma.
I’d like to think that if most people didn’t have a creative block, they would find the time to schedule out these posts.
So, the real ‘time’ issue, is actually the time it takes to think of content to post.
Enter Promo Republic
Amongst other great features, Promo Republic will suggest content to you based on topics that are most relevant to your business.
There are 20 different types of posts Promo Republic can suggest for you. Think of it like the Netflix for social media management. You can also search by keyword and it will pull from the 20 different content buckets.
Depending on which plan you choose, you can connect your Facebook page, Instagram, Twitter, Linkedin, Pinterest, and also Snapchat.
Promo Republic’s starter plan will give you the first four social networks, which are the most common anyway and with the highest active users.
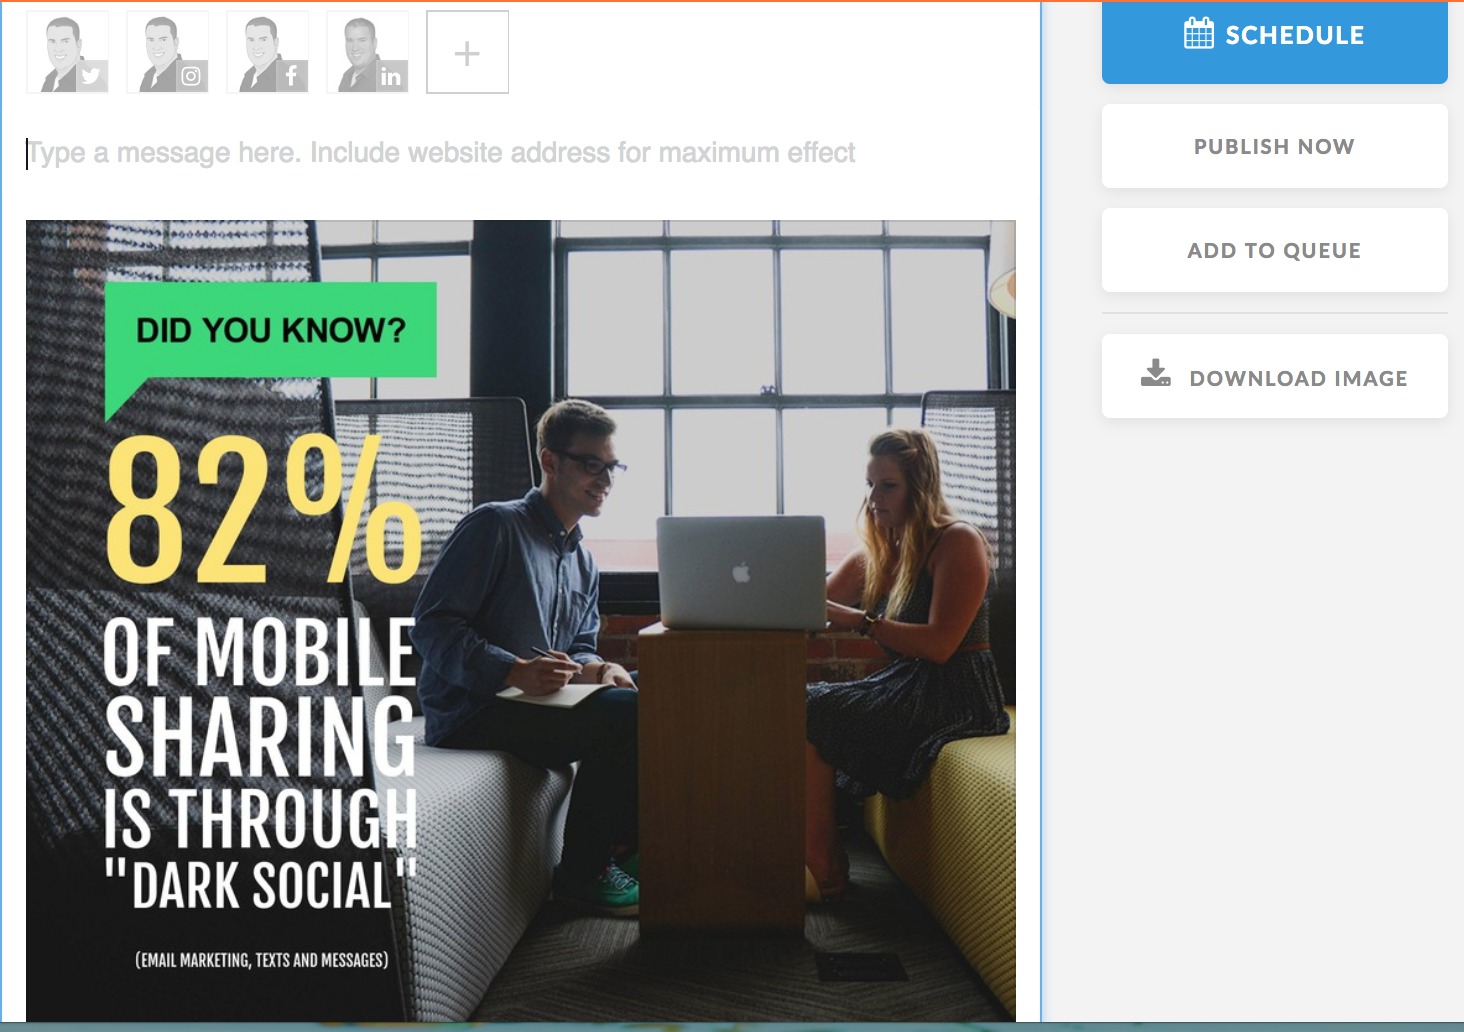
Once you find a certain post you like, you can click on it to optionally customize it.
Promo Republic has a built in photo-editor that will allow you to edit the suggested text, colors used, background images and more – if you want to. It’s completely optional.
Some of the post types will already have a suggested caption included, others will not and you can place one yourself. You can use the text from the image itself to use as the caption if you really don’t want to do much work!Once you get it the way you want, which is just a few clicks, you can schedule it to post on any of the networks you have connected. You can also immediately publish it if you’re ready for it to go out.
Promo Republic currently does not have Instagram direct publishing, but I’m told they are working on that.
Instead, you can download their iOS or Android app, will push a notification to your phone when the post is scheduled. From there, you it will copy the image and caption to the clipboard and you just have to open Instagram to post it.
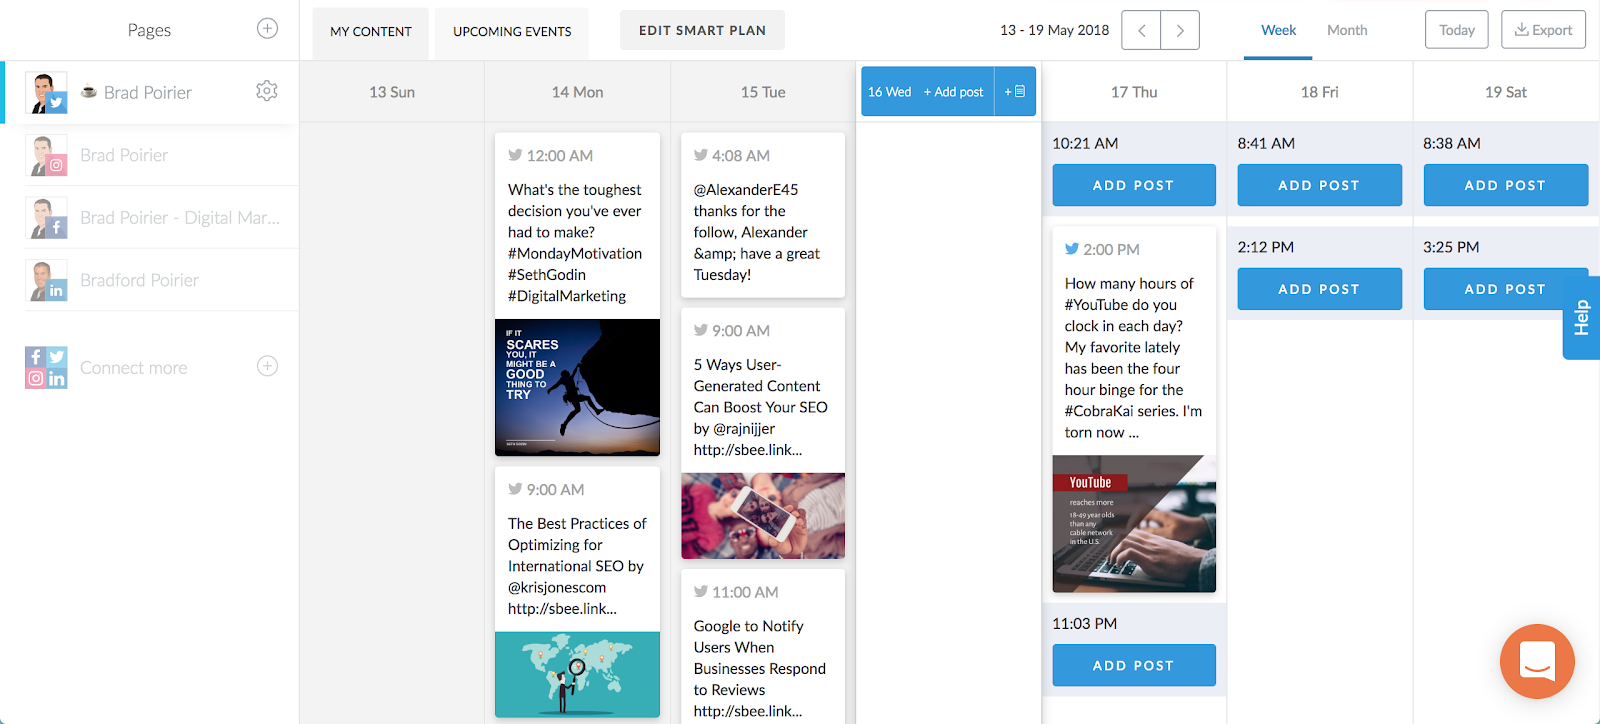
Additionally, you have a great content calendar included. Promo Republic will suggest time slots for you based on your industry category and the social network itself. You can quickly see upcoming posts for each network through the week. If you see that there are some suggested time slots with no posts scheduled, you can quickly add a post and it will search through the suggested buckets.
Analytics are included too. Tab over to the statistics tab and get a bird’s eye view of each networks performance. You can see the engagement for each post and each network.
If you notice that a particular post did really well, you can click on repost, and schedule it for another time.
If you want to eliminate the time and lack of creativity excuse, Promo Republic is a perfect fit for you.